
Kiln Building like a girl.
This page is currently under construction, and a few final details remain on the kiln: chimney cricket, snotting the bricks, and a final insulating layer over the arches.
updated July 28, 2025
In 2023, I began taking my previous wood-fired kiln apart brick by brick. I had built it in 2001 as a temporary ‘starter’, and while it had been an efficient and productive kiln, I was feeling its limitations and wanted to try something new. Taking that kiln apart had me quite torn at first, but to my surprise, the disassembly process gave me renewed confidence: I had tied my courses together, laid a very strong arch, and even reinforced the chimney. (As time allows, I will digitize some of the photos and add information about that kiln.)
And so began this current project, the construction of the new kiln, larger and more dynamic in layout. I wanted it to be beautiful and well thought out, so prioritizing quality of work over time was important, and the work had to take place while keeping up with current commitments and production.
First I laid out the kiln shelves to decide on the kiln chamber size, and then did some drawings before making one (and several subsequent) 1/12 scale models out of clay. As construction continued, I made better drawings and revised models.
Then the existing slab had to be extended to accommodate a longer footprint. The firebox extends from the front such that the main kiln pad from the previous kiln is repurposed as the stepped-up base for the kiln chamber.
In May of 2024, new apprentice, Tori Nicoletti, arrived and has been a help every step of the way. Together we have laid every brick, thought through design challenges, and proceeded with careful consideration. We have gone through dozens of pairs of every kind of work glove known to man.
Throughout the process, my husband, Mark Saxe, has contributed invaluable expertise gained from his decades-long career as a stone mason, and I have been referring at critical junctures to several books from his library as well as to The Kiln Book by Fred Olsen. Borrowing Mark’s tools - trowels and mason’s blocks, etc., and his equipment - brick saw, grinders, metal cutting saws, etc., consulting with him at critical junctures, smoothed the way. For me, thinking through each step has been just as important as the actual bricklaying.
My teacher in Japan, Yutaka Ohashi, gave me crucial advice and sent images of his recently reconfigured kiln, with which my design shares a basic profile (firebox, kiln chamber, collection box, chimney), and he has continued to encourage me, as is his way.
The bricks themselves came mostly from my old kiln, and I also bought 1600 secondhand bricks from Djann Hoffmann in Medanales, NM. New arch bricks, as well as refractory mortar and castable refractory, were sourced via Southwest Stoneworks from a regional refractory supplier. Other supplies were bought locally from hardware stores and from Taos Ceramics Center.
I include these process photos to explain the basic structure of the kiln and to offer support to potters serious about building a kiln, especially women. If you have questions, get in touch with me via the connect page.
“Level, plumb, and stagger the joints.”
The bricklaying is done! Remaining tasks include ‘snotting’ the chimney bricks (applying a thin mortar coat with a sponge to seal any gaps between bricks), insulating the top of the arches, fabricating the steel framework, and building the cricket for the chimney (to prevent water seeping through the chimney surround).
Tori Nicoletti put her fabulous architectural modeling skills (using Rhino) to work and created a digital model of the brick and mortar kiln.
Simply press the play button, and then use your cursor/finger to turn the model in all directions.
EBBY
This kiln bears the name Ebby in loving memory of my dear friend,
Ebby Malmgren.
Ebby was a bright spirit—generous, poetic, imaginative and true. Born on February 14, 1921, Ebby celebrated her 101st birthday just weeks before her passing on March 5, 2022. Just as this kiln will shape and transform clay with steady heat and care, Ebby’s friendship shaped my life. Naming the kiln after her is a tribute to her enduring flame and the profound impact she has had on me.

I am often asked how I learned to build a kiln (almost as often as I am asked who built it for me!). My teacher in Japan, understanding that after my apprenticeship I would have to build my own kiln, always made sure to put me in charge of any kiln renovations and reconfigurations, so I learned how to mix mortar and lay bricks. I also referred to Fred Olsen's The Kiln Book, which gives the important proportional relations of inlet and exit ports, etc. For the first kiln, I did not have a brick saw, so each cut was made with a hammer and brick chisel.

The 'crew' - Betsy and Atticus Finch. This first kiln usually reached temperature (approximately 2350 degrees Fahrenheit) in about 14 or so hours, so I could fire it alone. The 'original' kiln, which I built in the summer of 2001 served me well for 95 firings / 22 years. Each firing using about 1/2 cord of wood. For the new kiln I wanted a kiln chamber that would allow for larger work and less frequent firings, as well as more direct contact with the fly ash.
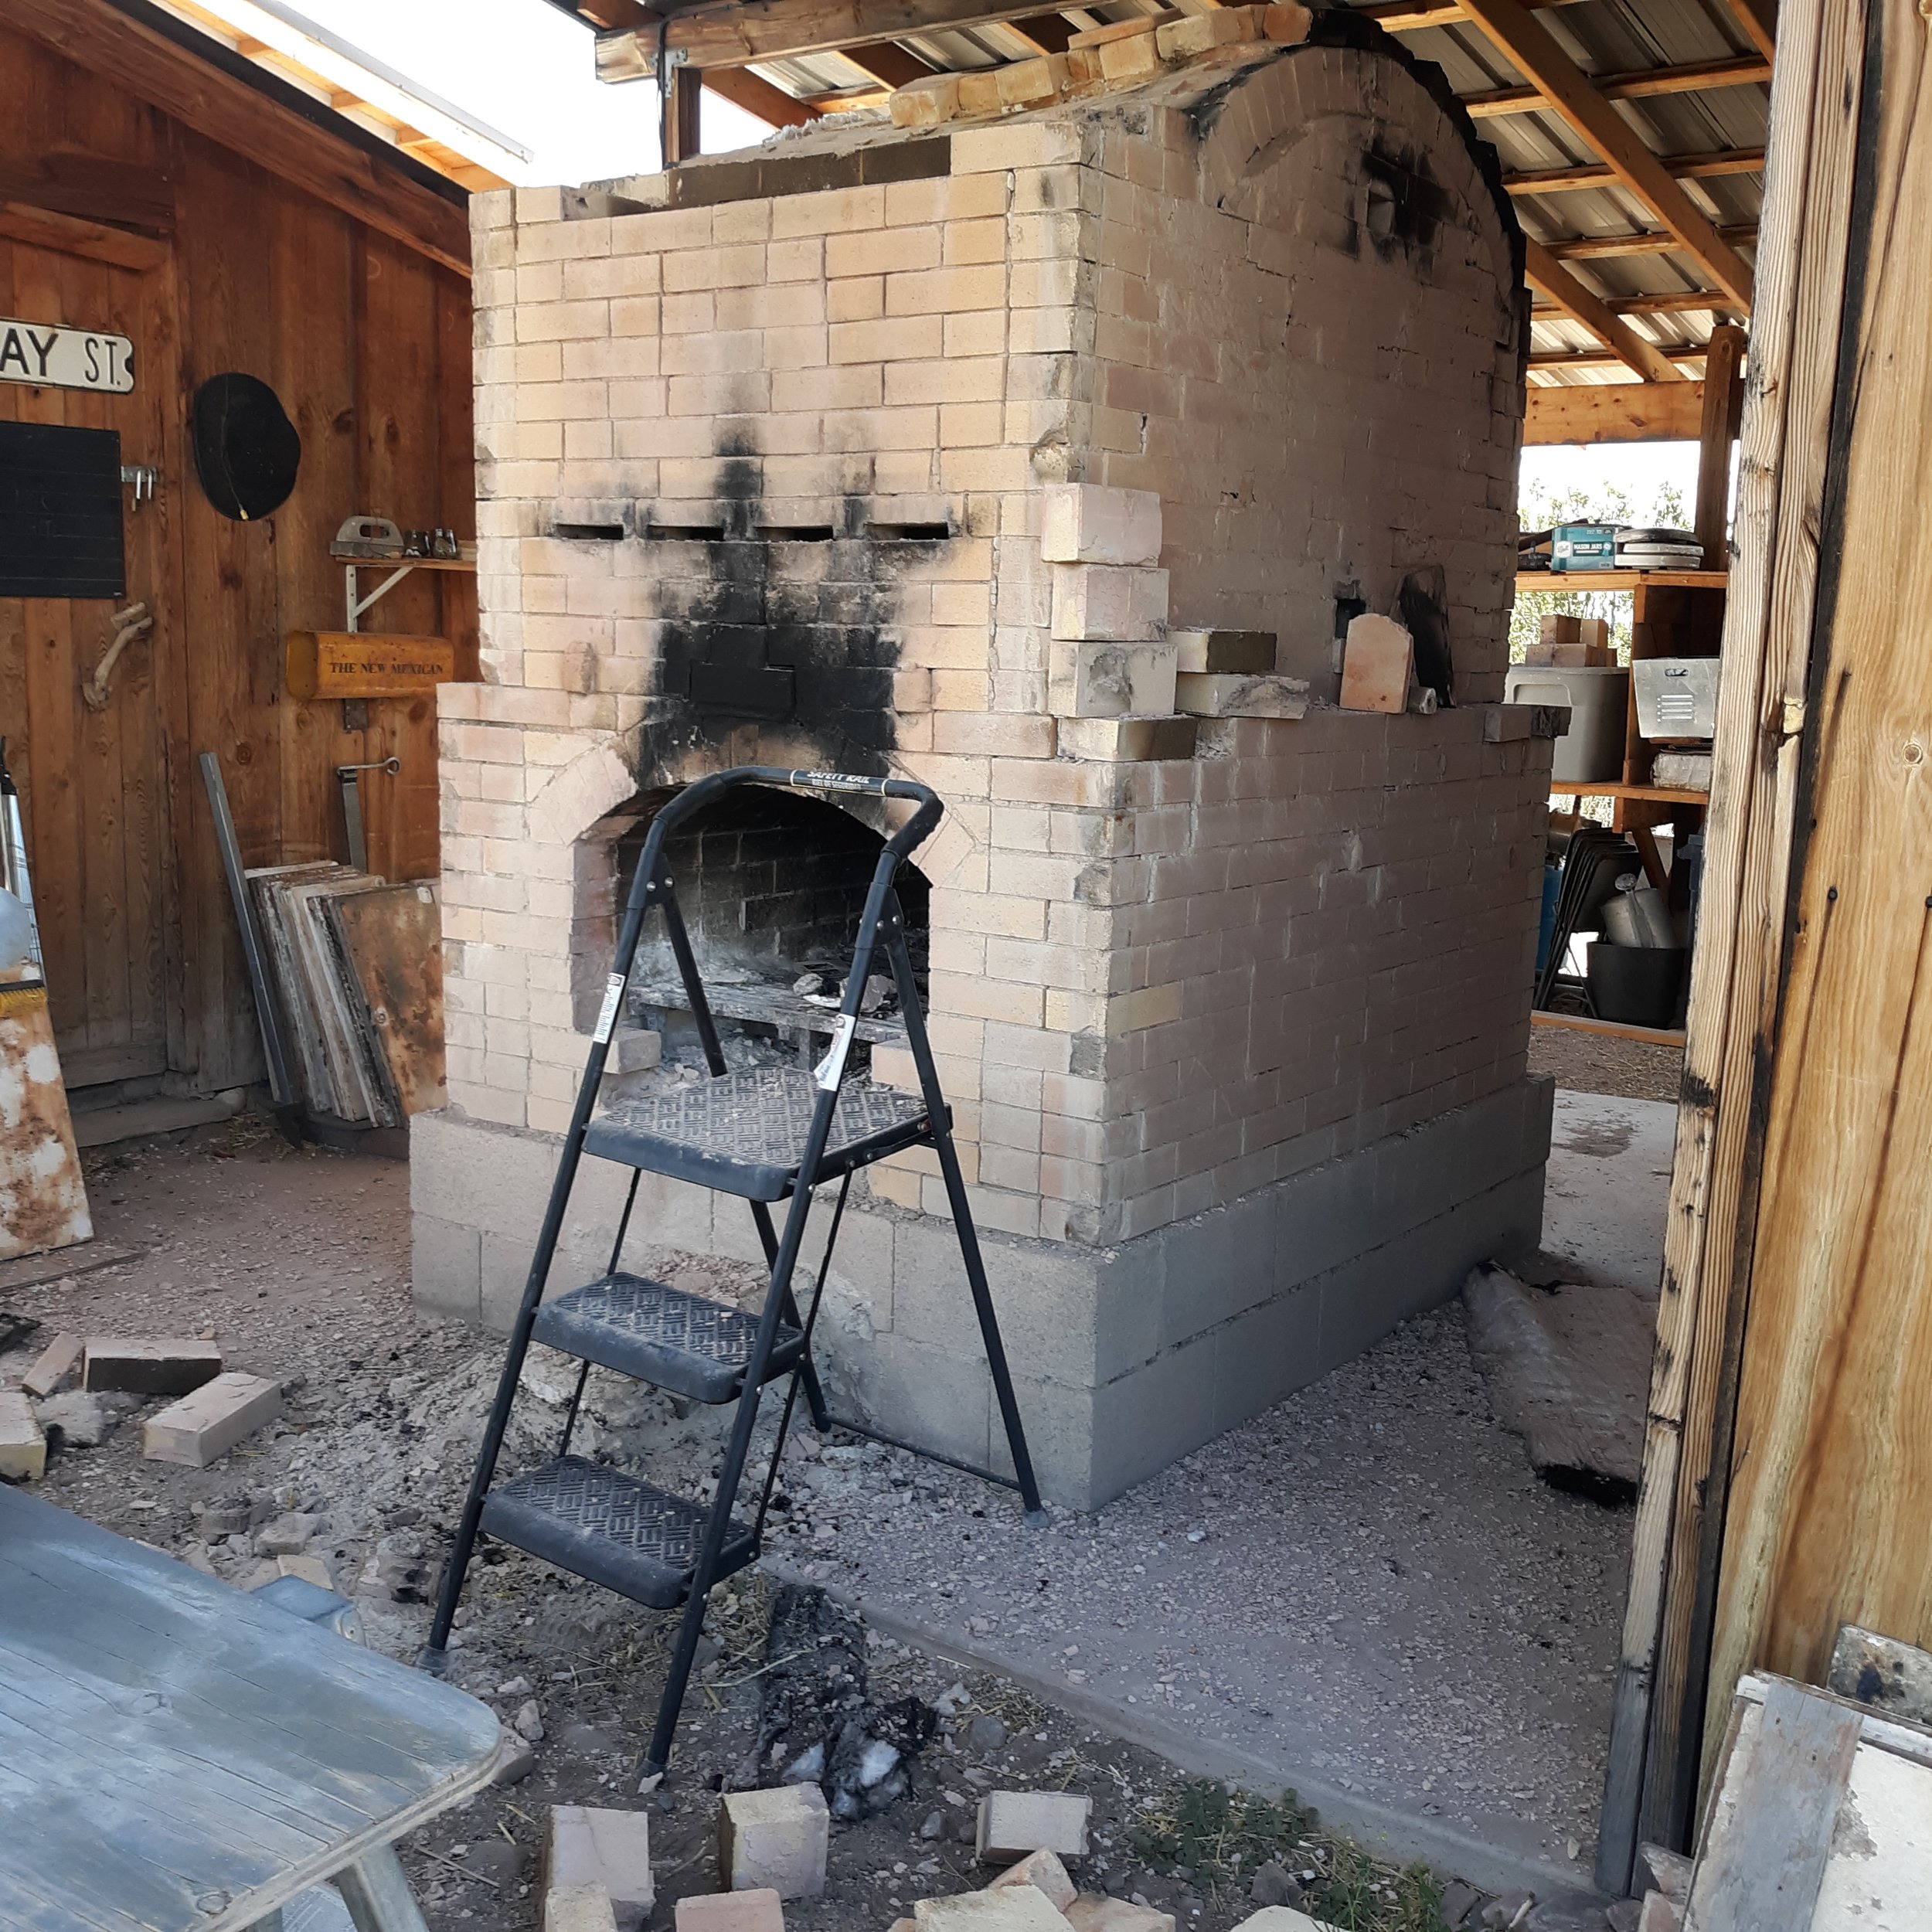
Deconstruction begun, starting with the chimney.

Deconstructing the first kiln was a hard decision, but in order to use the existing slab, kiln pad, and bricks, a necessary one. This image shows the inside of the kiln chamber after the arch has been mostly removed. It was a sad day to begin pulling it apart, but I've been able to reuse almost all of these beautiful bricks in the new kiln.
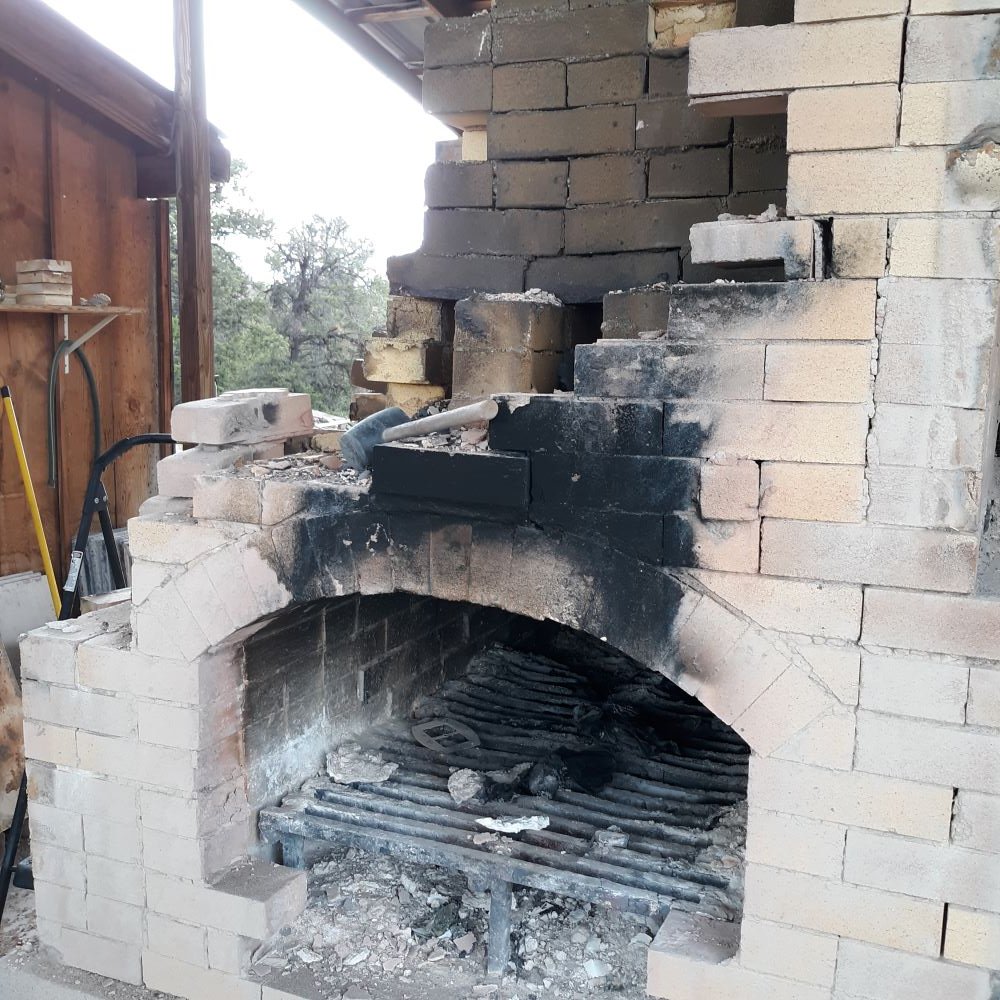
Deconstructing the first kiln. Firebox view.
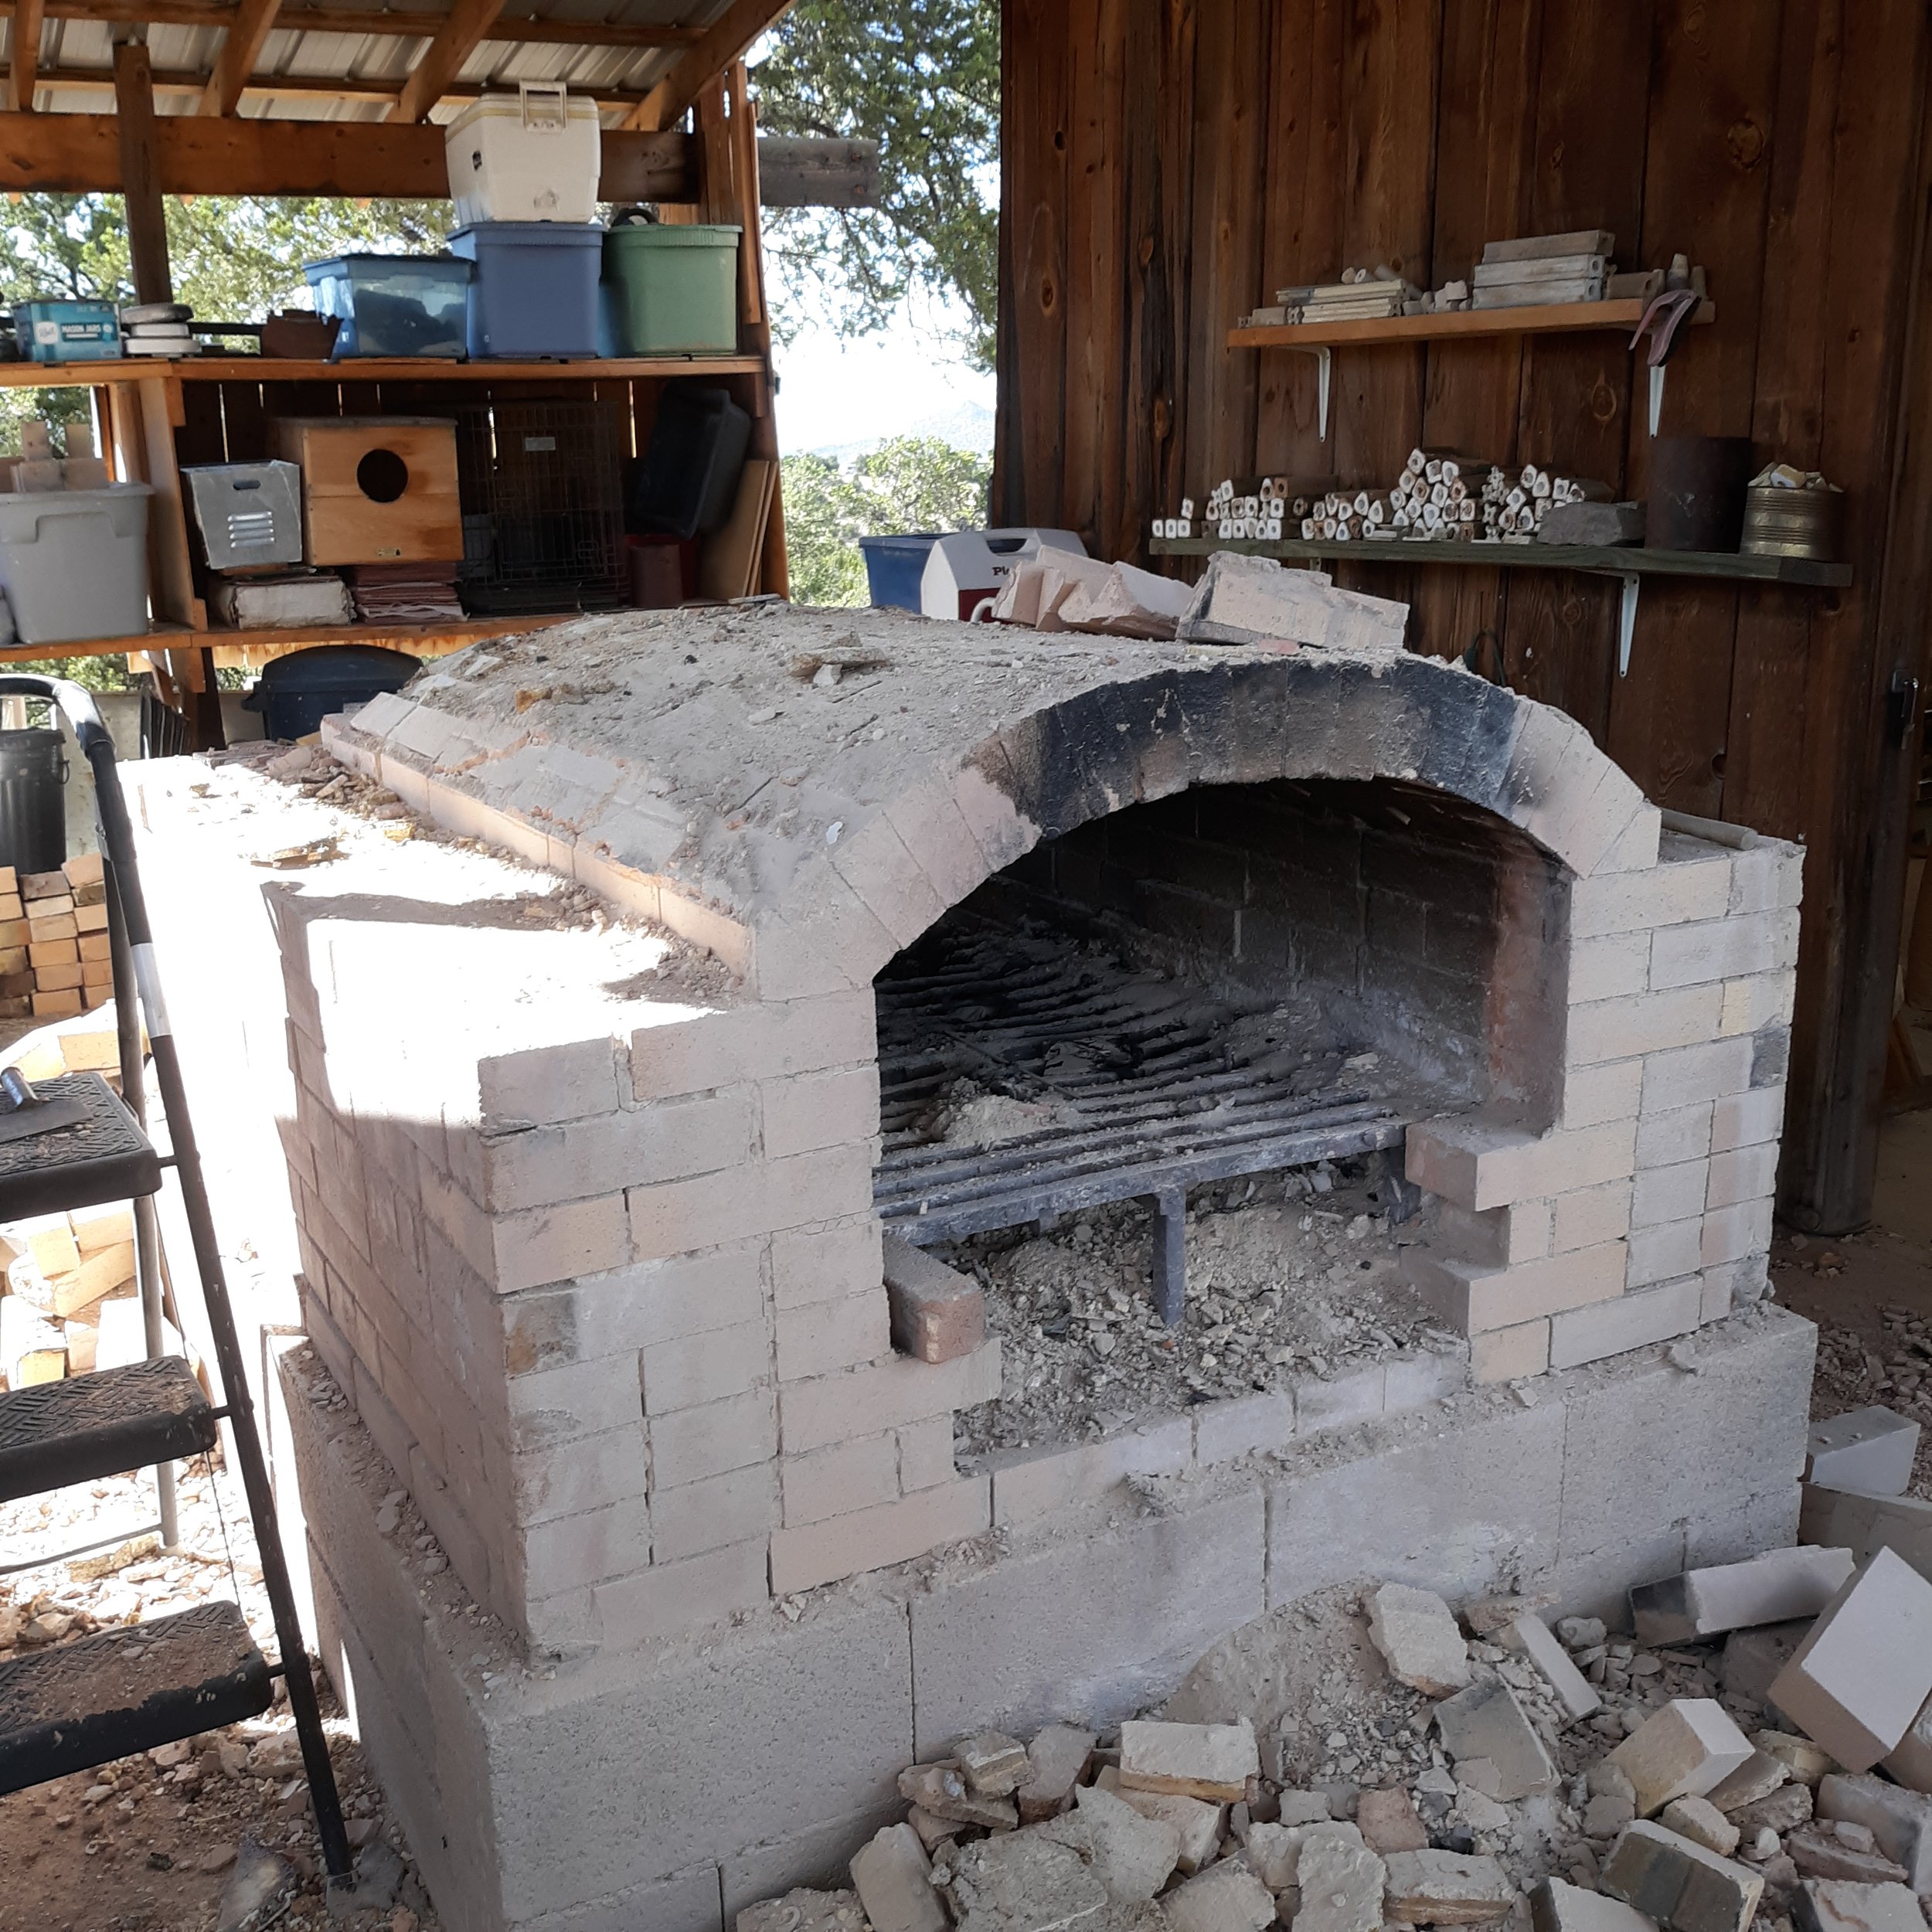
Kiln chamber and chimney removed, with only the firebox remaining. The firebox arch was in perfect condition.
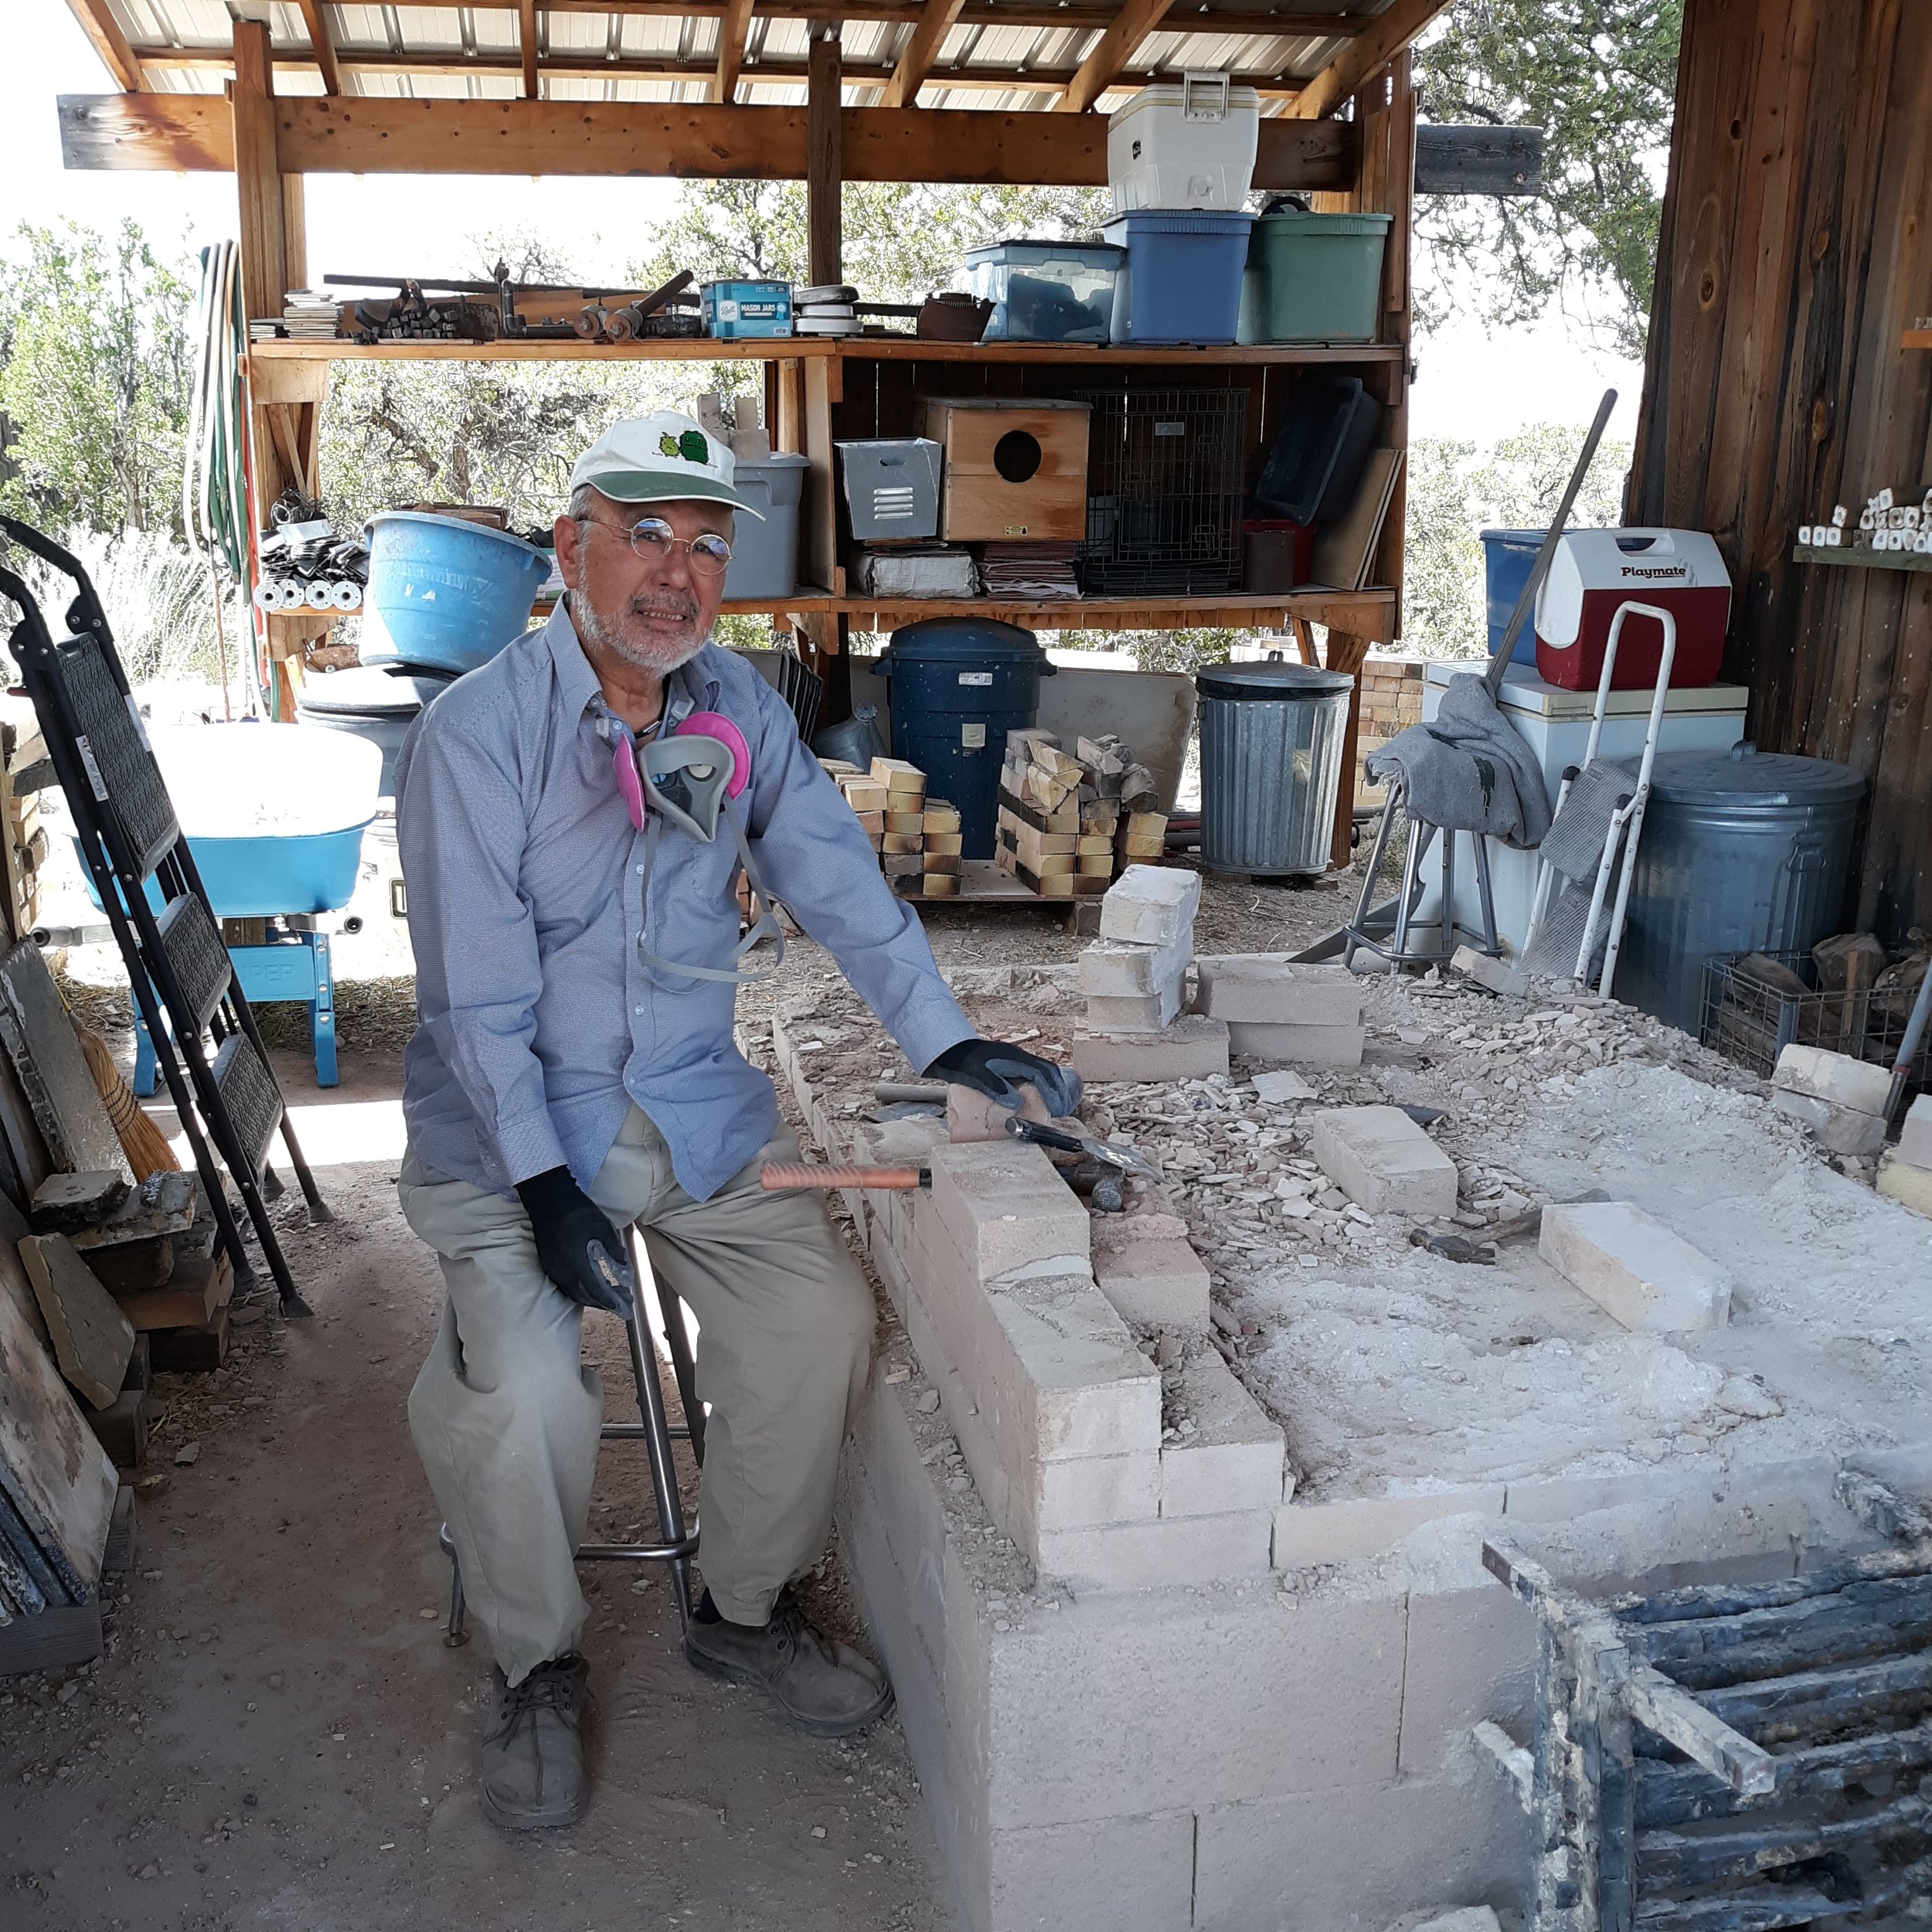
Kazutaka Uchida (1948-2024) was here for an extended stay during the summer, and he assisted with the disassembly, helping remove the final layer of the original kiln floor.
A hot Saturday afternoon palletizing bricks in Medanales (just over an hour away), so that we could go pick them up the following weekend.

Picking up the palletized firebricks. Mark drove his big delivery truck with forklift out to Medanales to pick up the hundreds of bricks I had secured on pallets the weekend before.
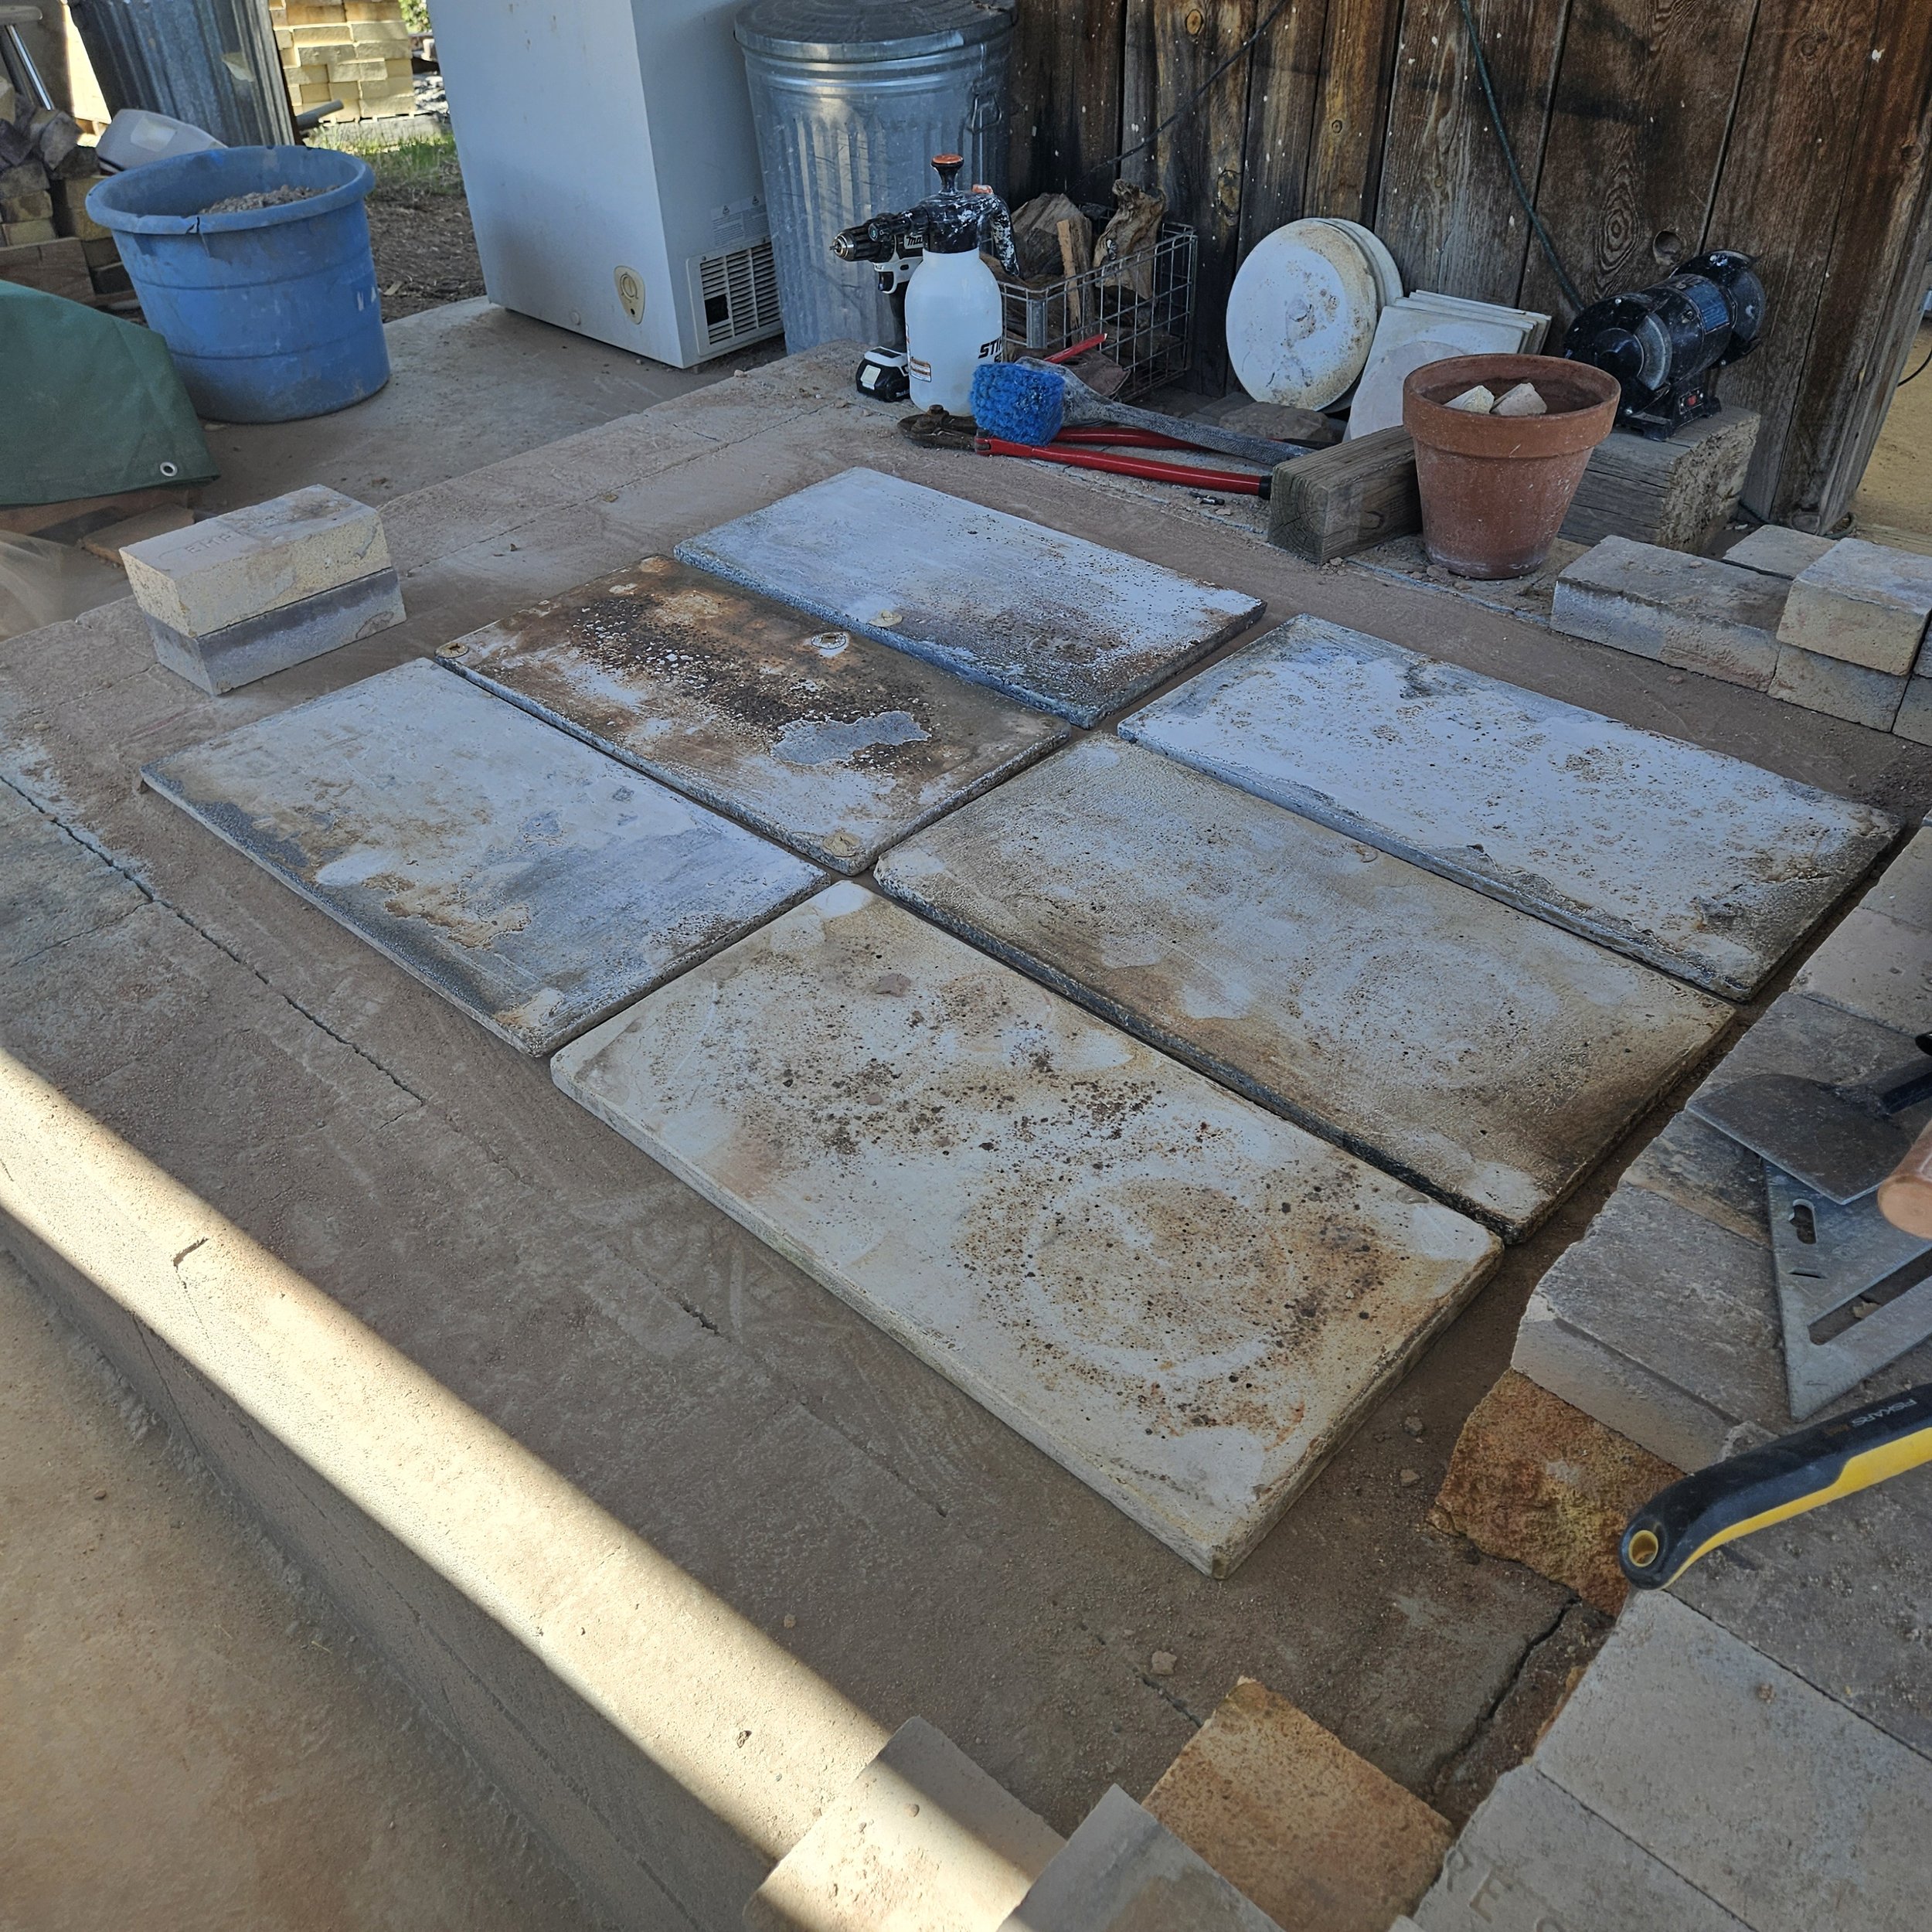
New kiln shelf layout - using the existing platform that held the original kiln (two cement blocks high, with a concrete-and-construction-rubble filled interior. This shelf layout is the first step in deciding what kind of kiln to build, as the kiln chamber floor area determines the area of the firebox floor, and so on until all of the proportions are established. I created a spreadsheet to understand the proportional relations among the inlet and exit flues, etc., such that changing one value would also change the other values.

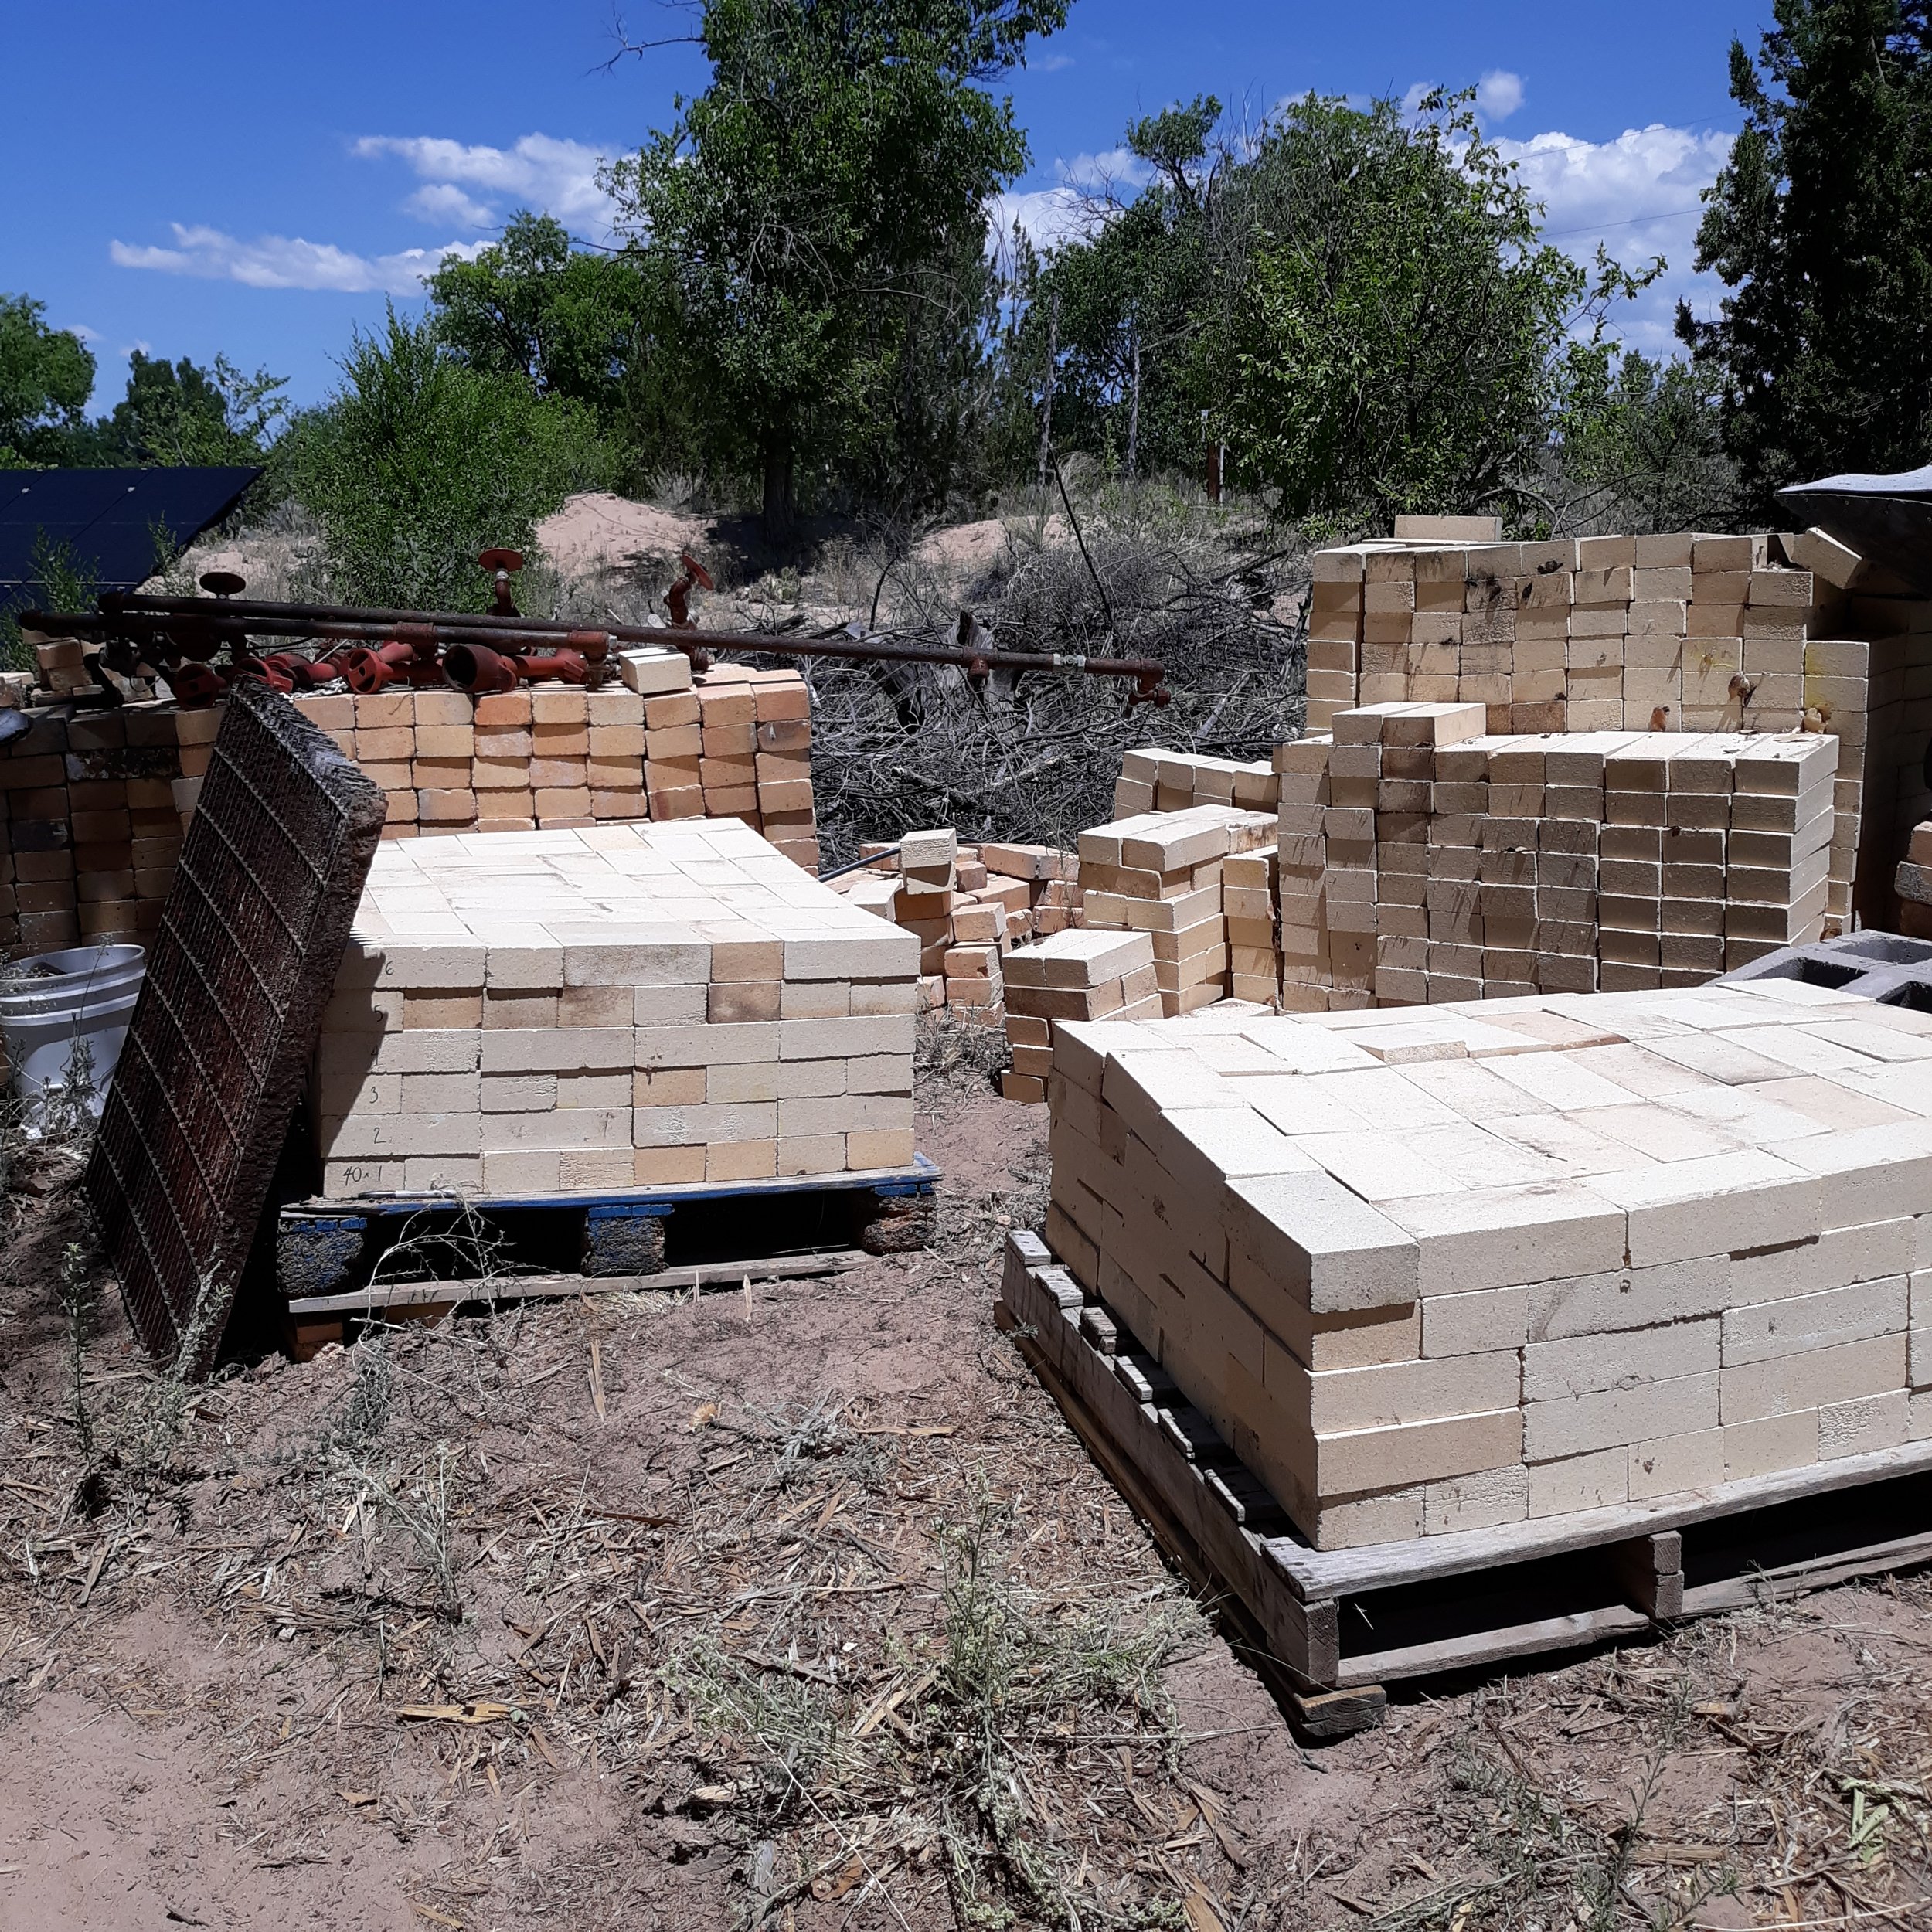
Some of my used firebricks from the first kiln, stacked and ready for re-use. Agnes for scale.

Studying different wall configurations.

One-twelfth scale model showing the final version of the kiln without buttressing. This is one of many models that I made during the building process because each one helped me work out specific design considerations. I highly recommend this exercise.

Model alternate view.
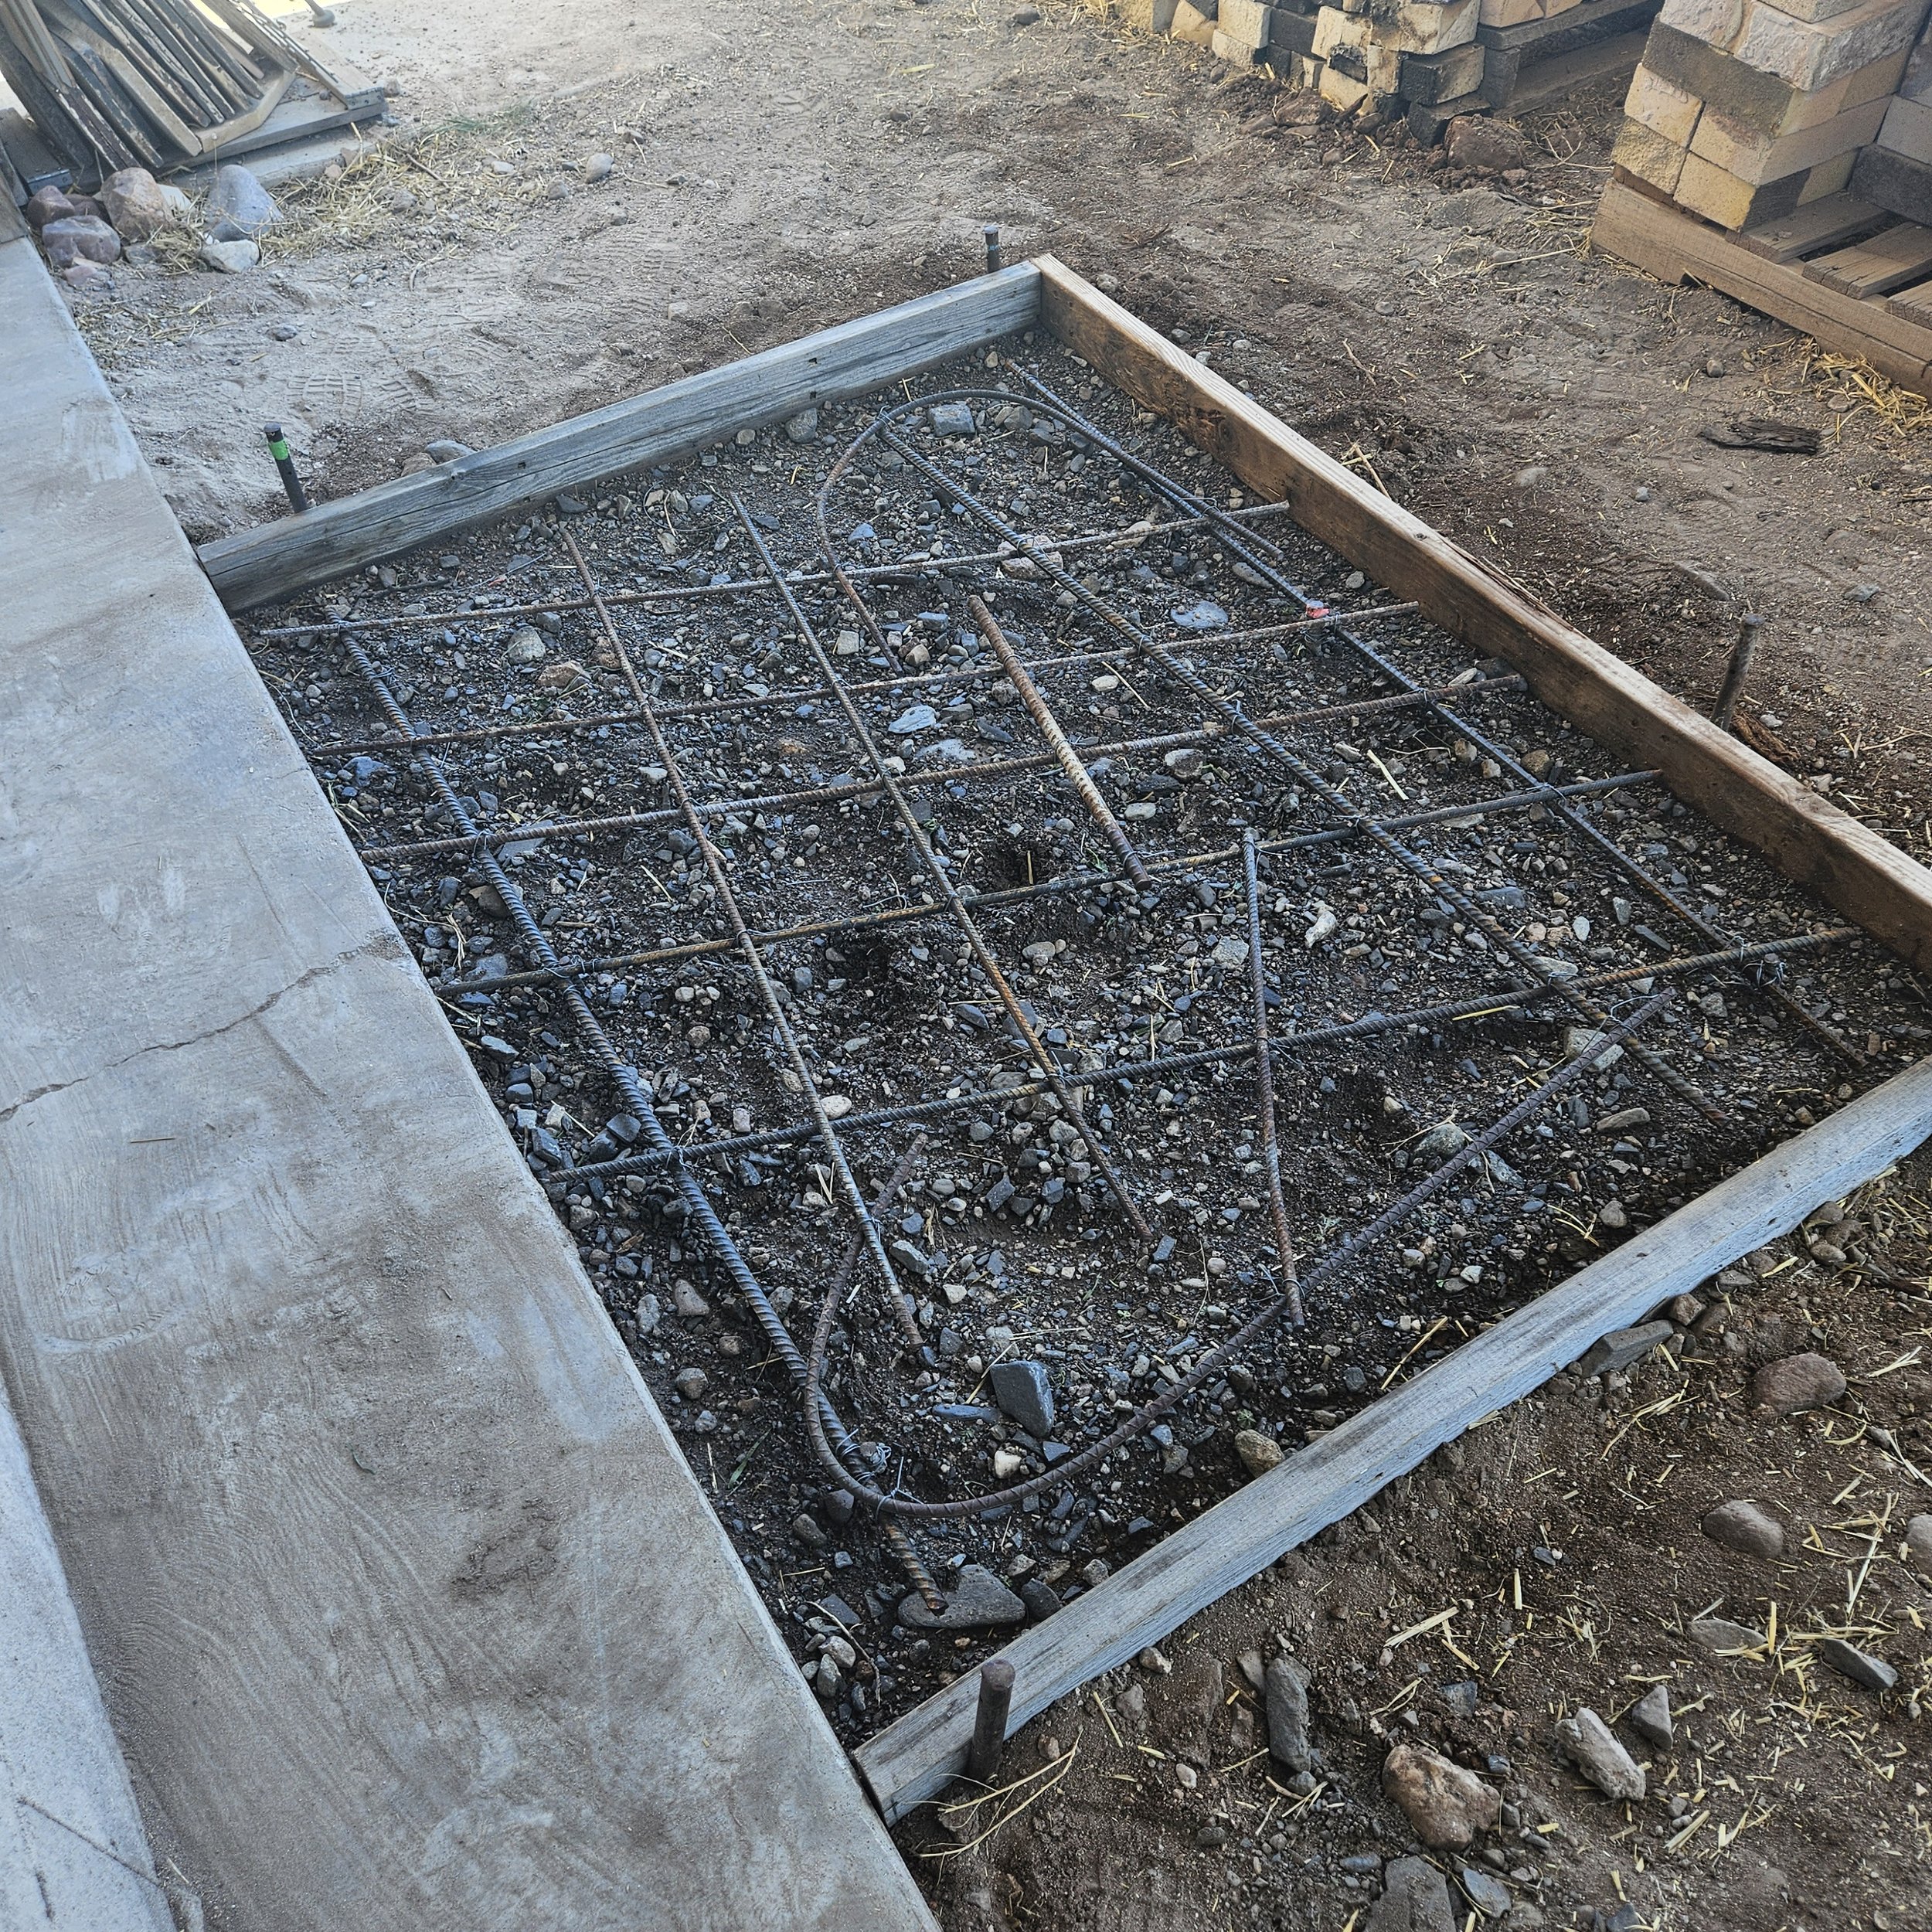
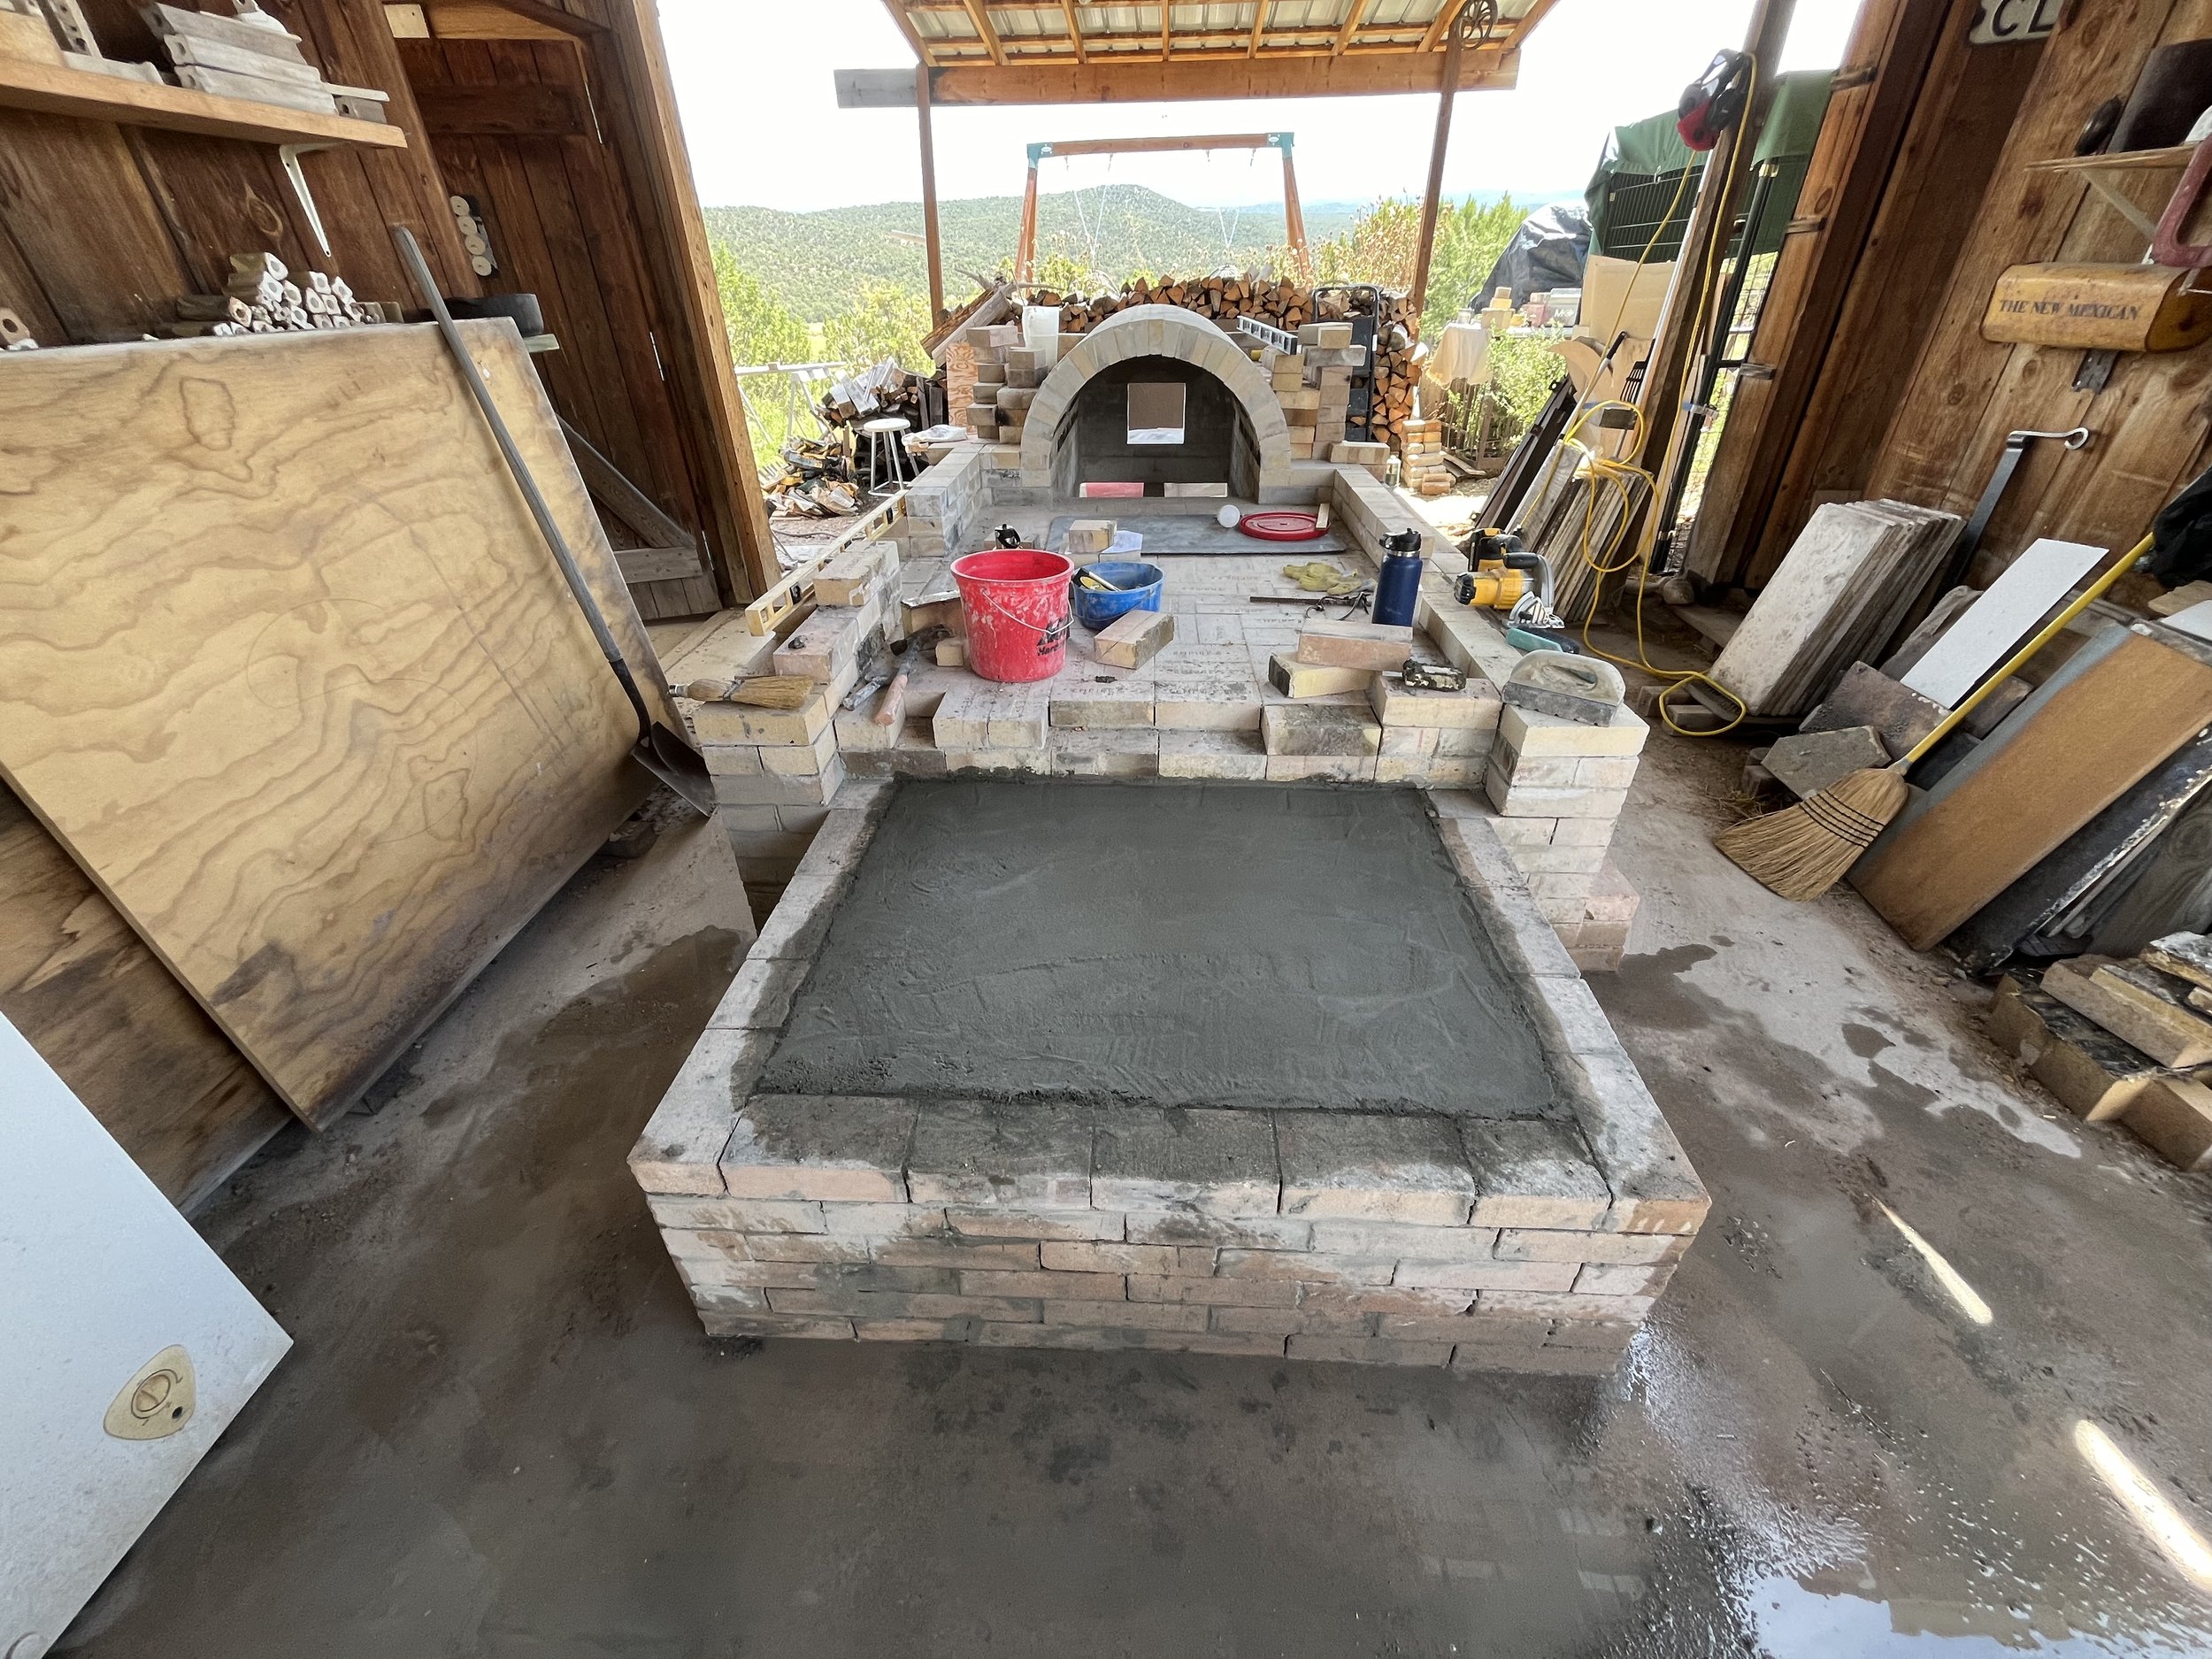
Preparing for the extension of the existing slab to accommodate the new firebox section. Perez Ciddio was a great help with pouring this slab.
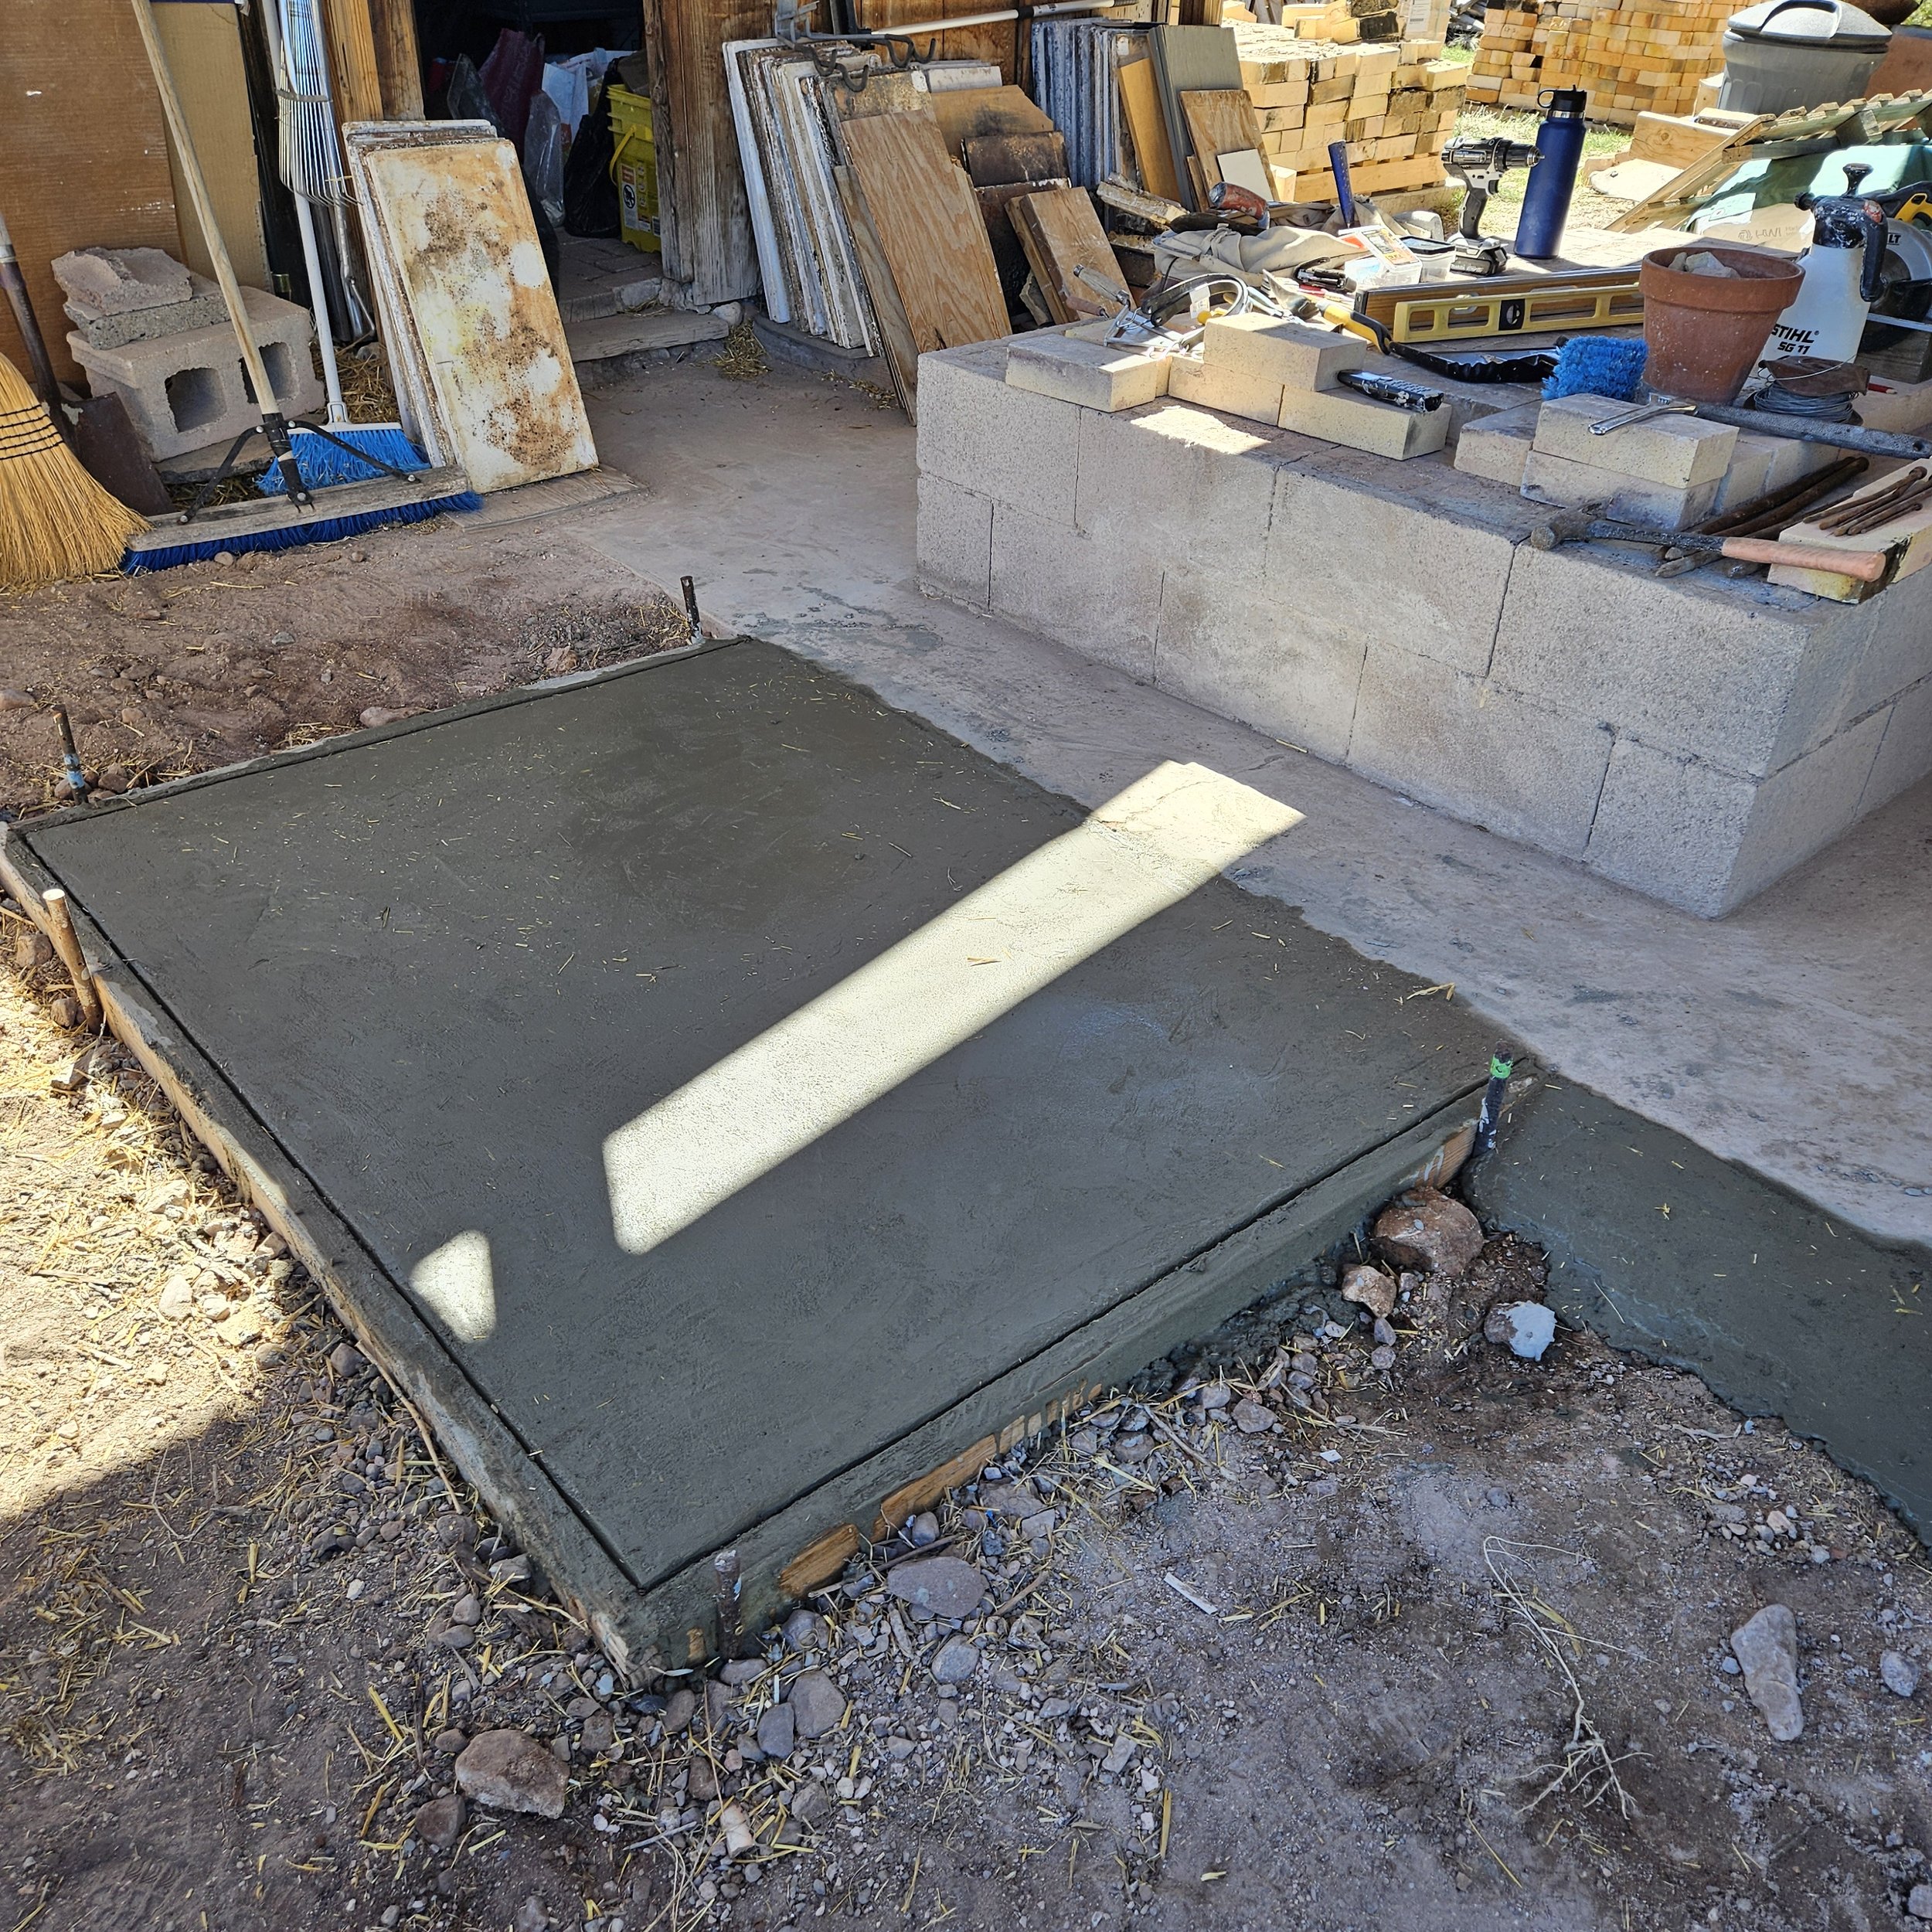
New slab curing. Five days were allowed before putting any weight on it.
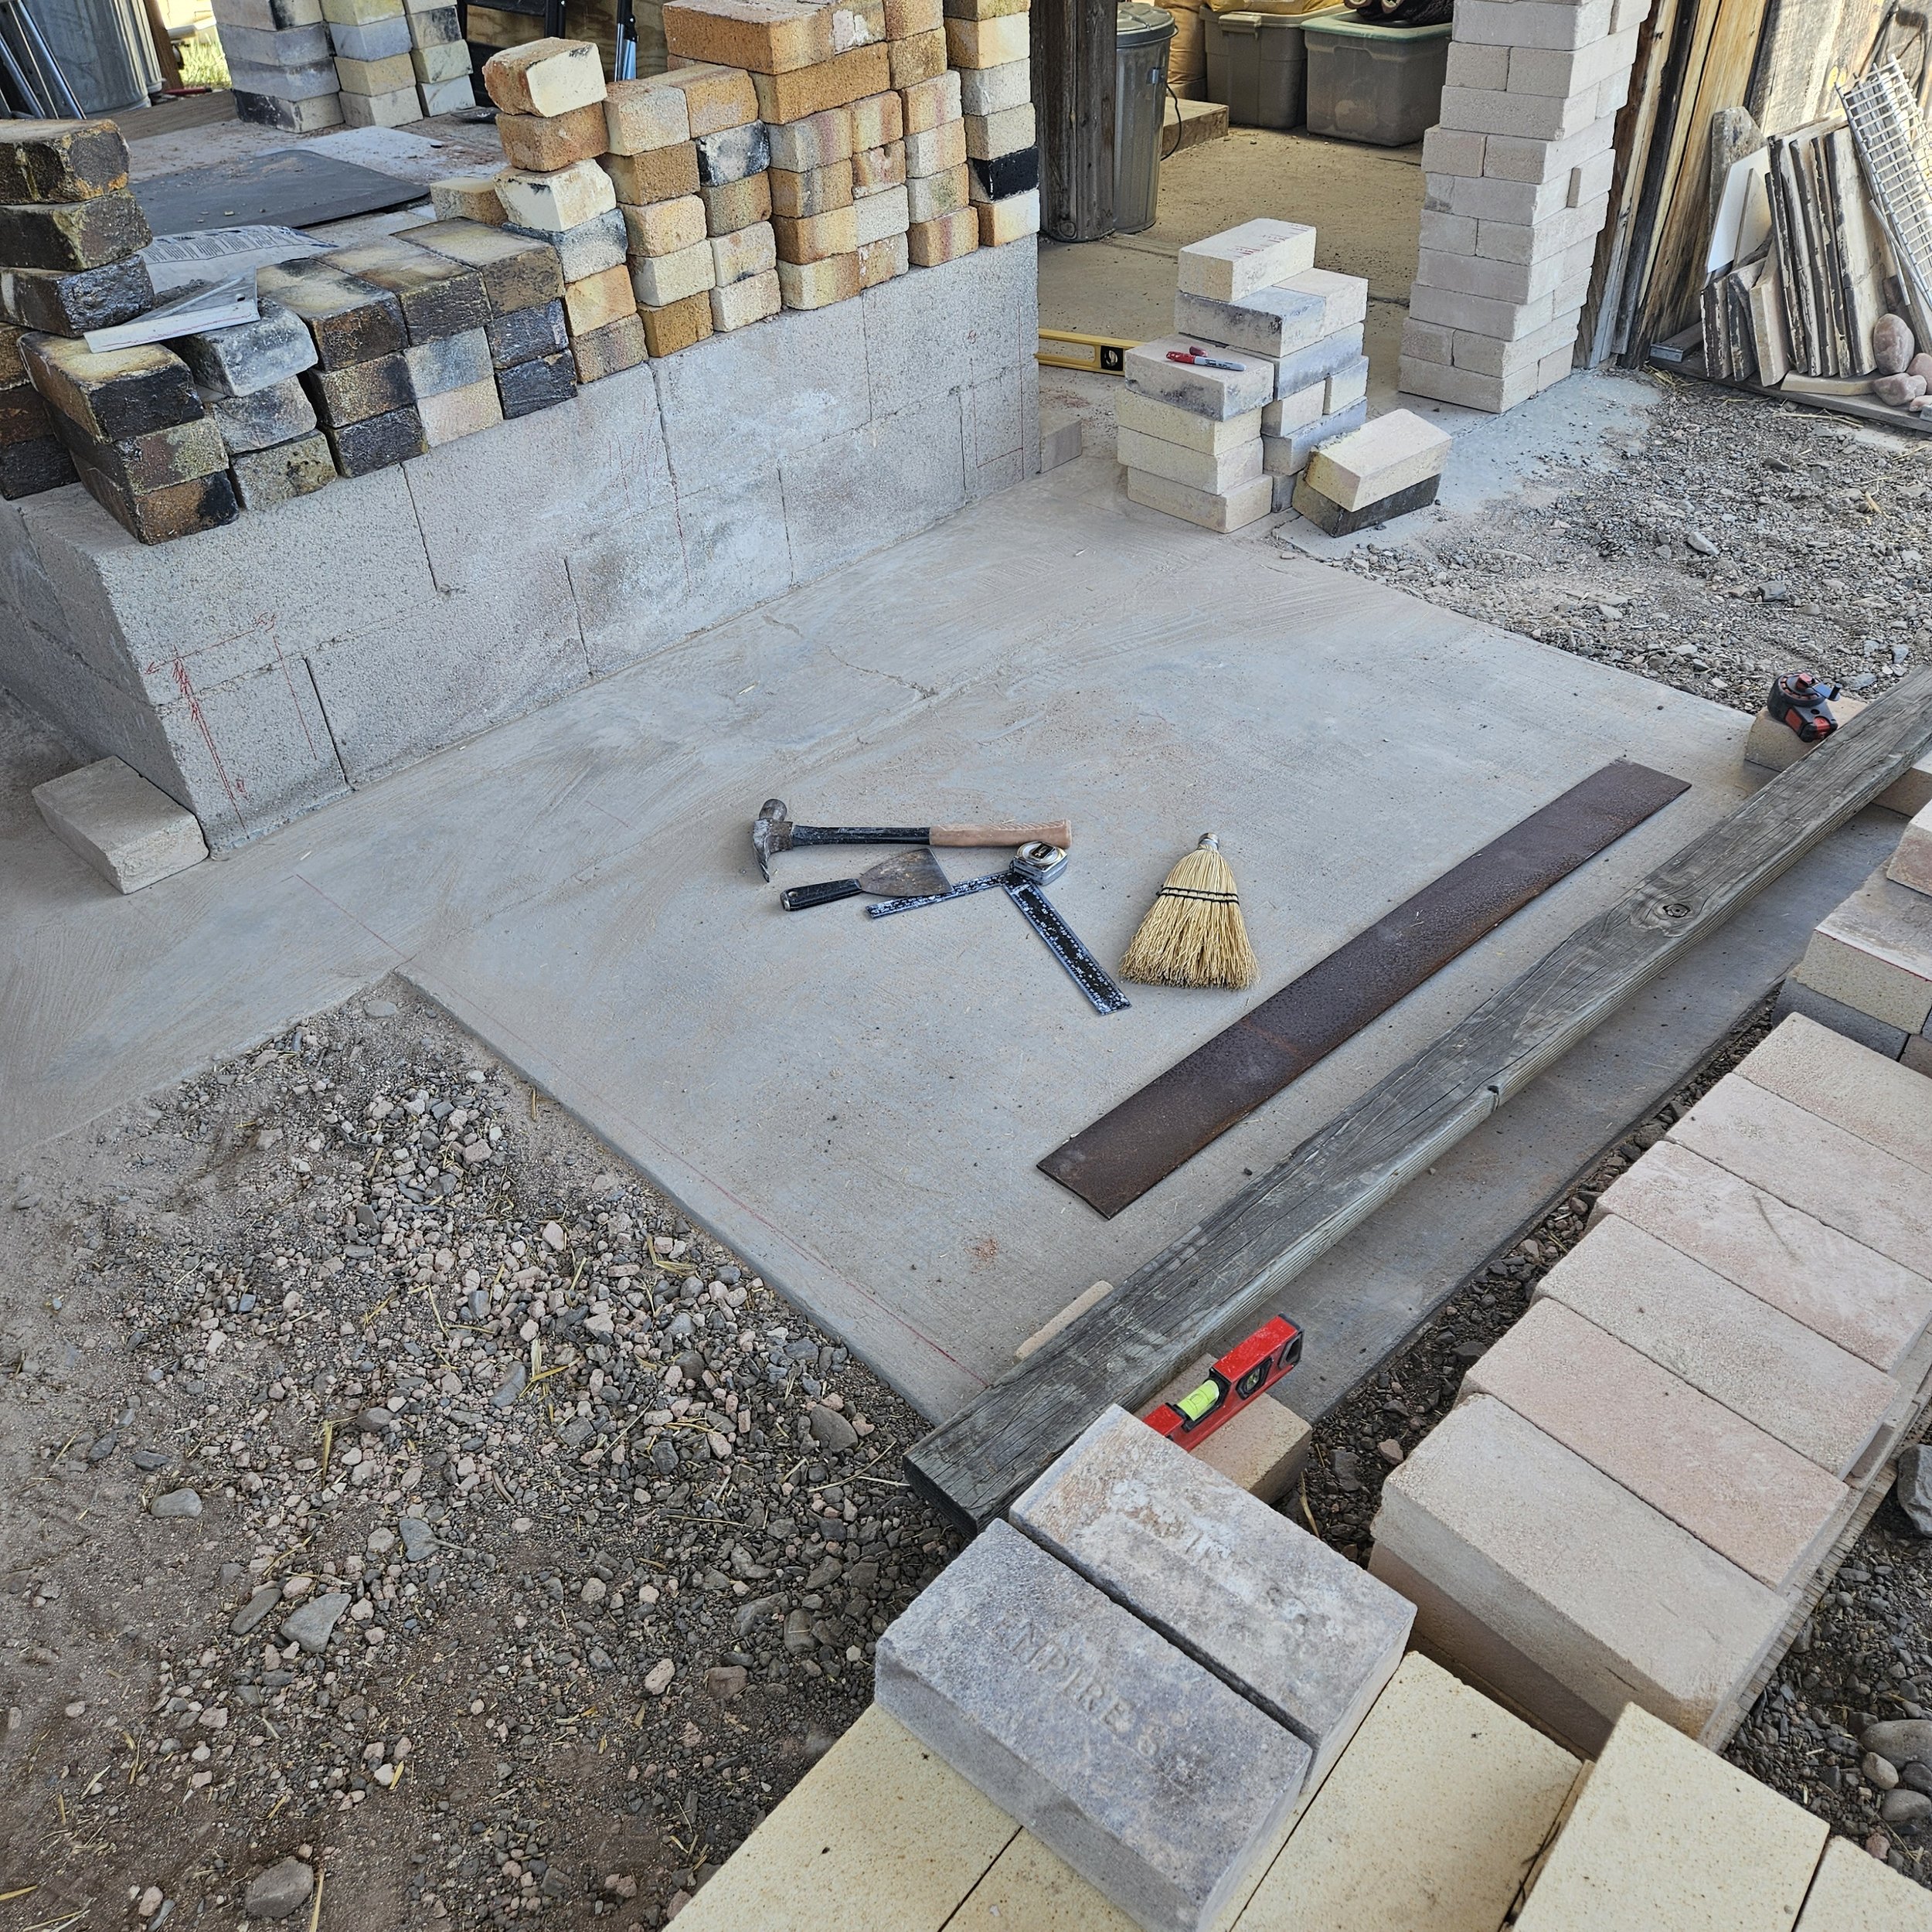
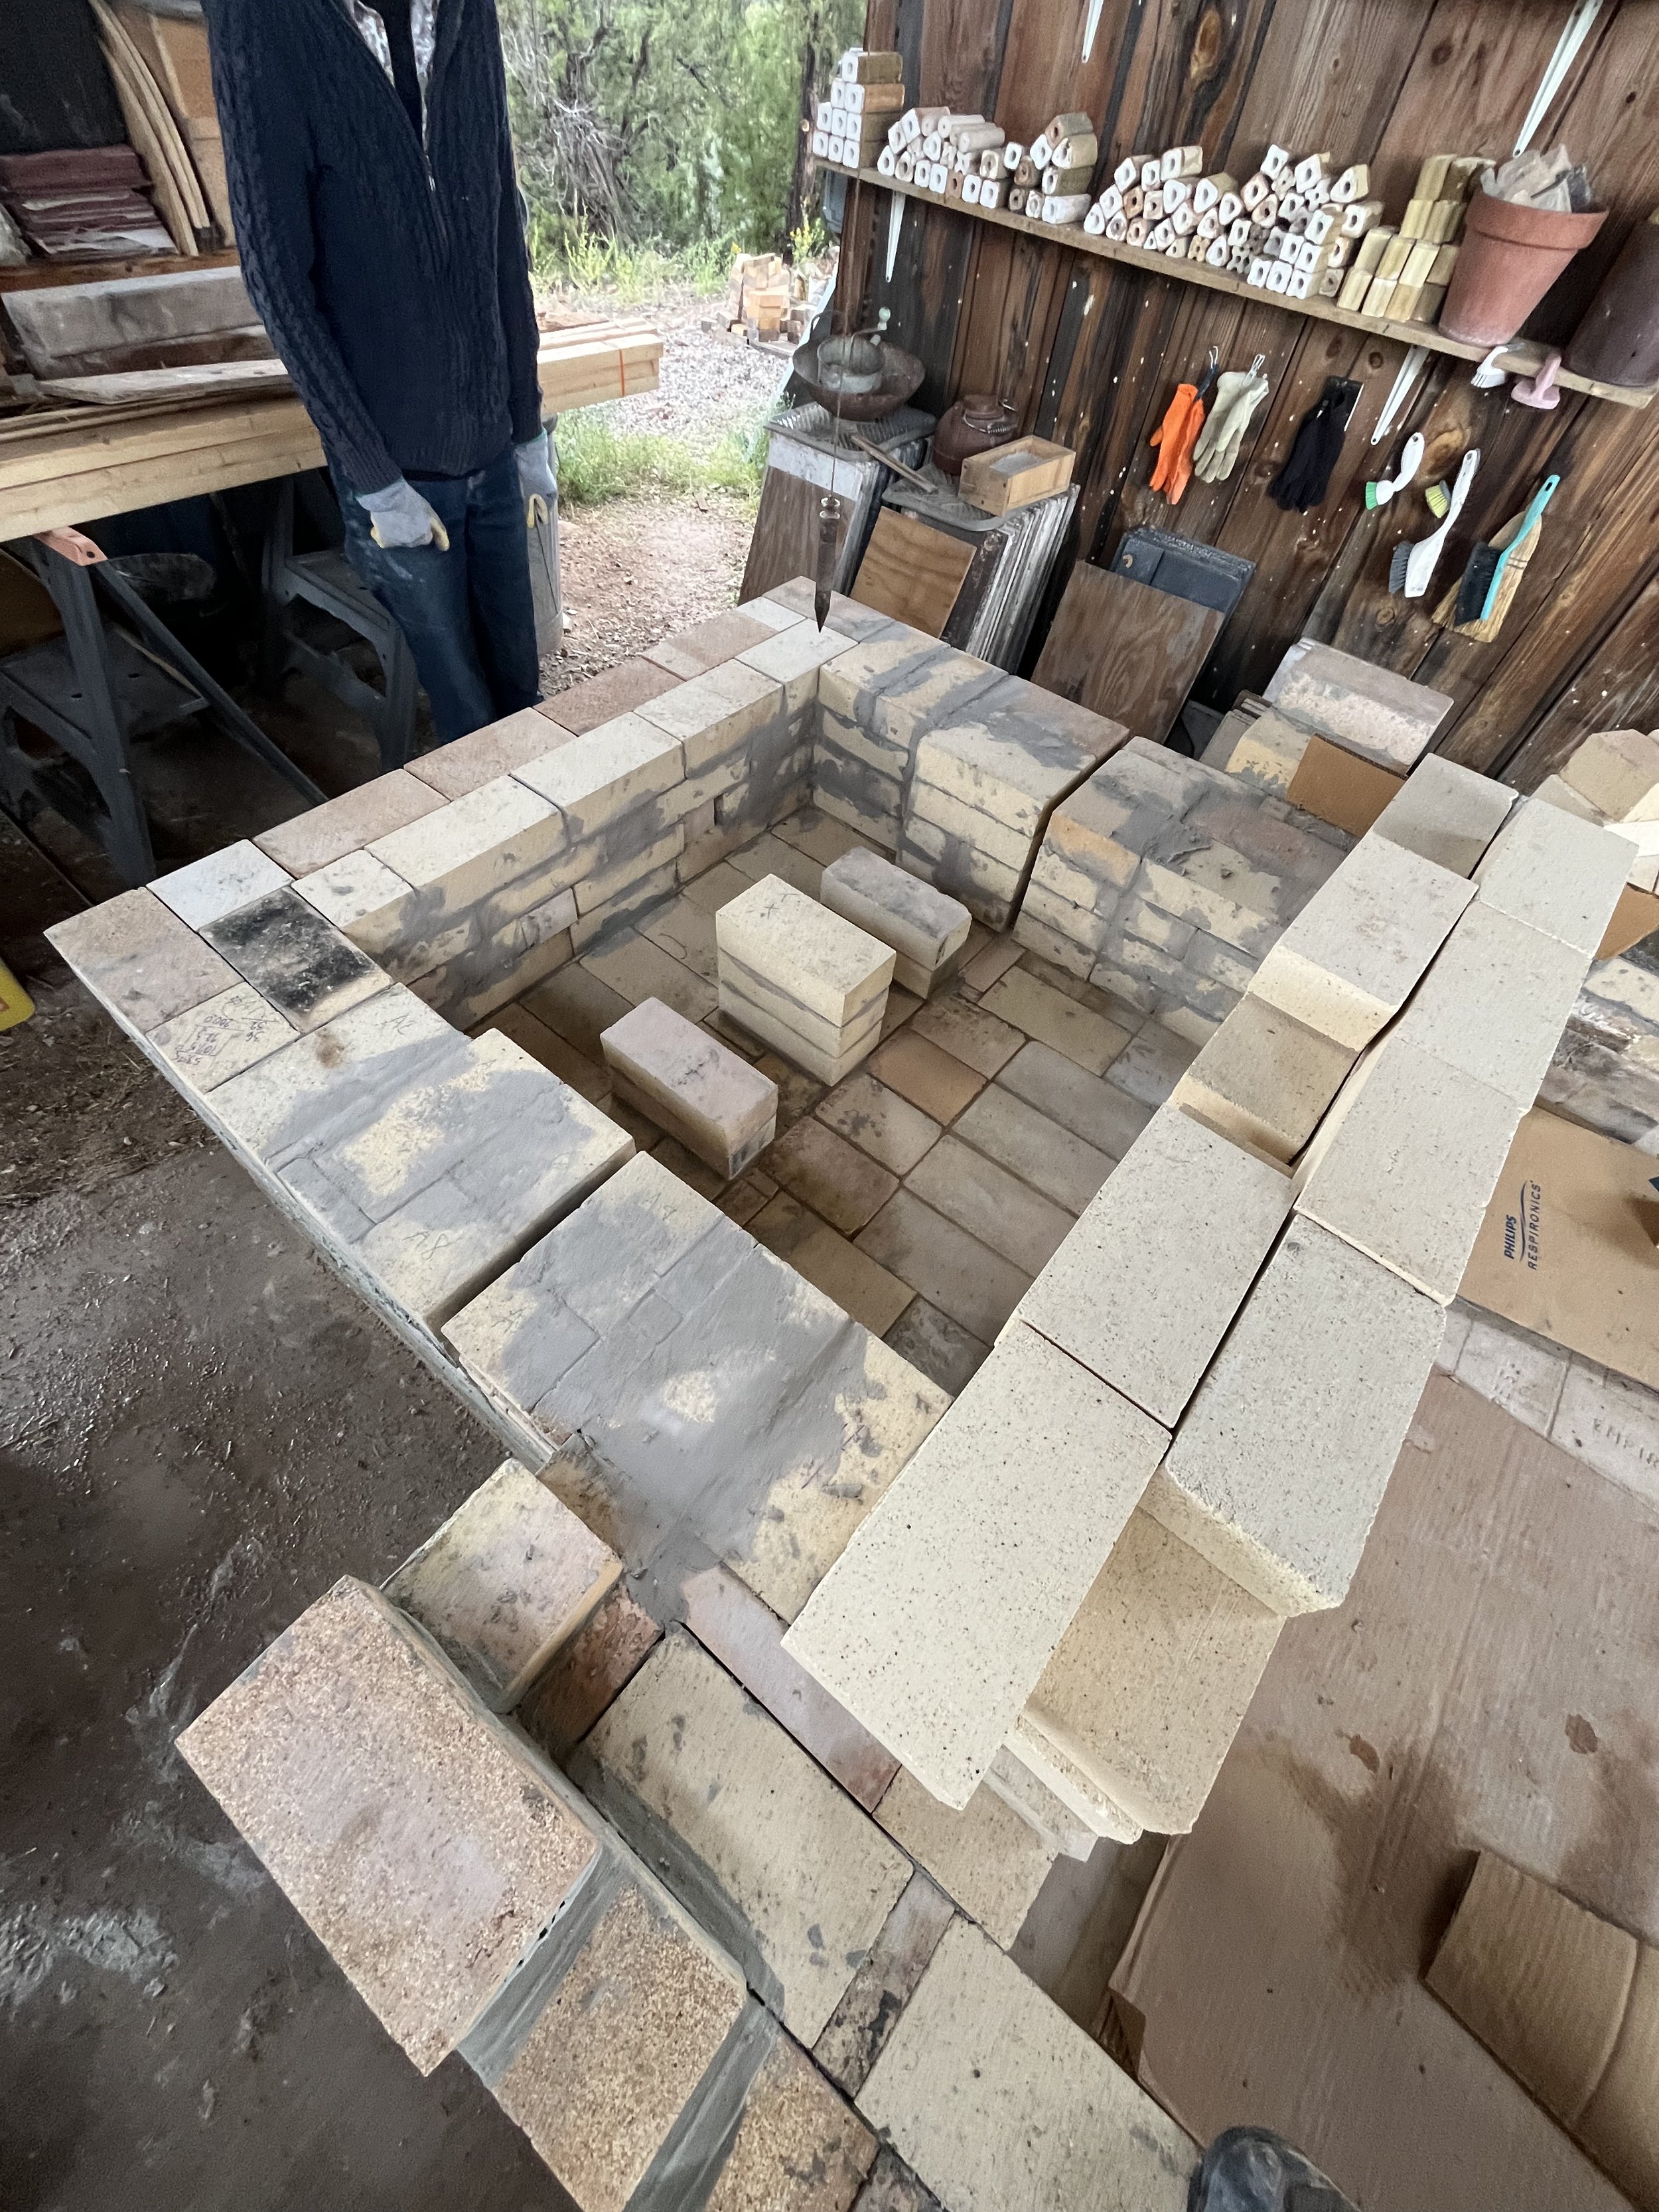
Beginning the layout of the firebox.
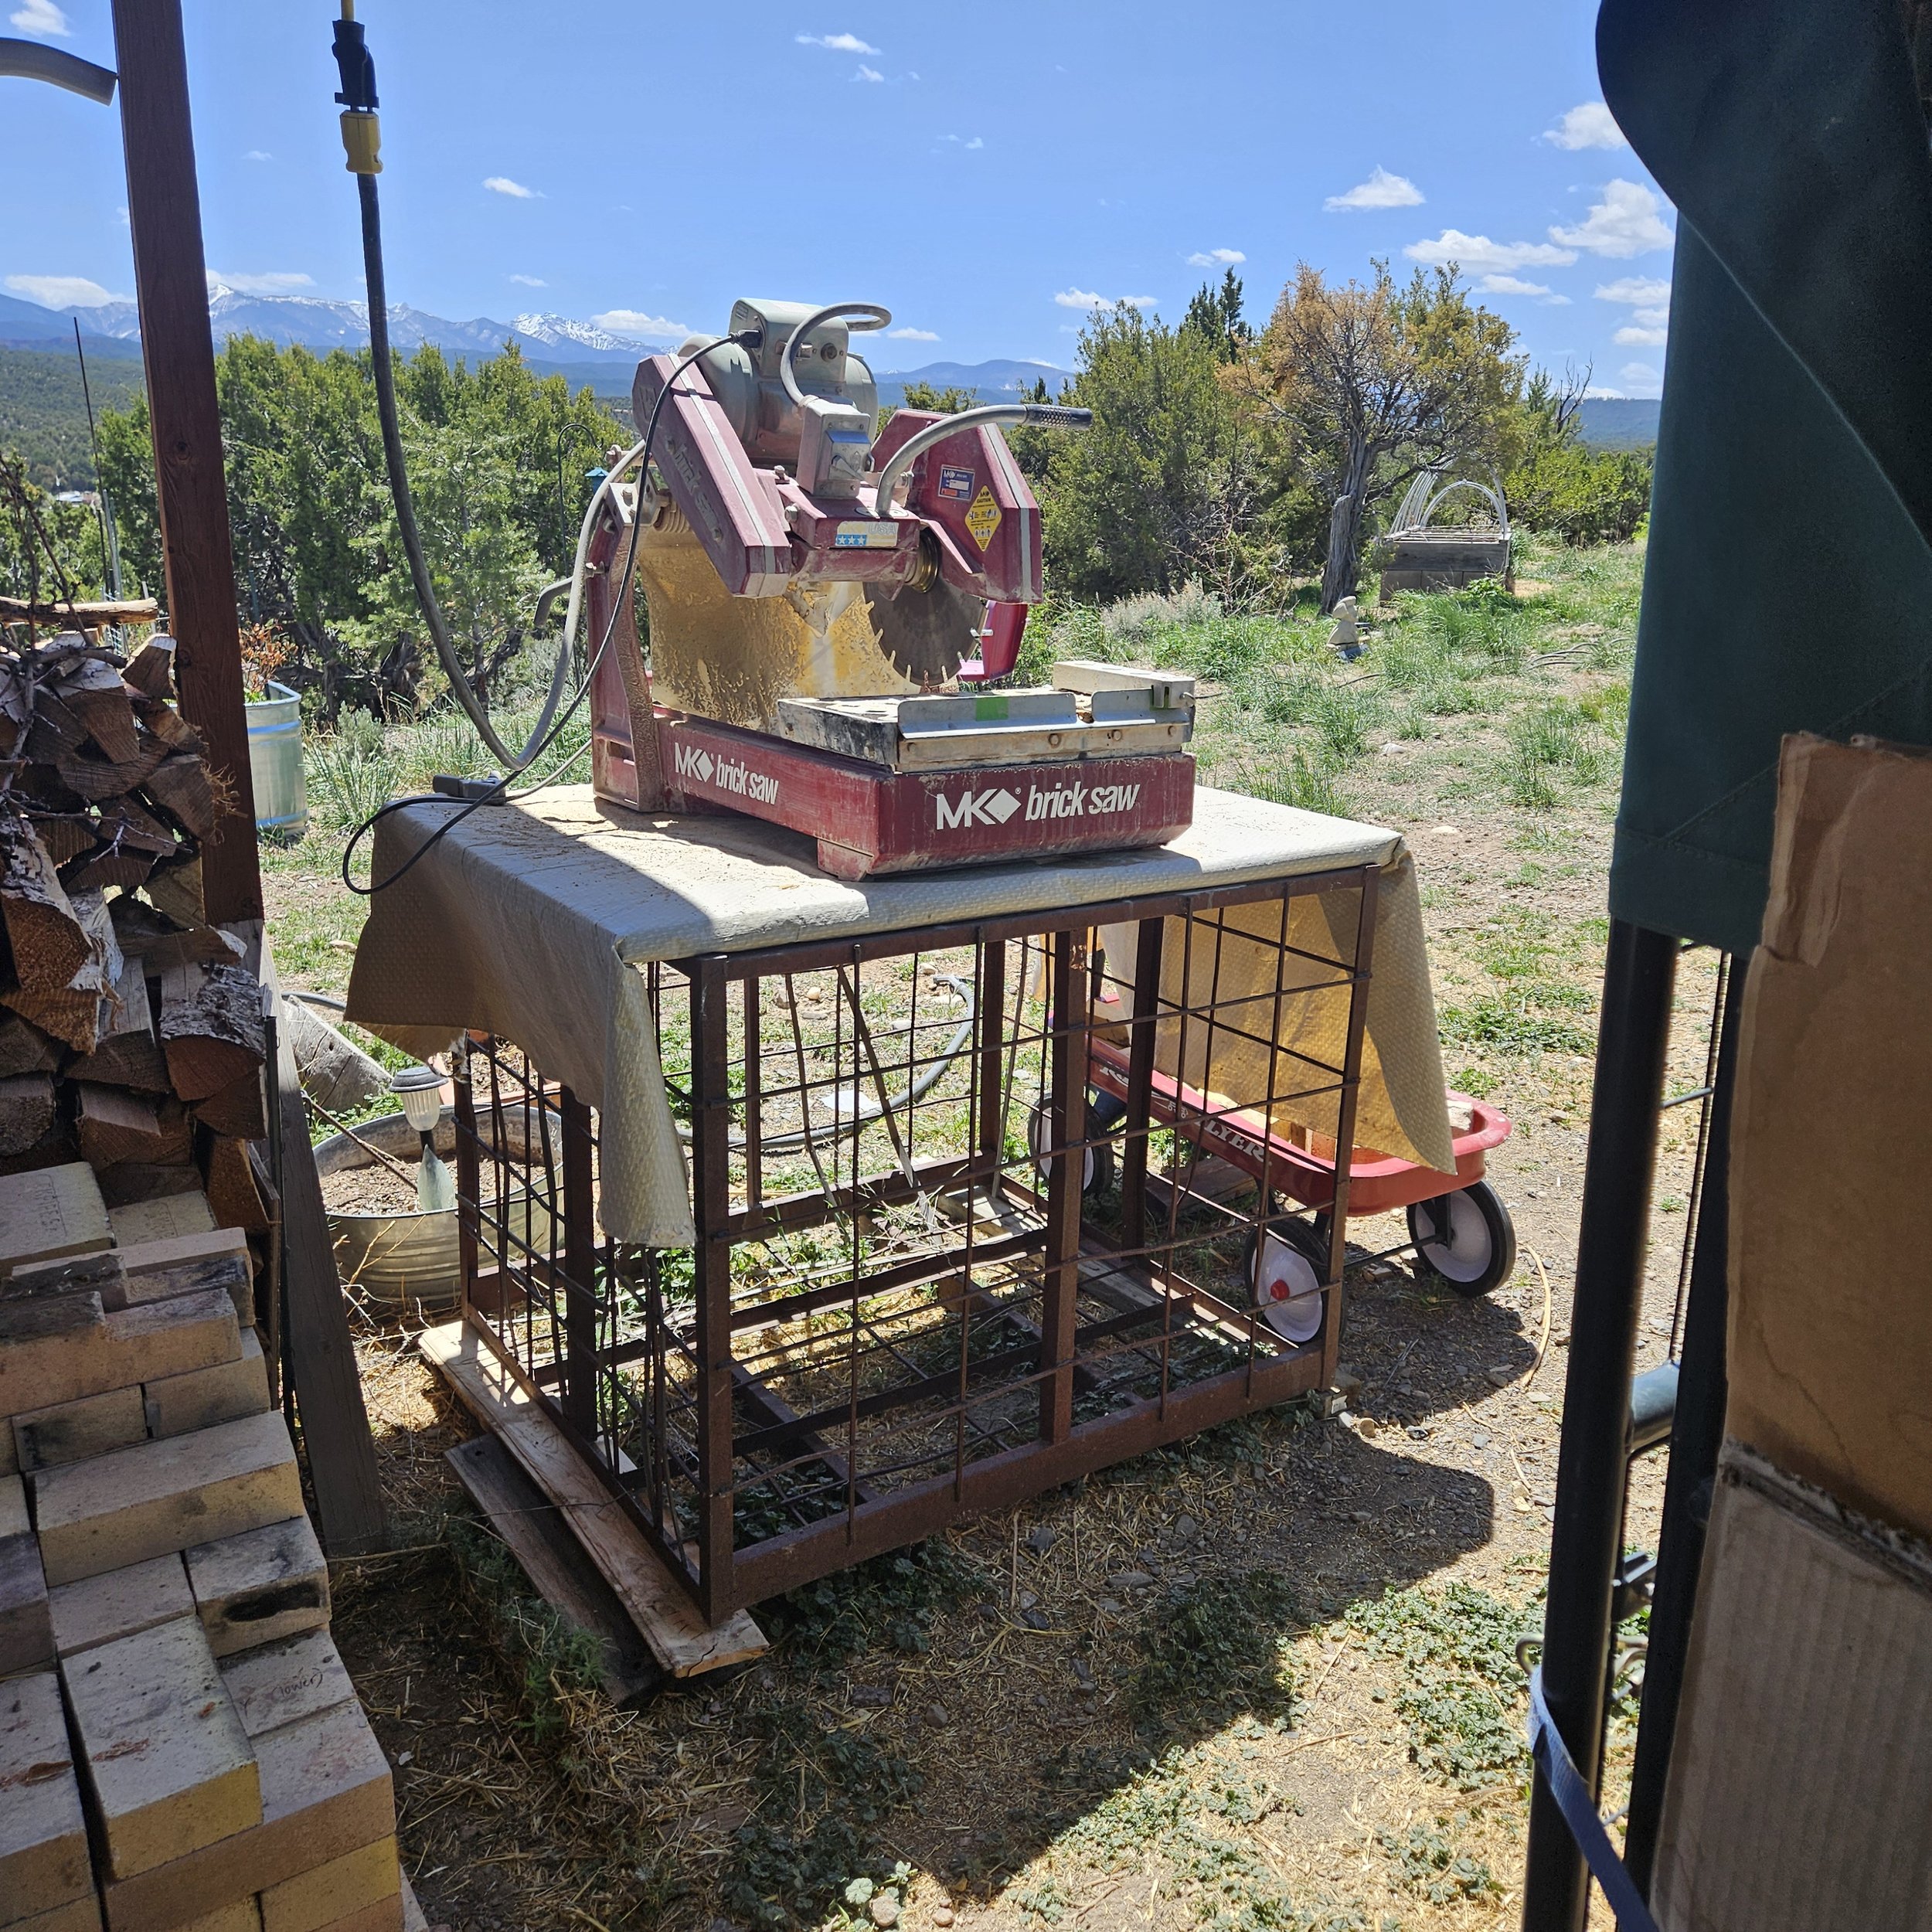
Brick saw set up. Mark had bought this saw secondhand many years ago, and I cleaned it up and replaced the blade. It is a scary machine, but it has made this work possible.

Insulating layer of firebox floor.
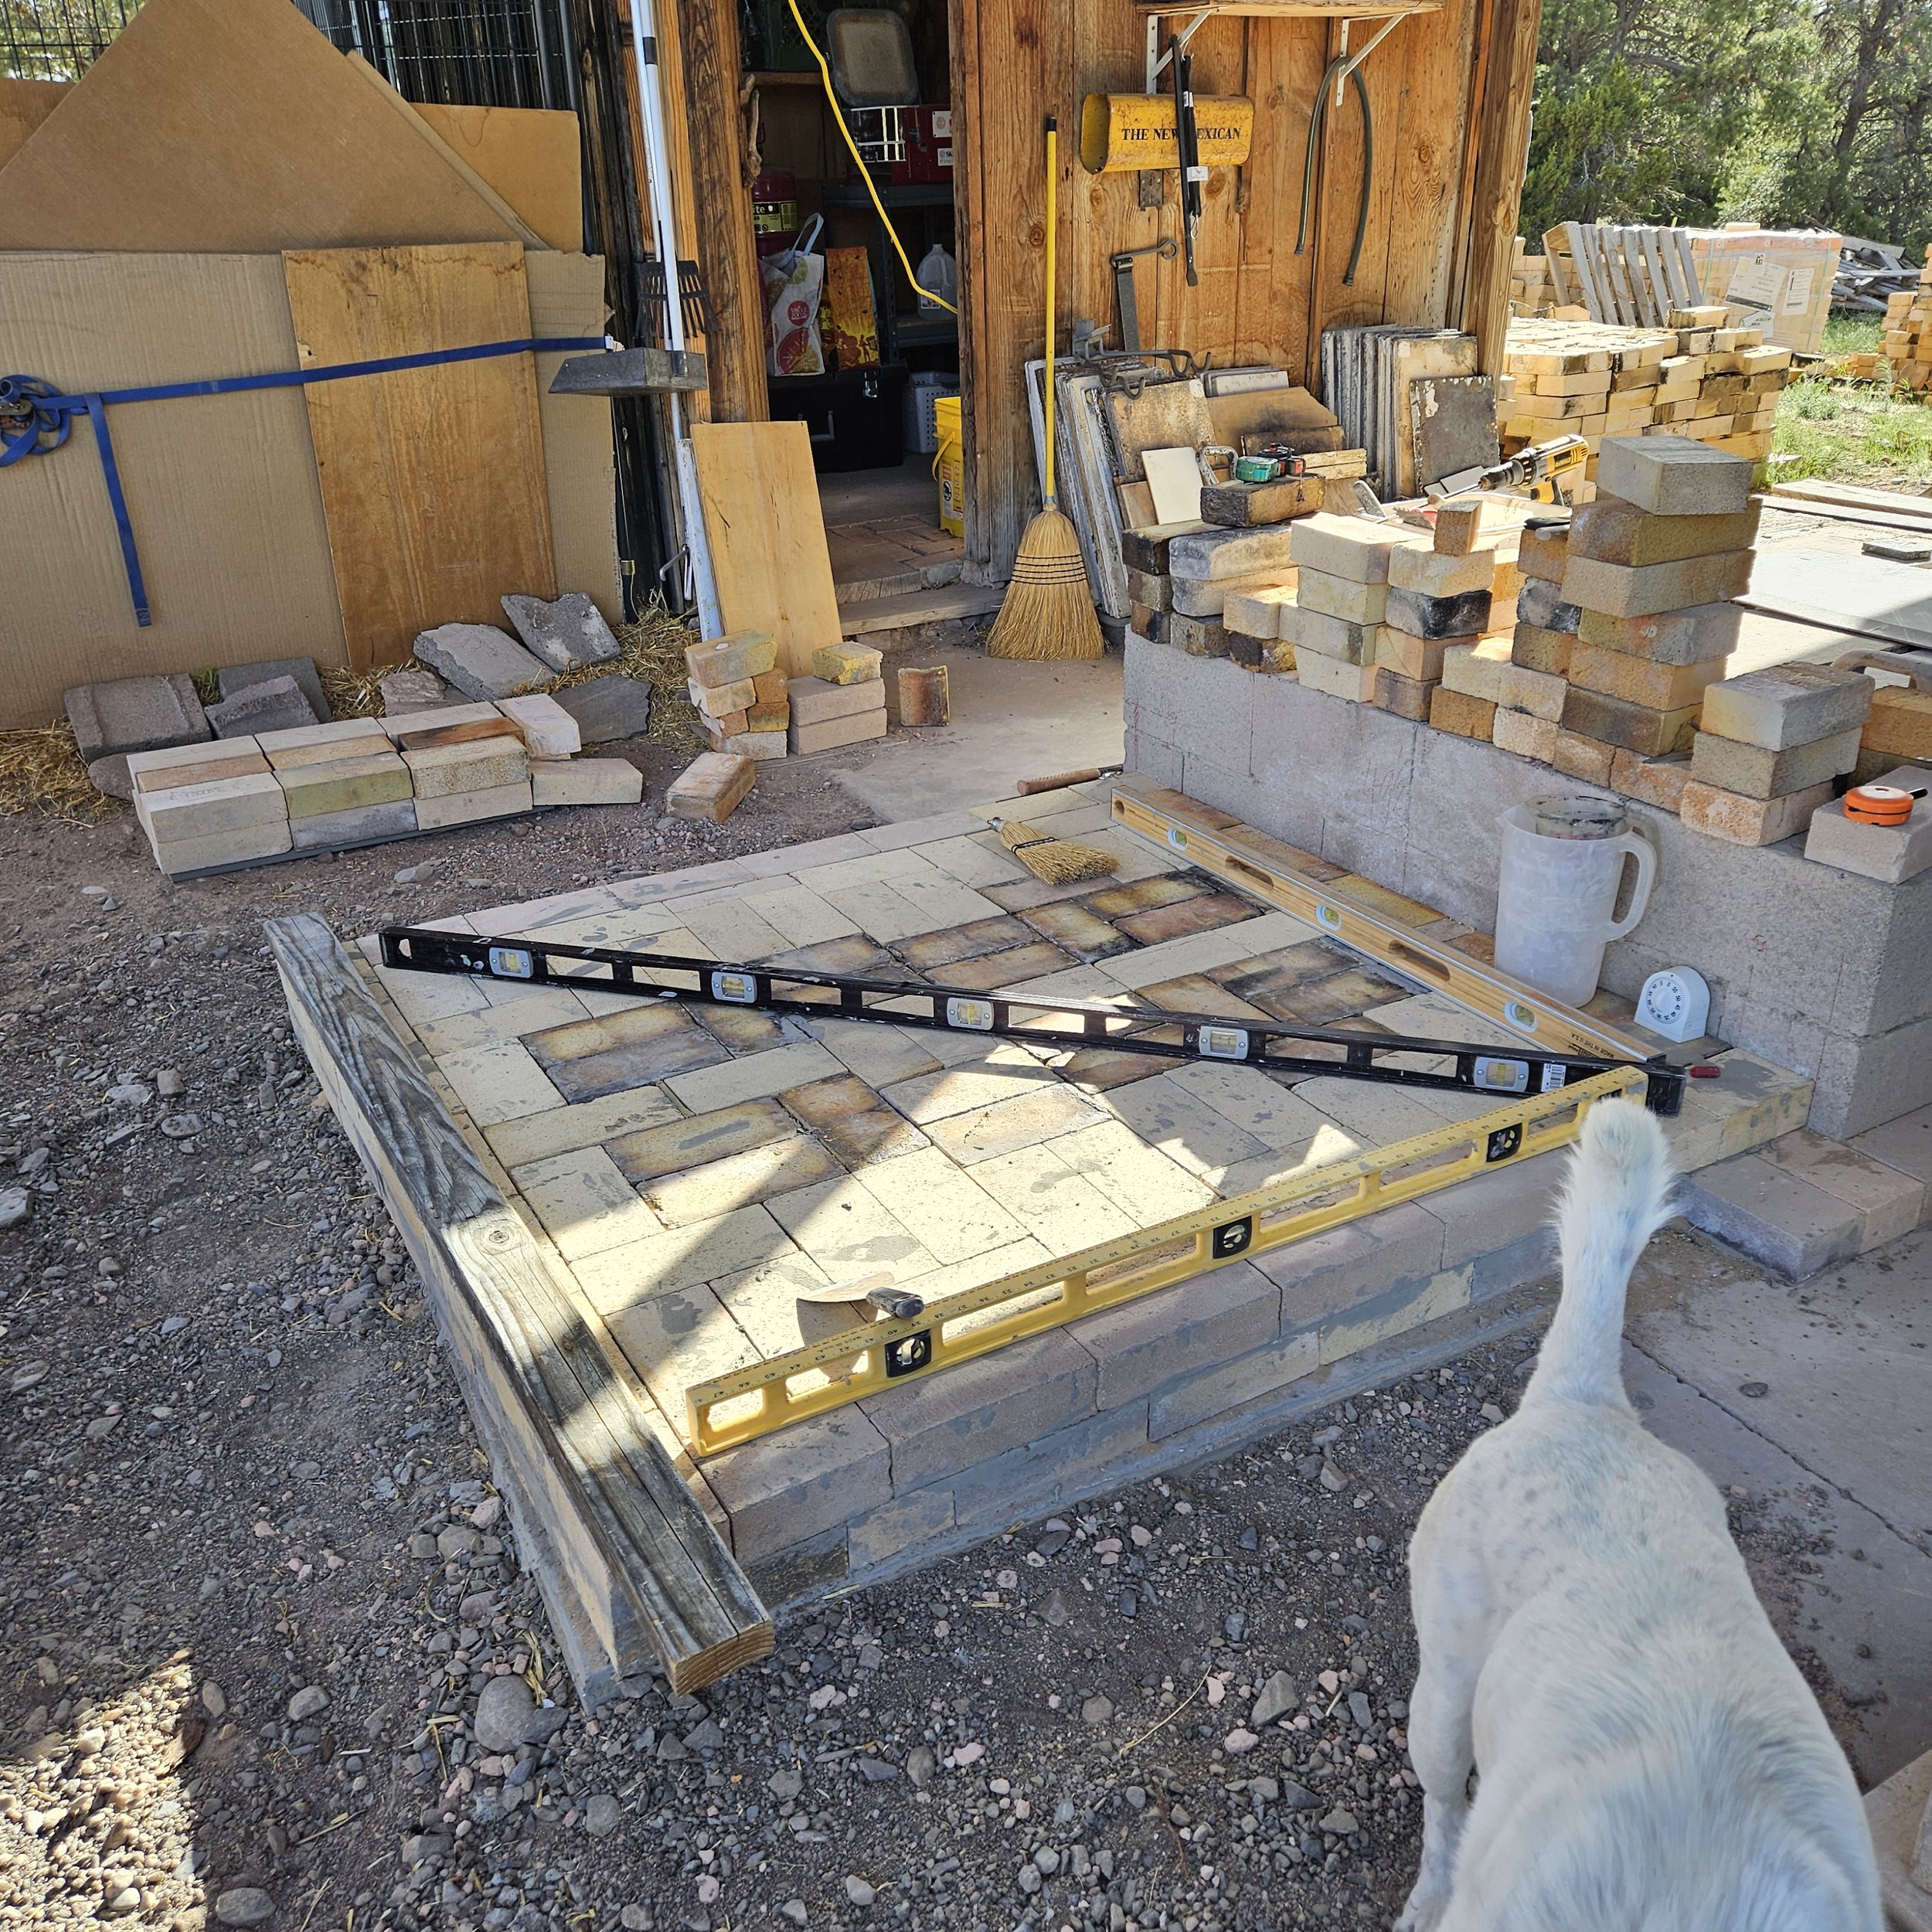
Second (hot face) layer of firebox floor.
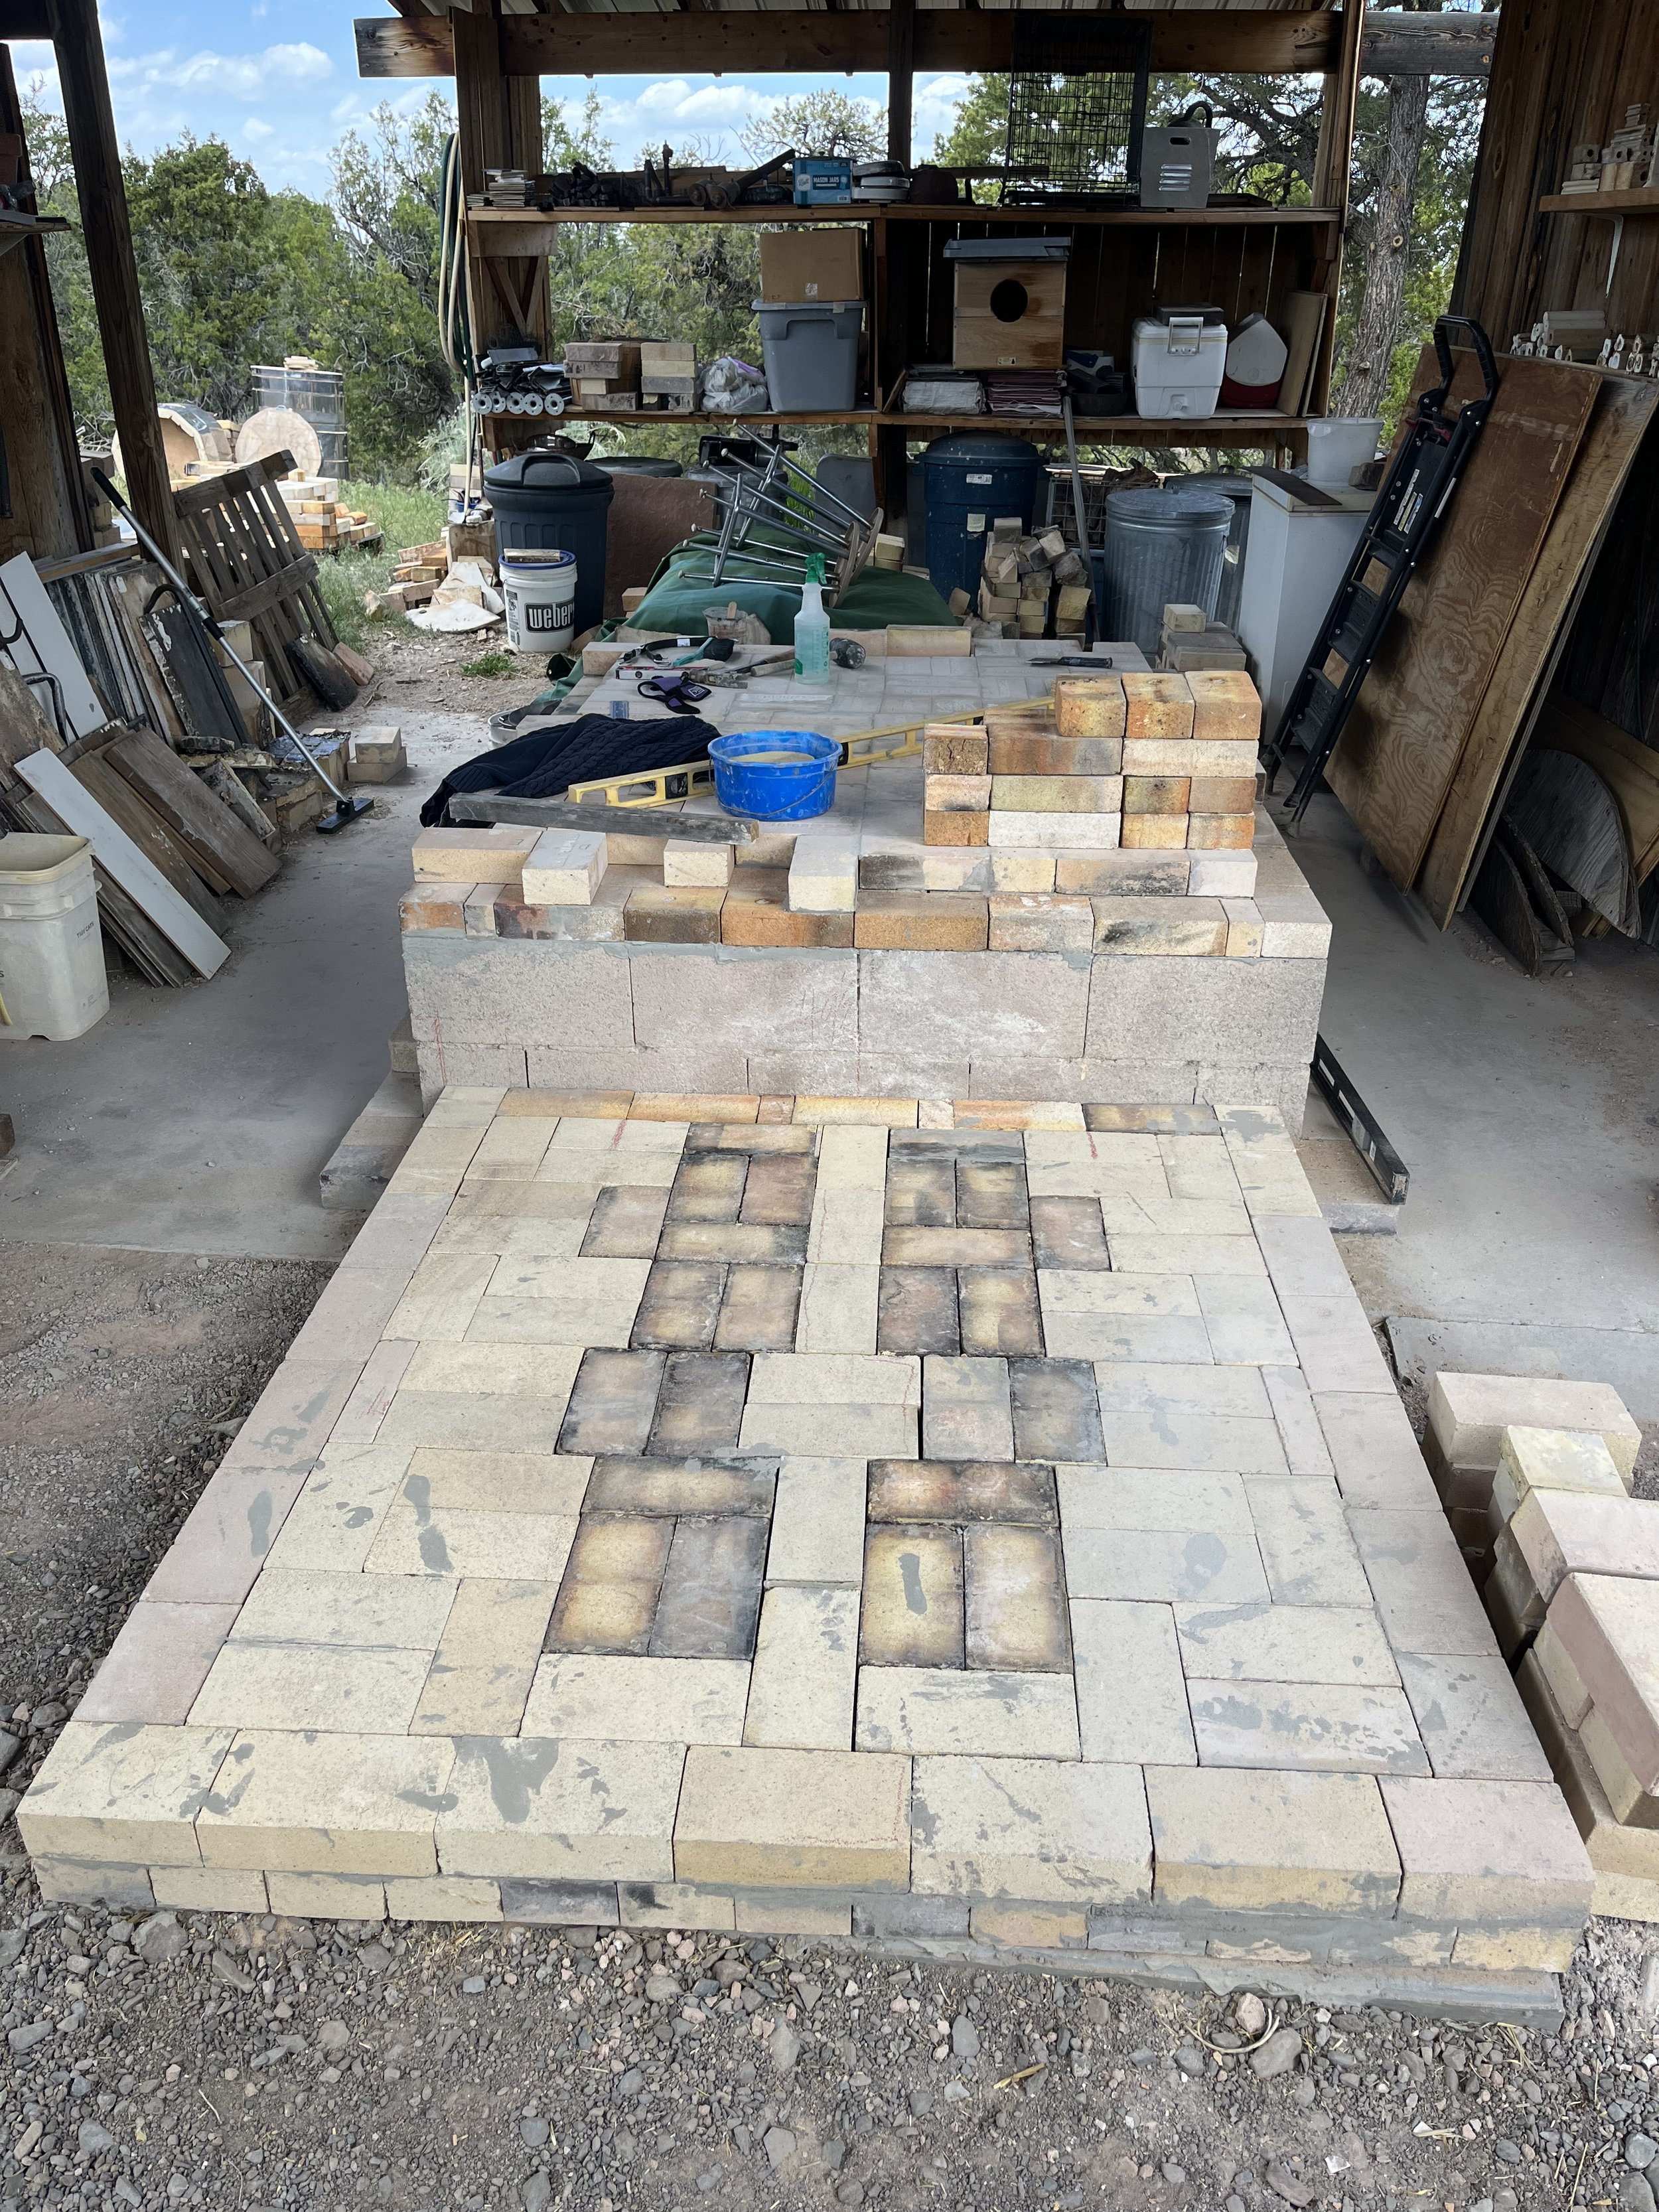
Floor layer of the firebox complete. (-photo by Tori)
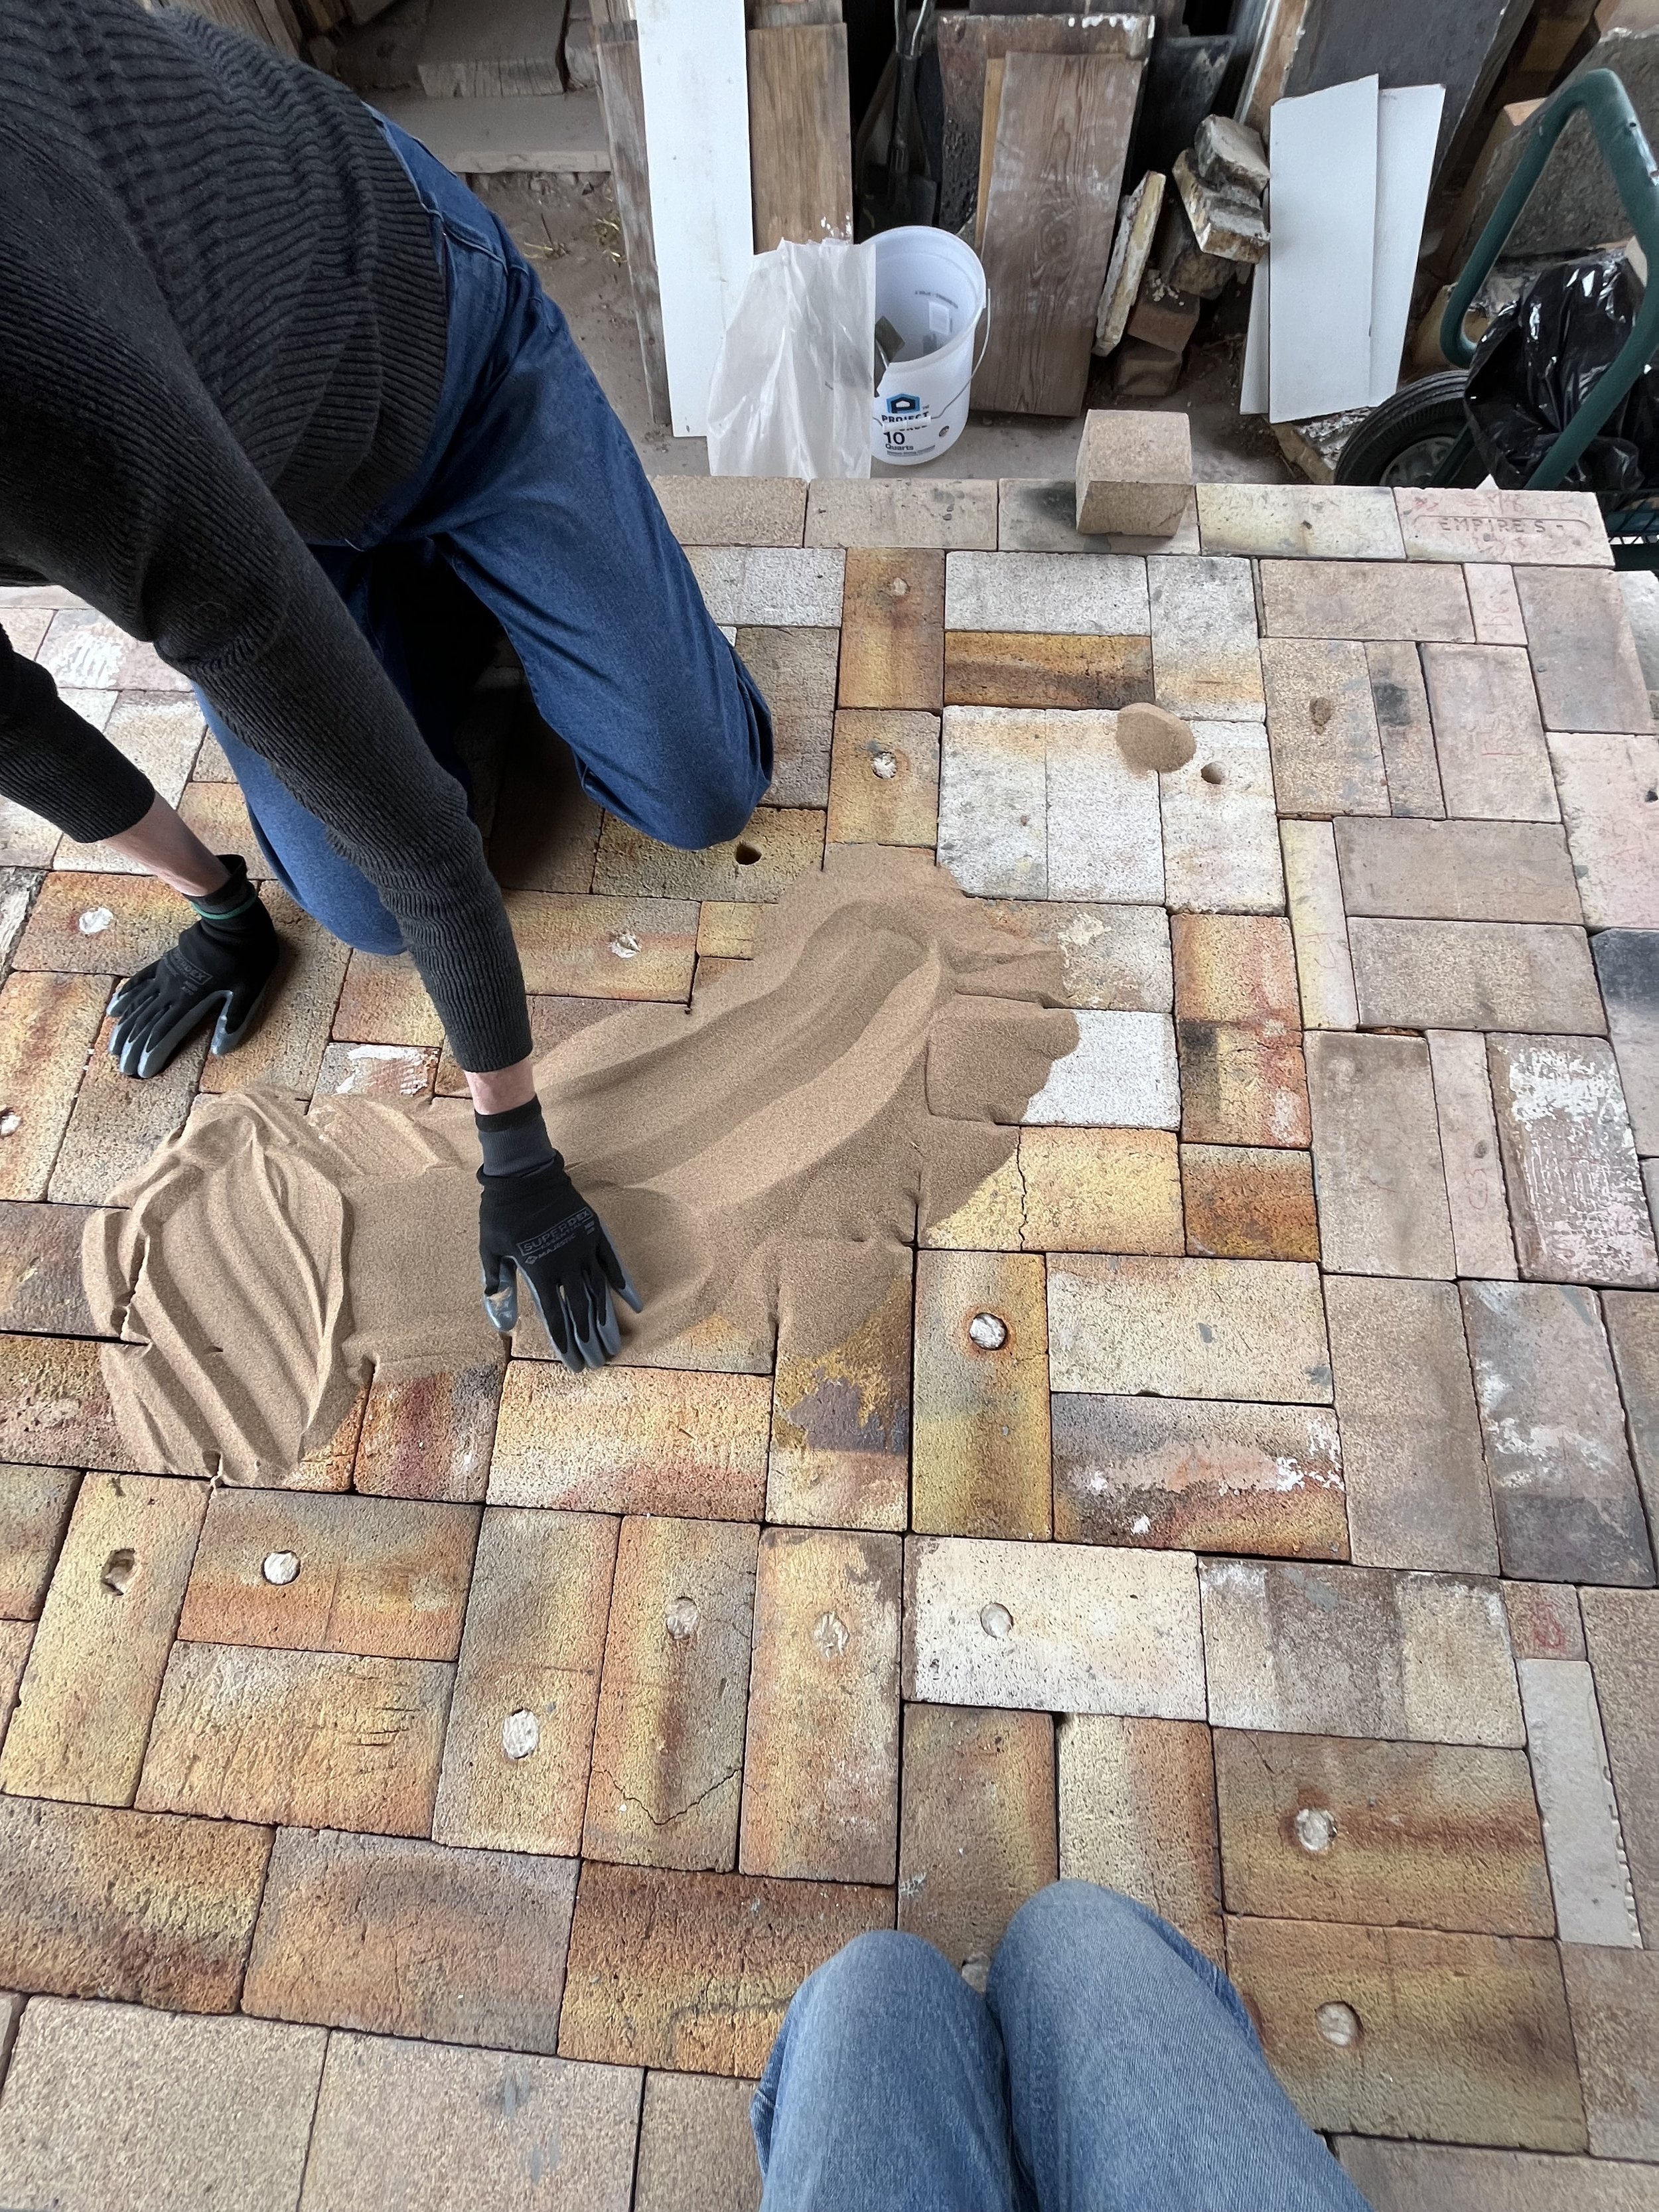
Filling in the insulating layer of the kiln chamber floor with sand. (-photo by Tori)
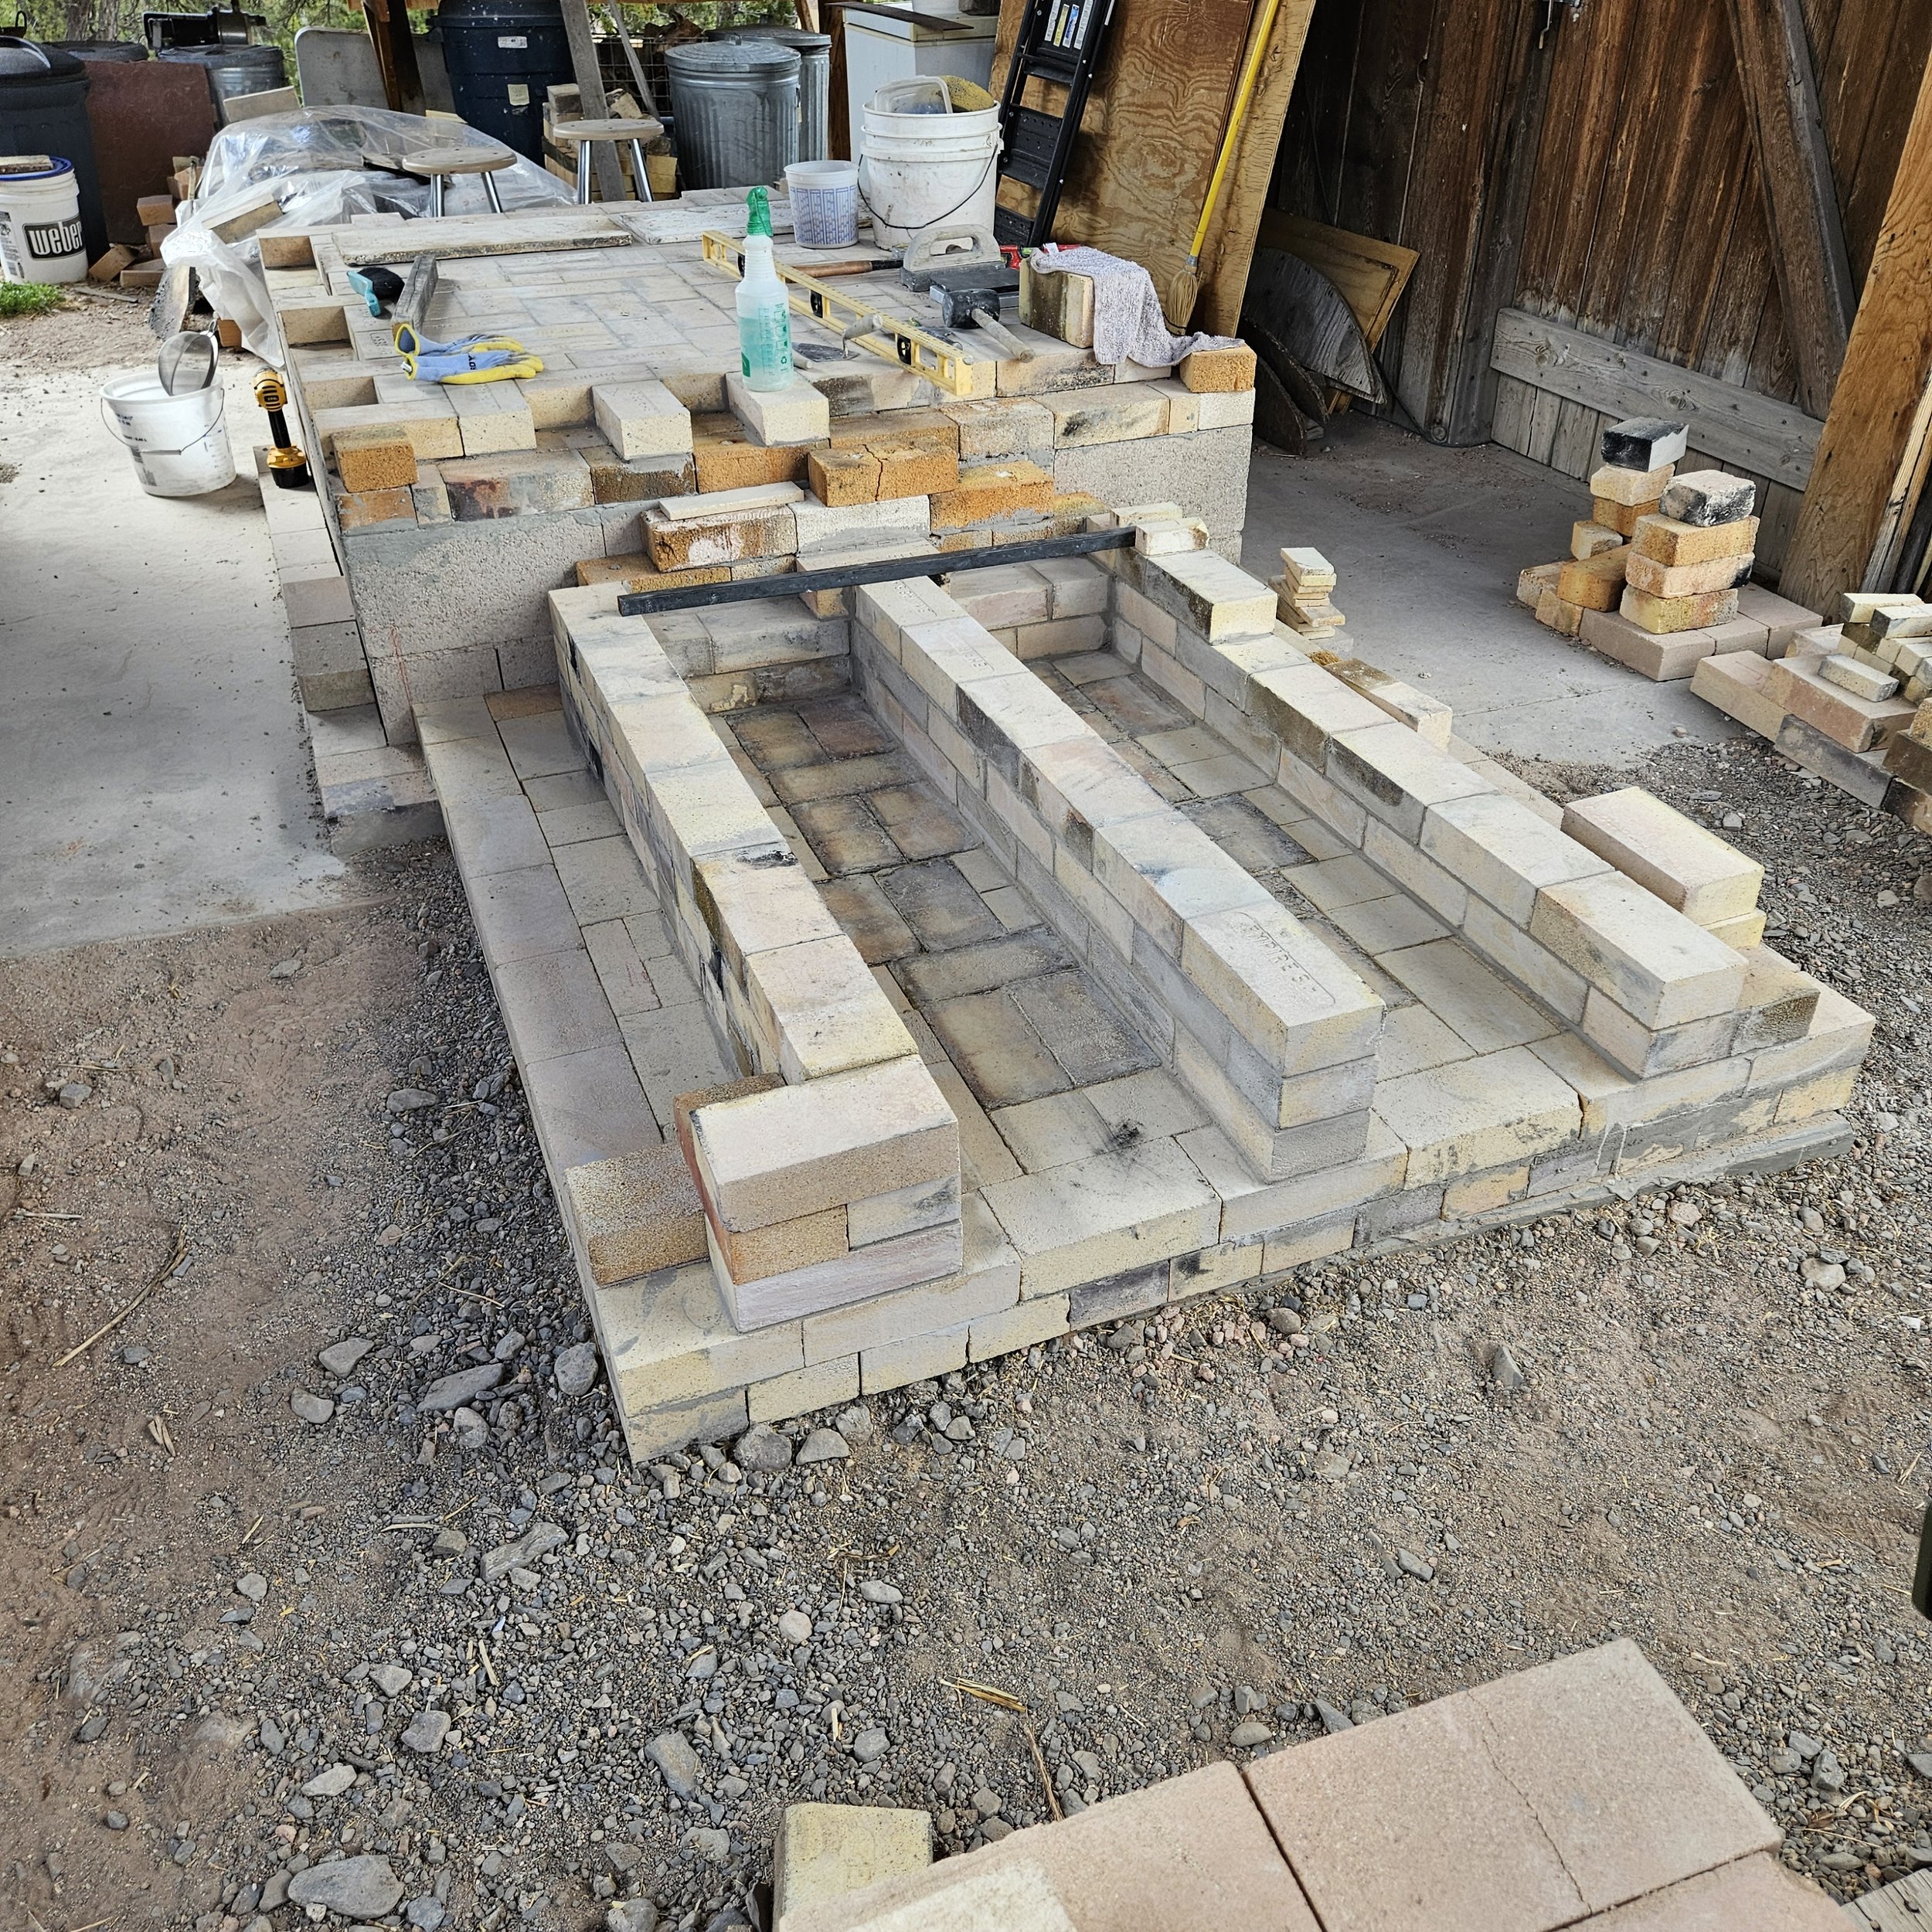
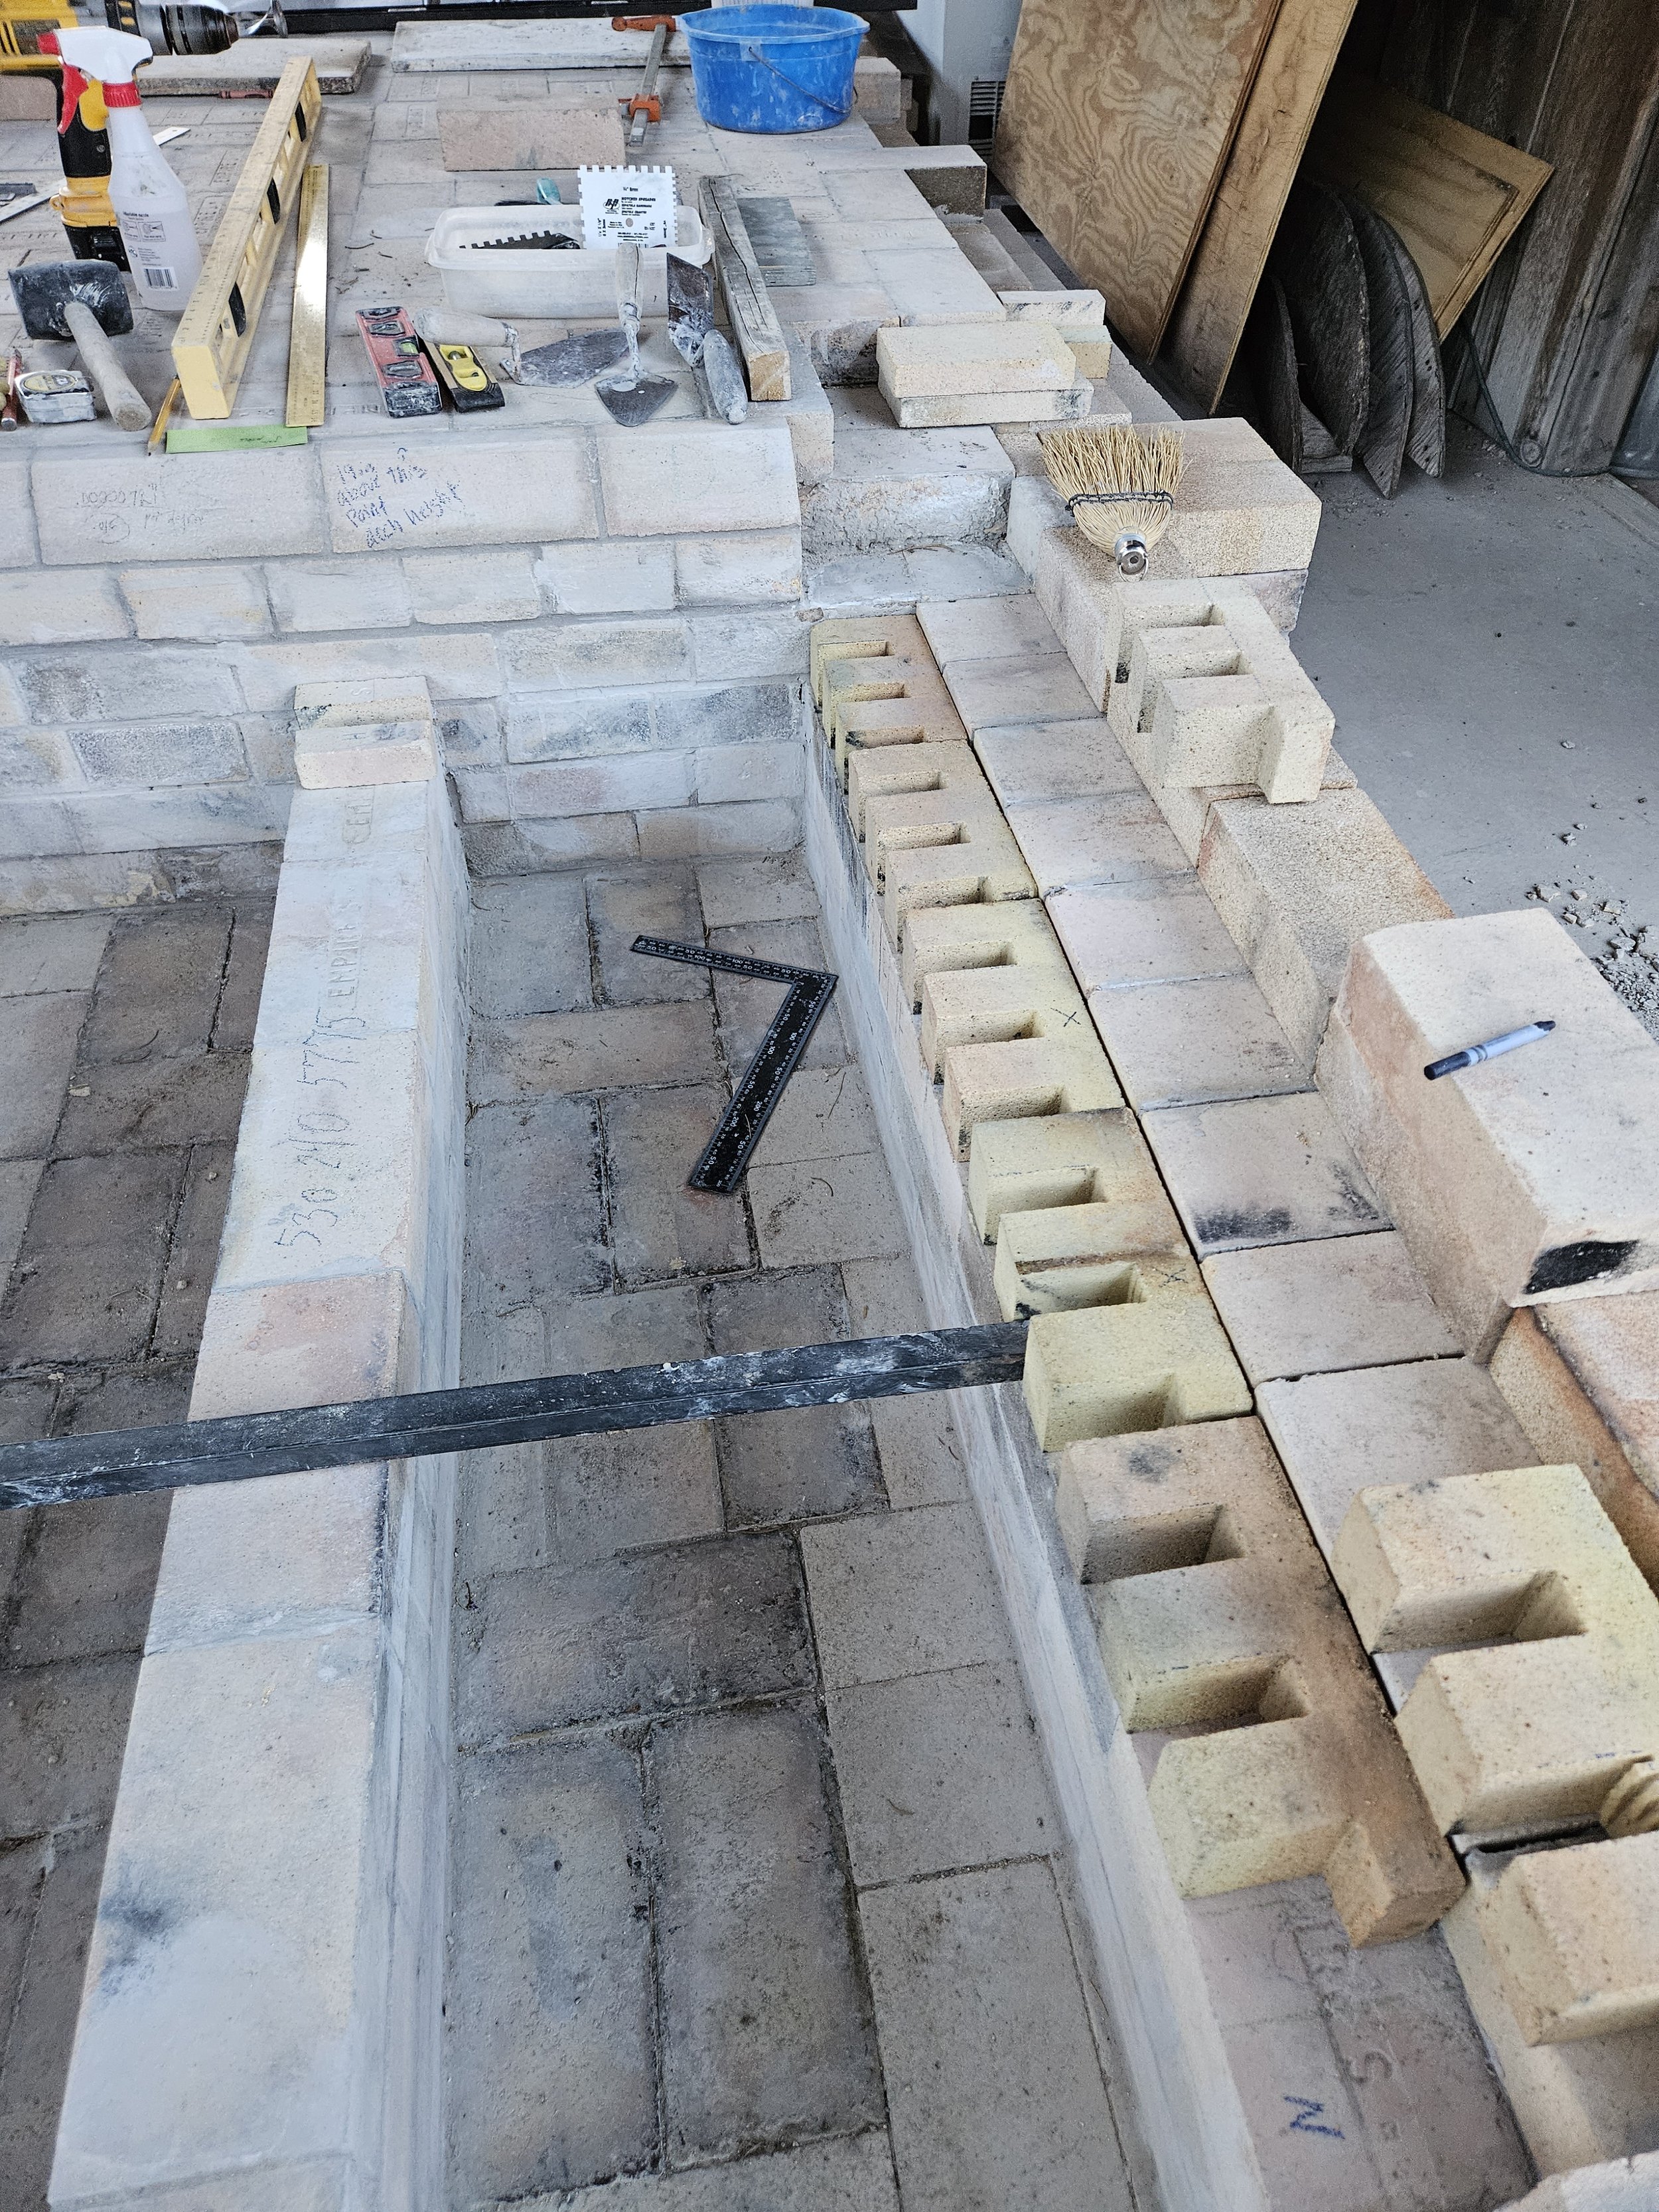
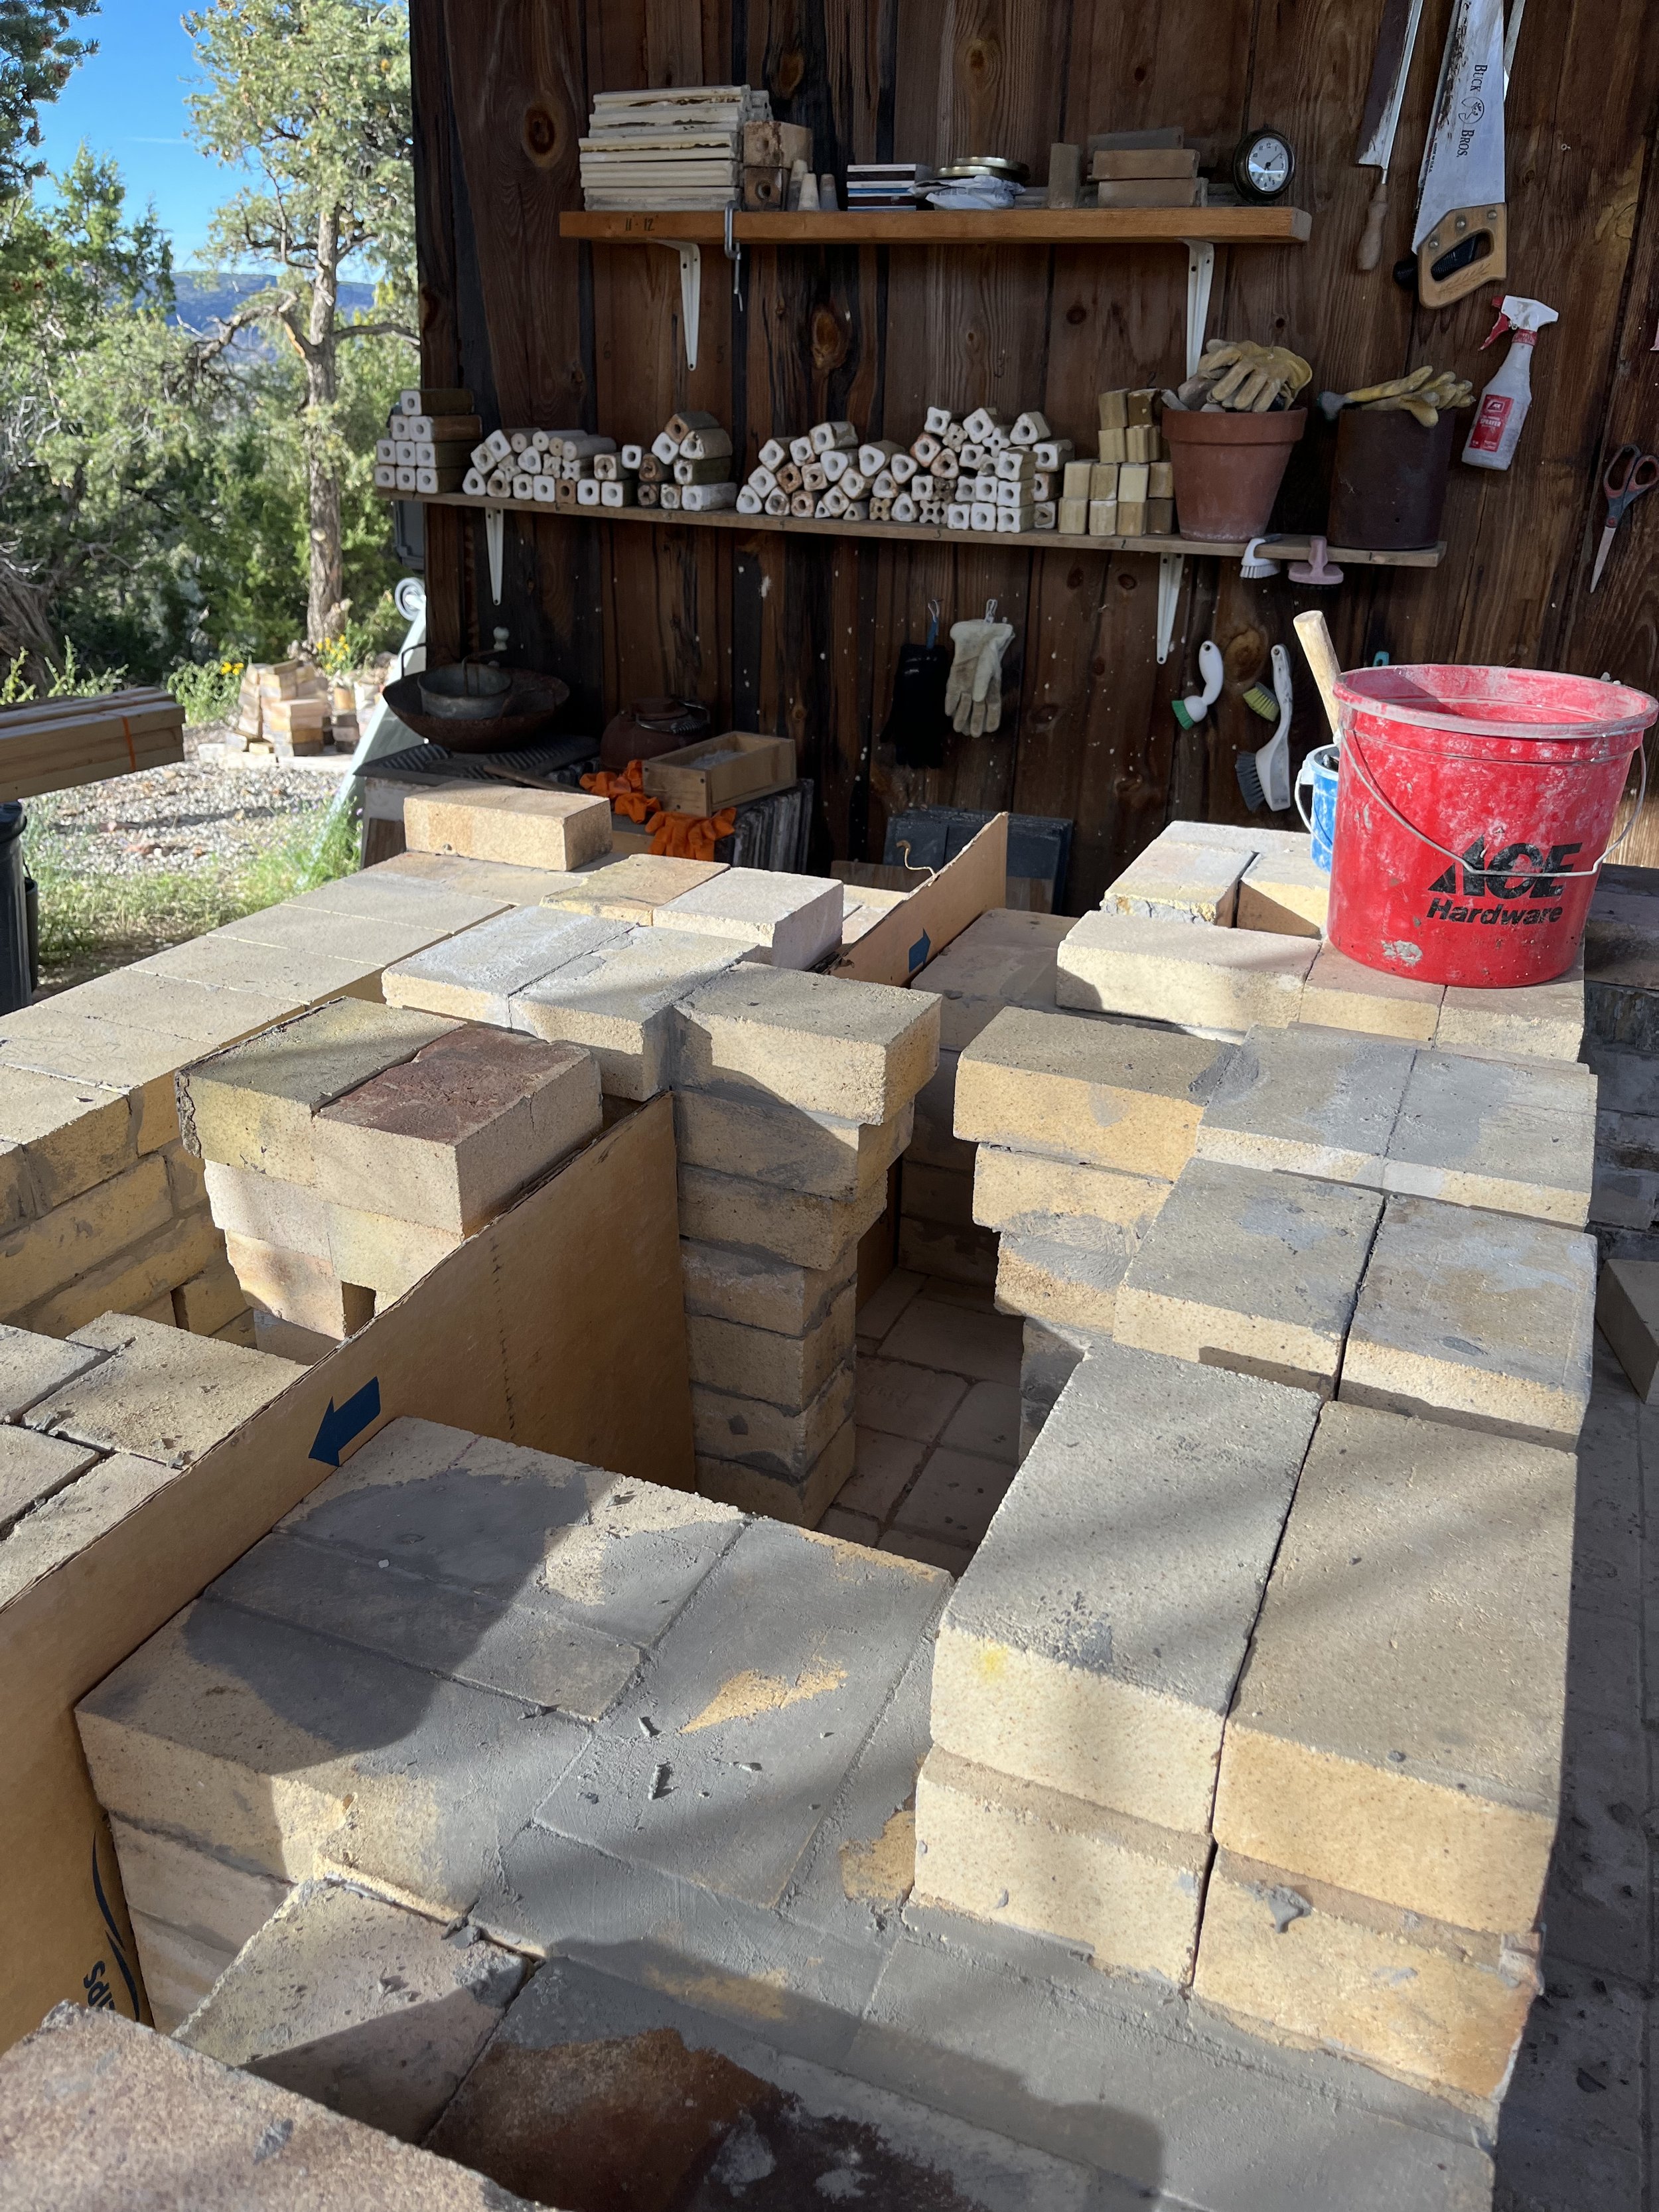
Firebox walls, including a center 'spine' to support the grate bars.
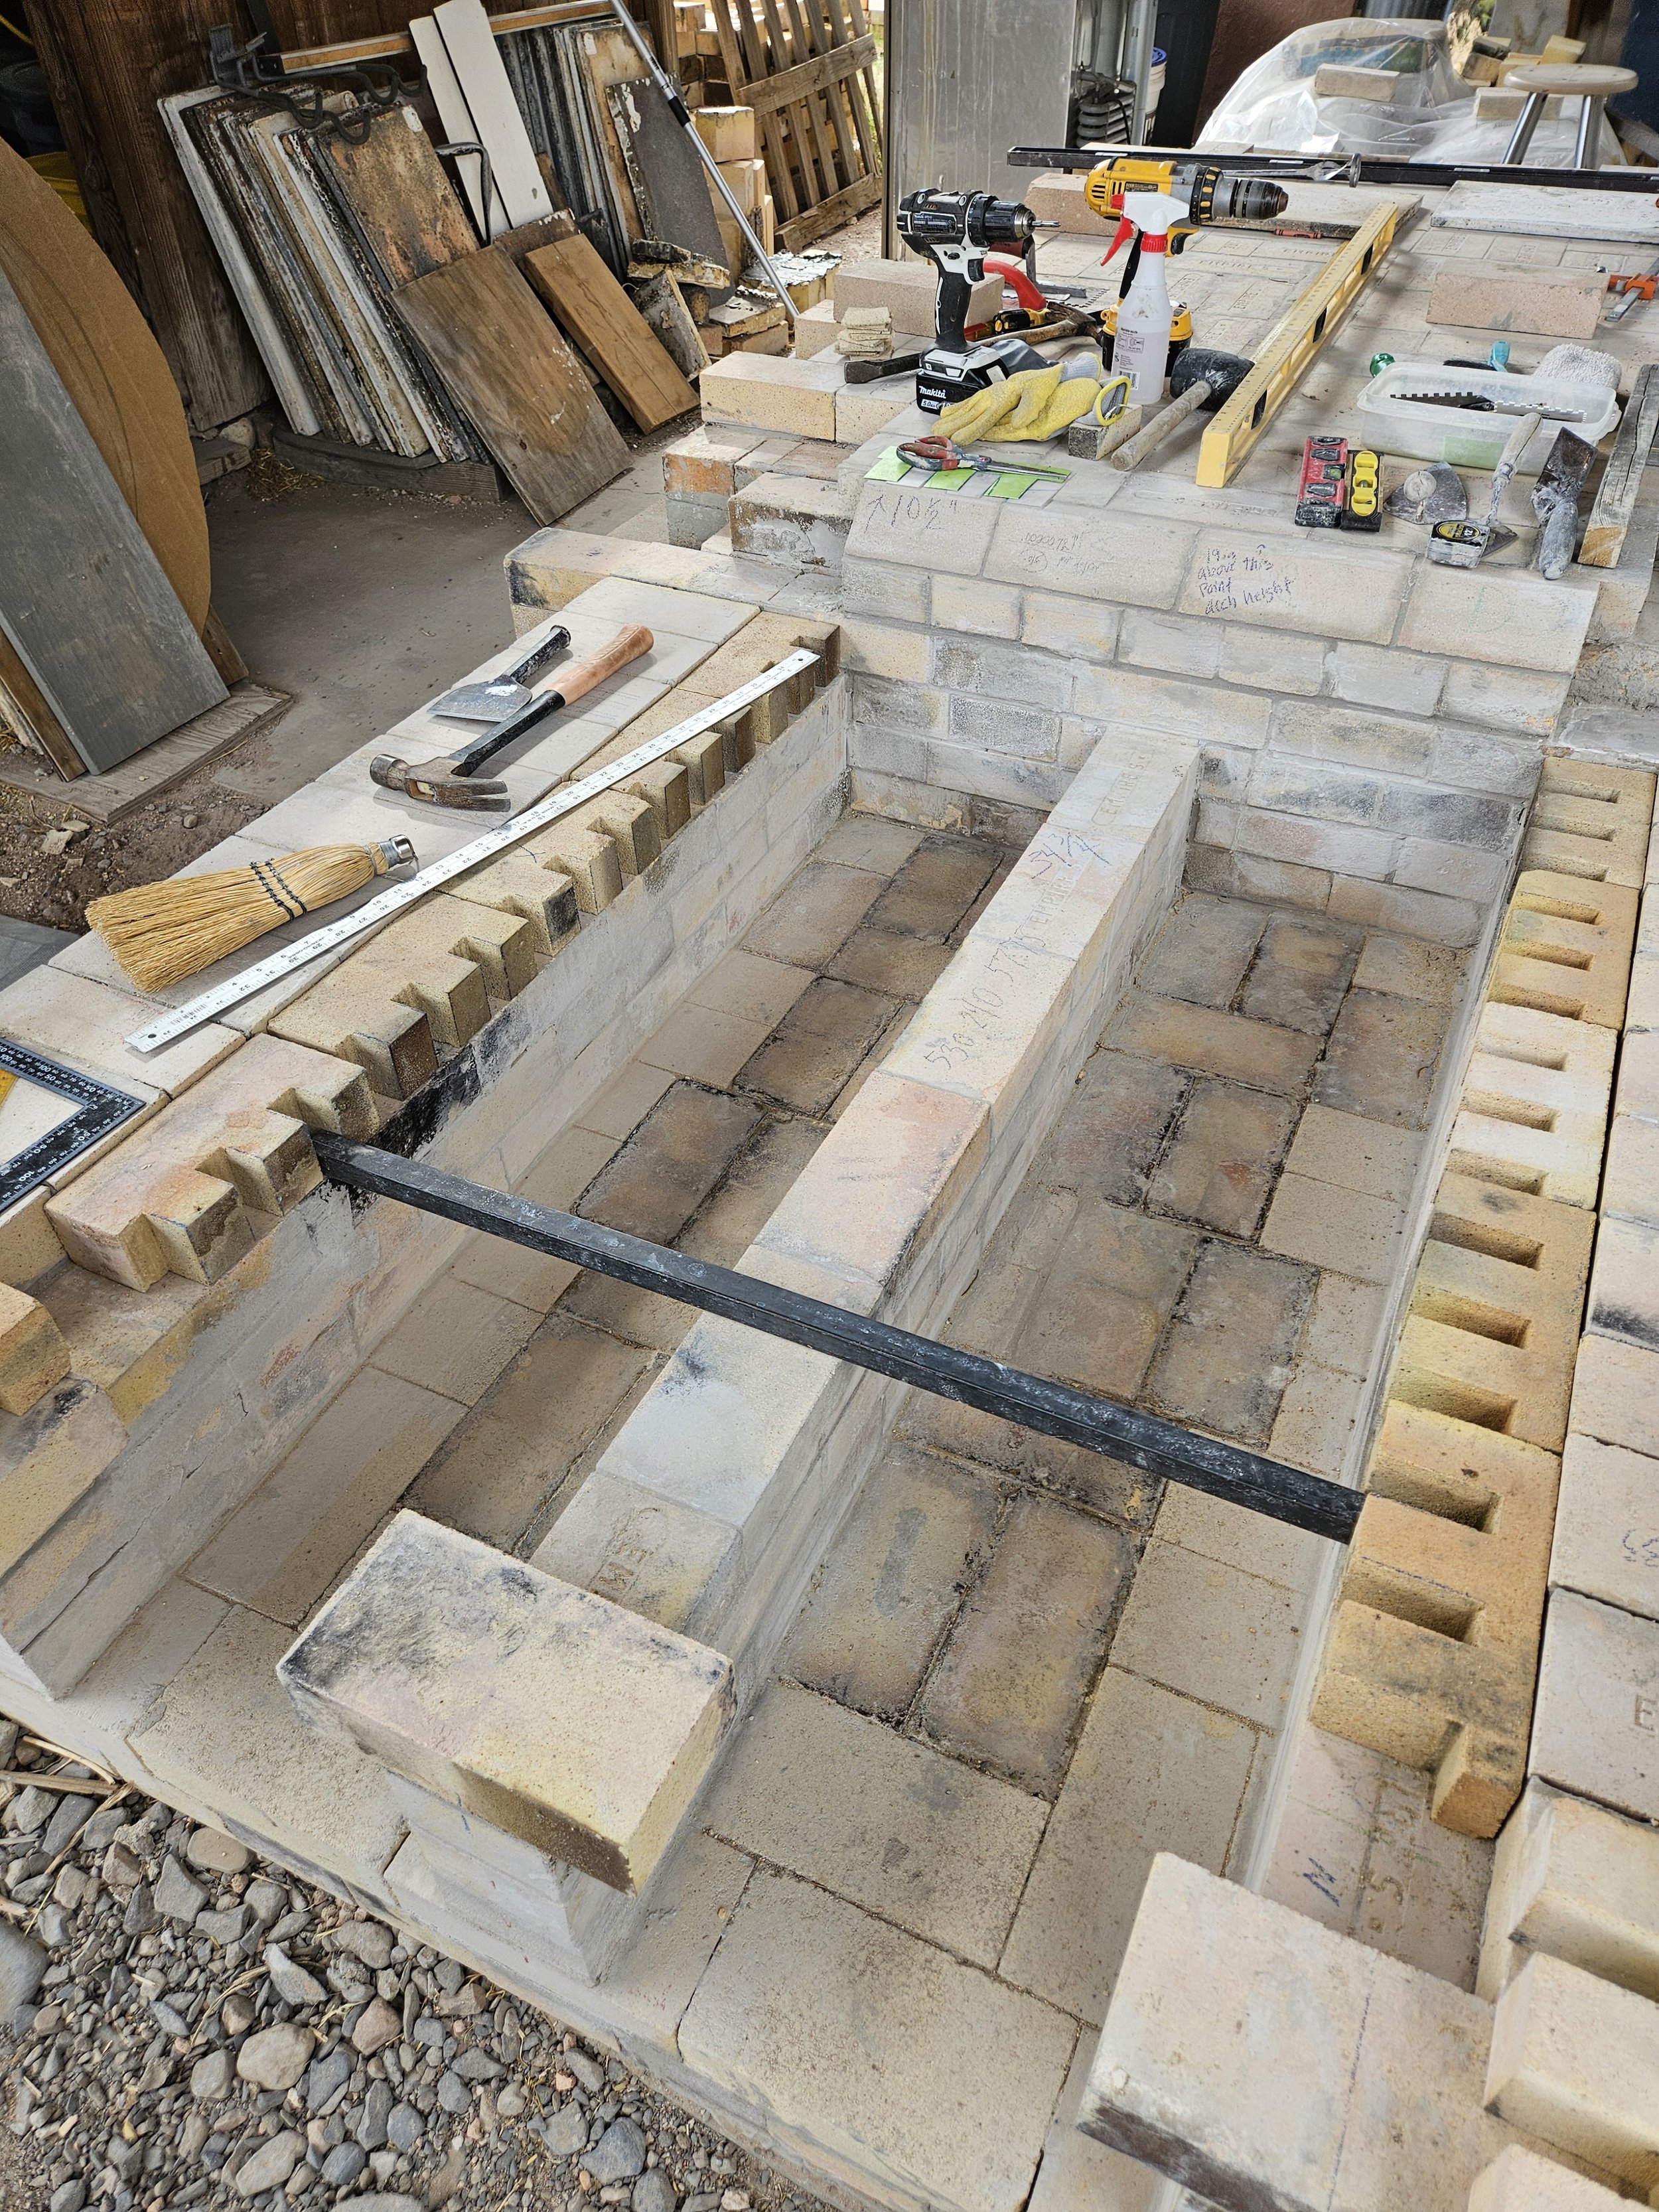
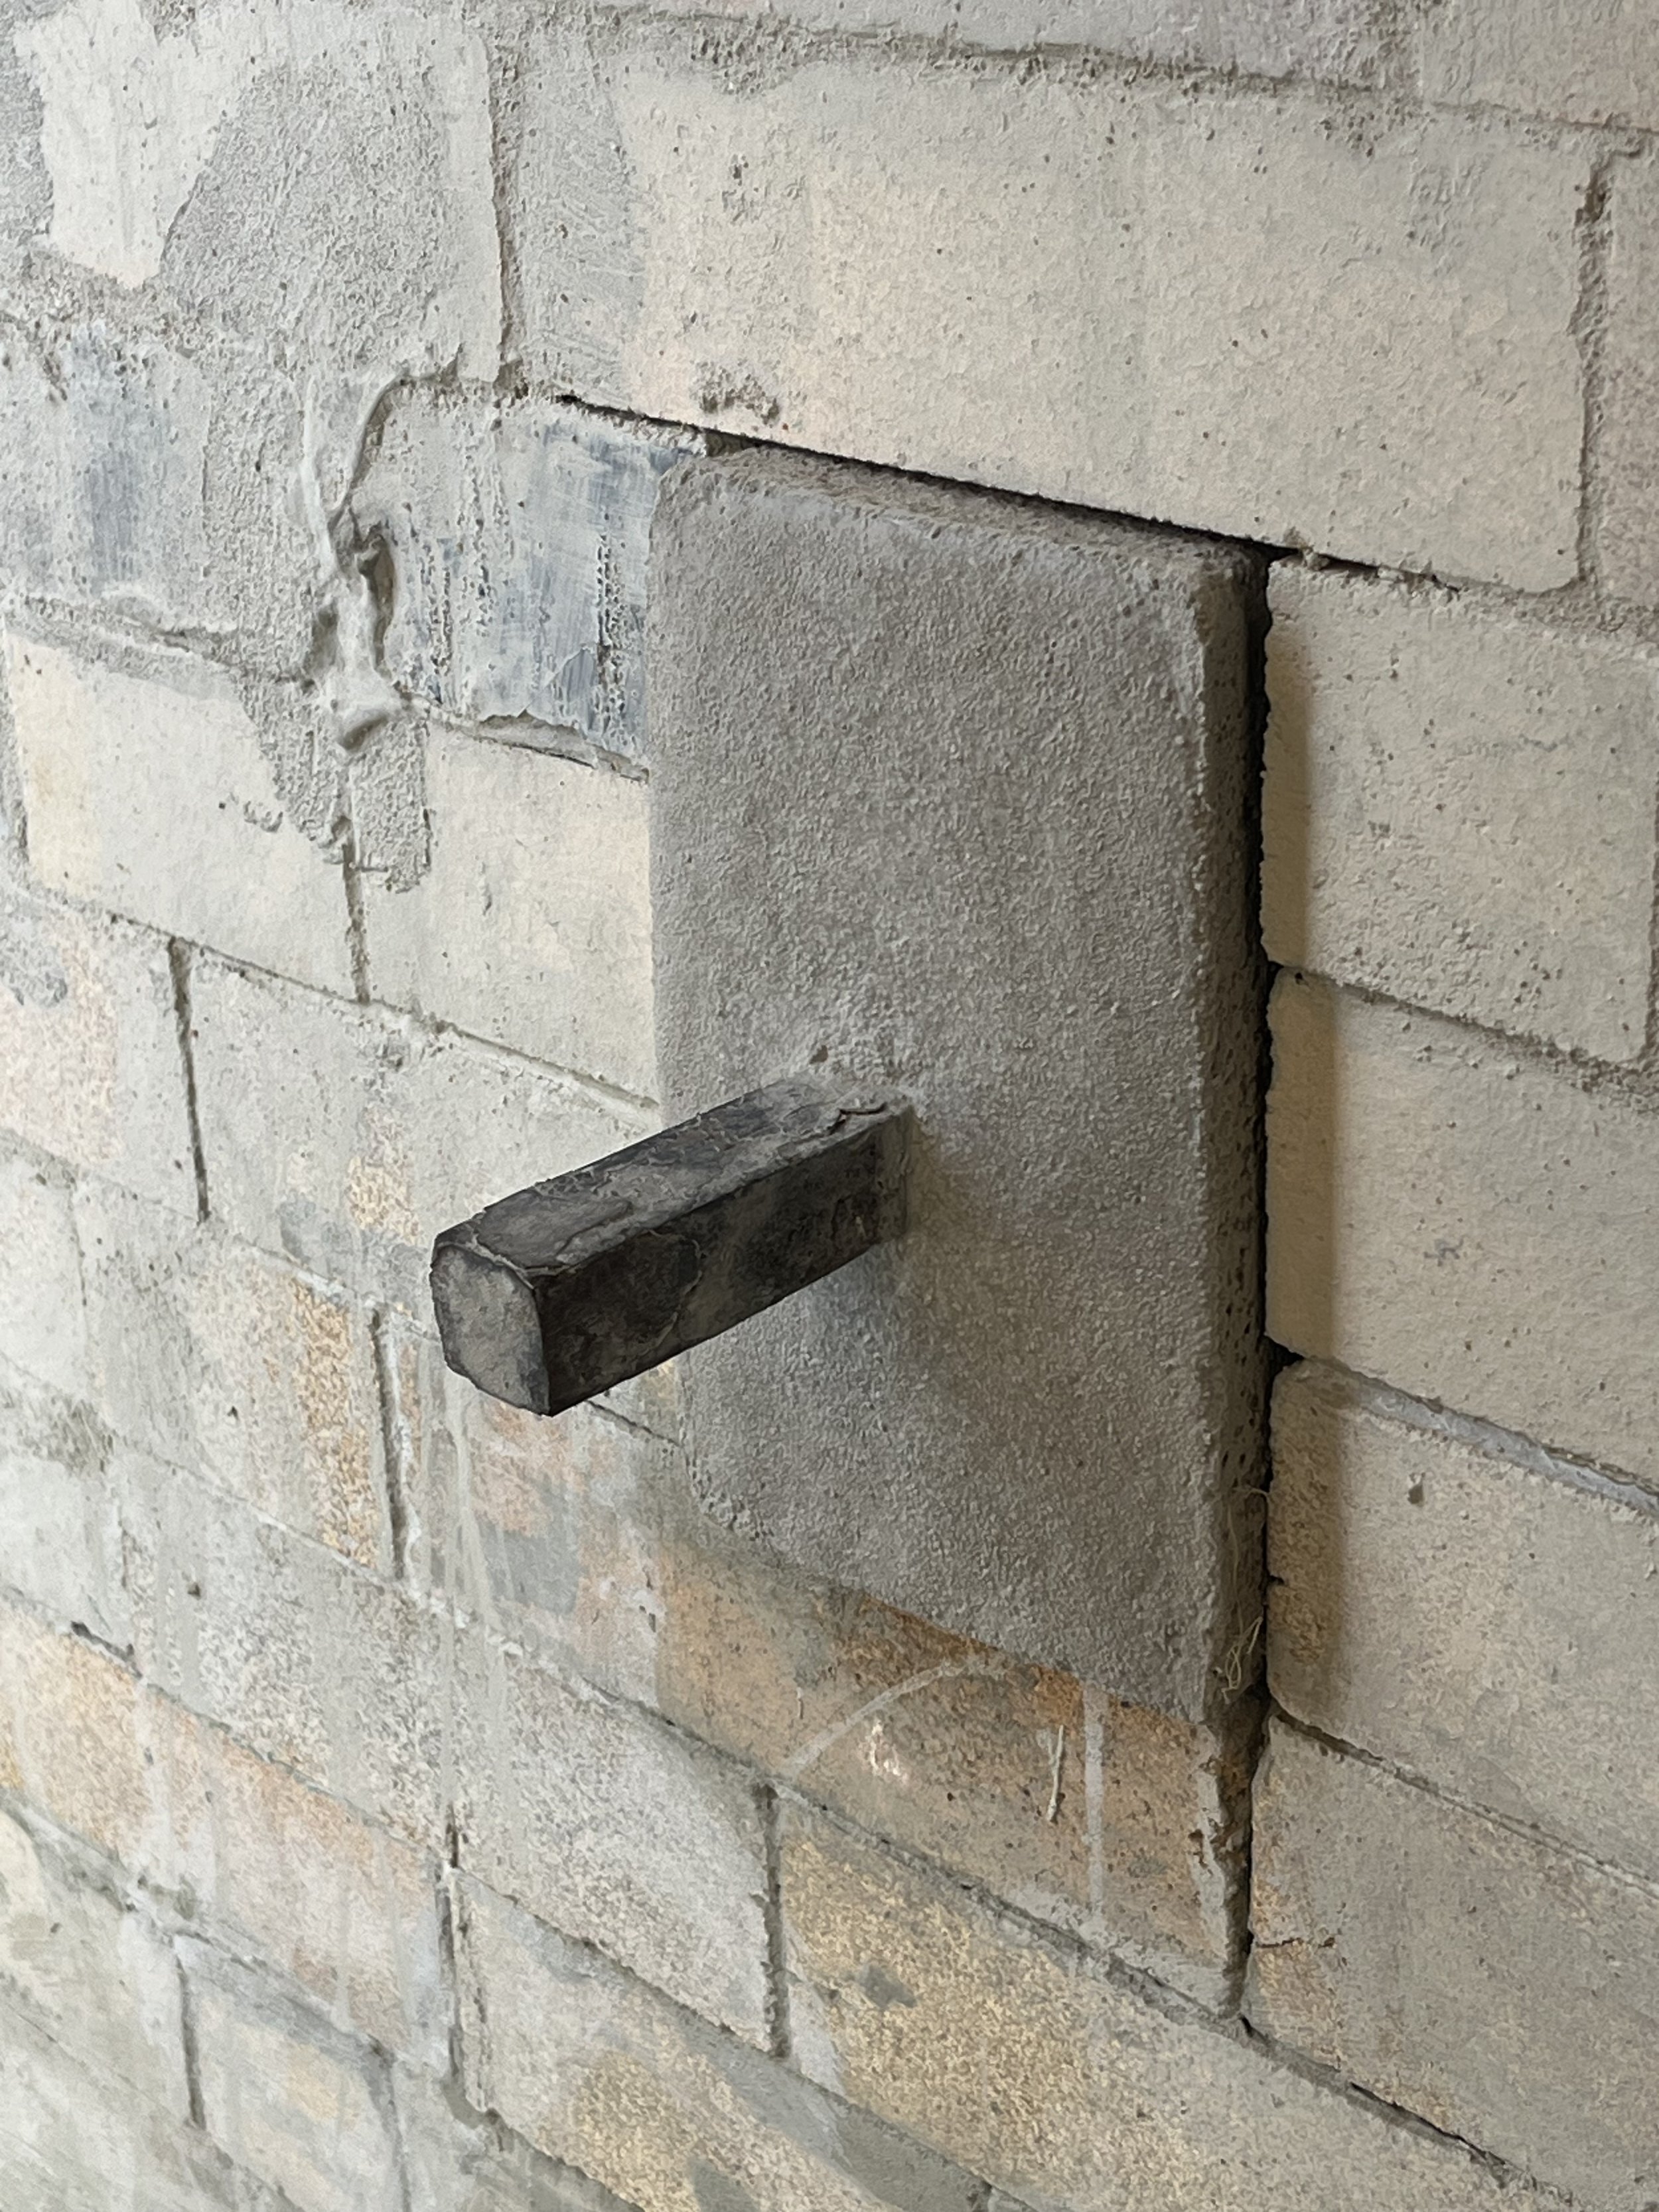
Notched bricks on either side to hold the grate bars. This is my idea for a grate in which each bar can be removed and replaced as needed. My husband, Mark, gave us a lesson in how to notch the bricks cleanly using the brick saw followed by a hammer and chisel.
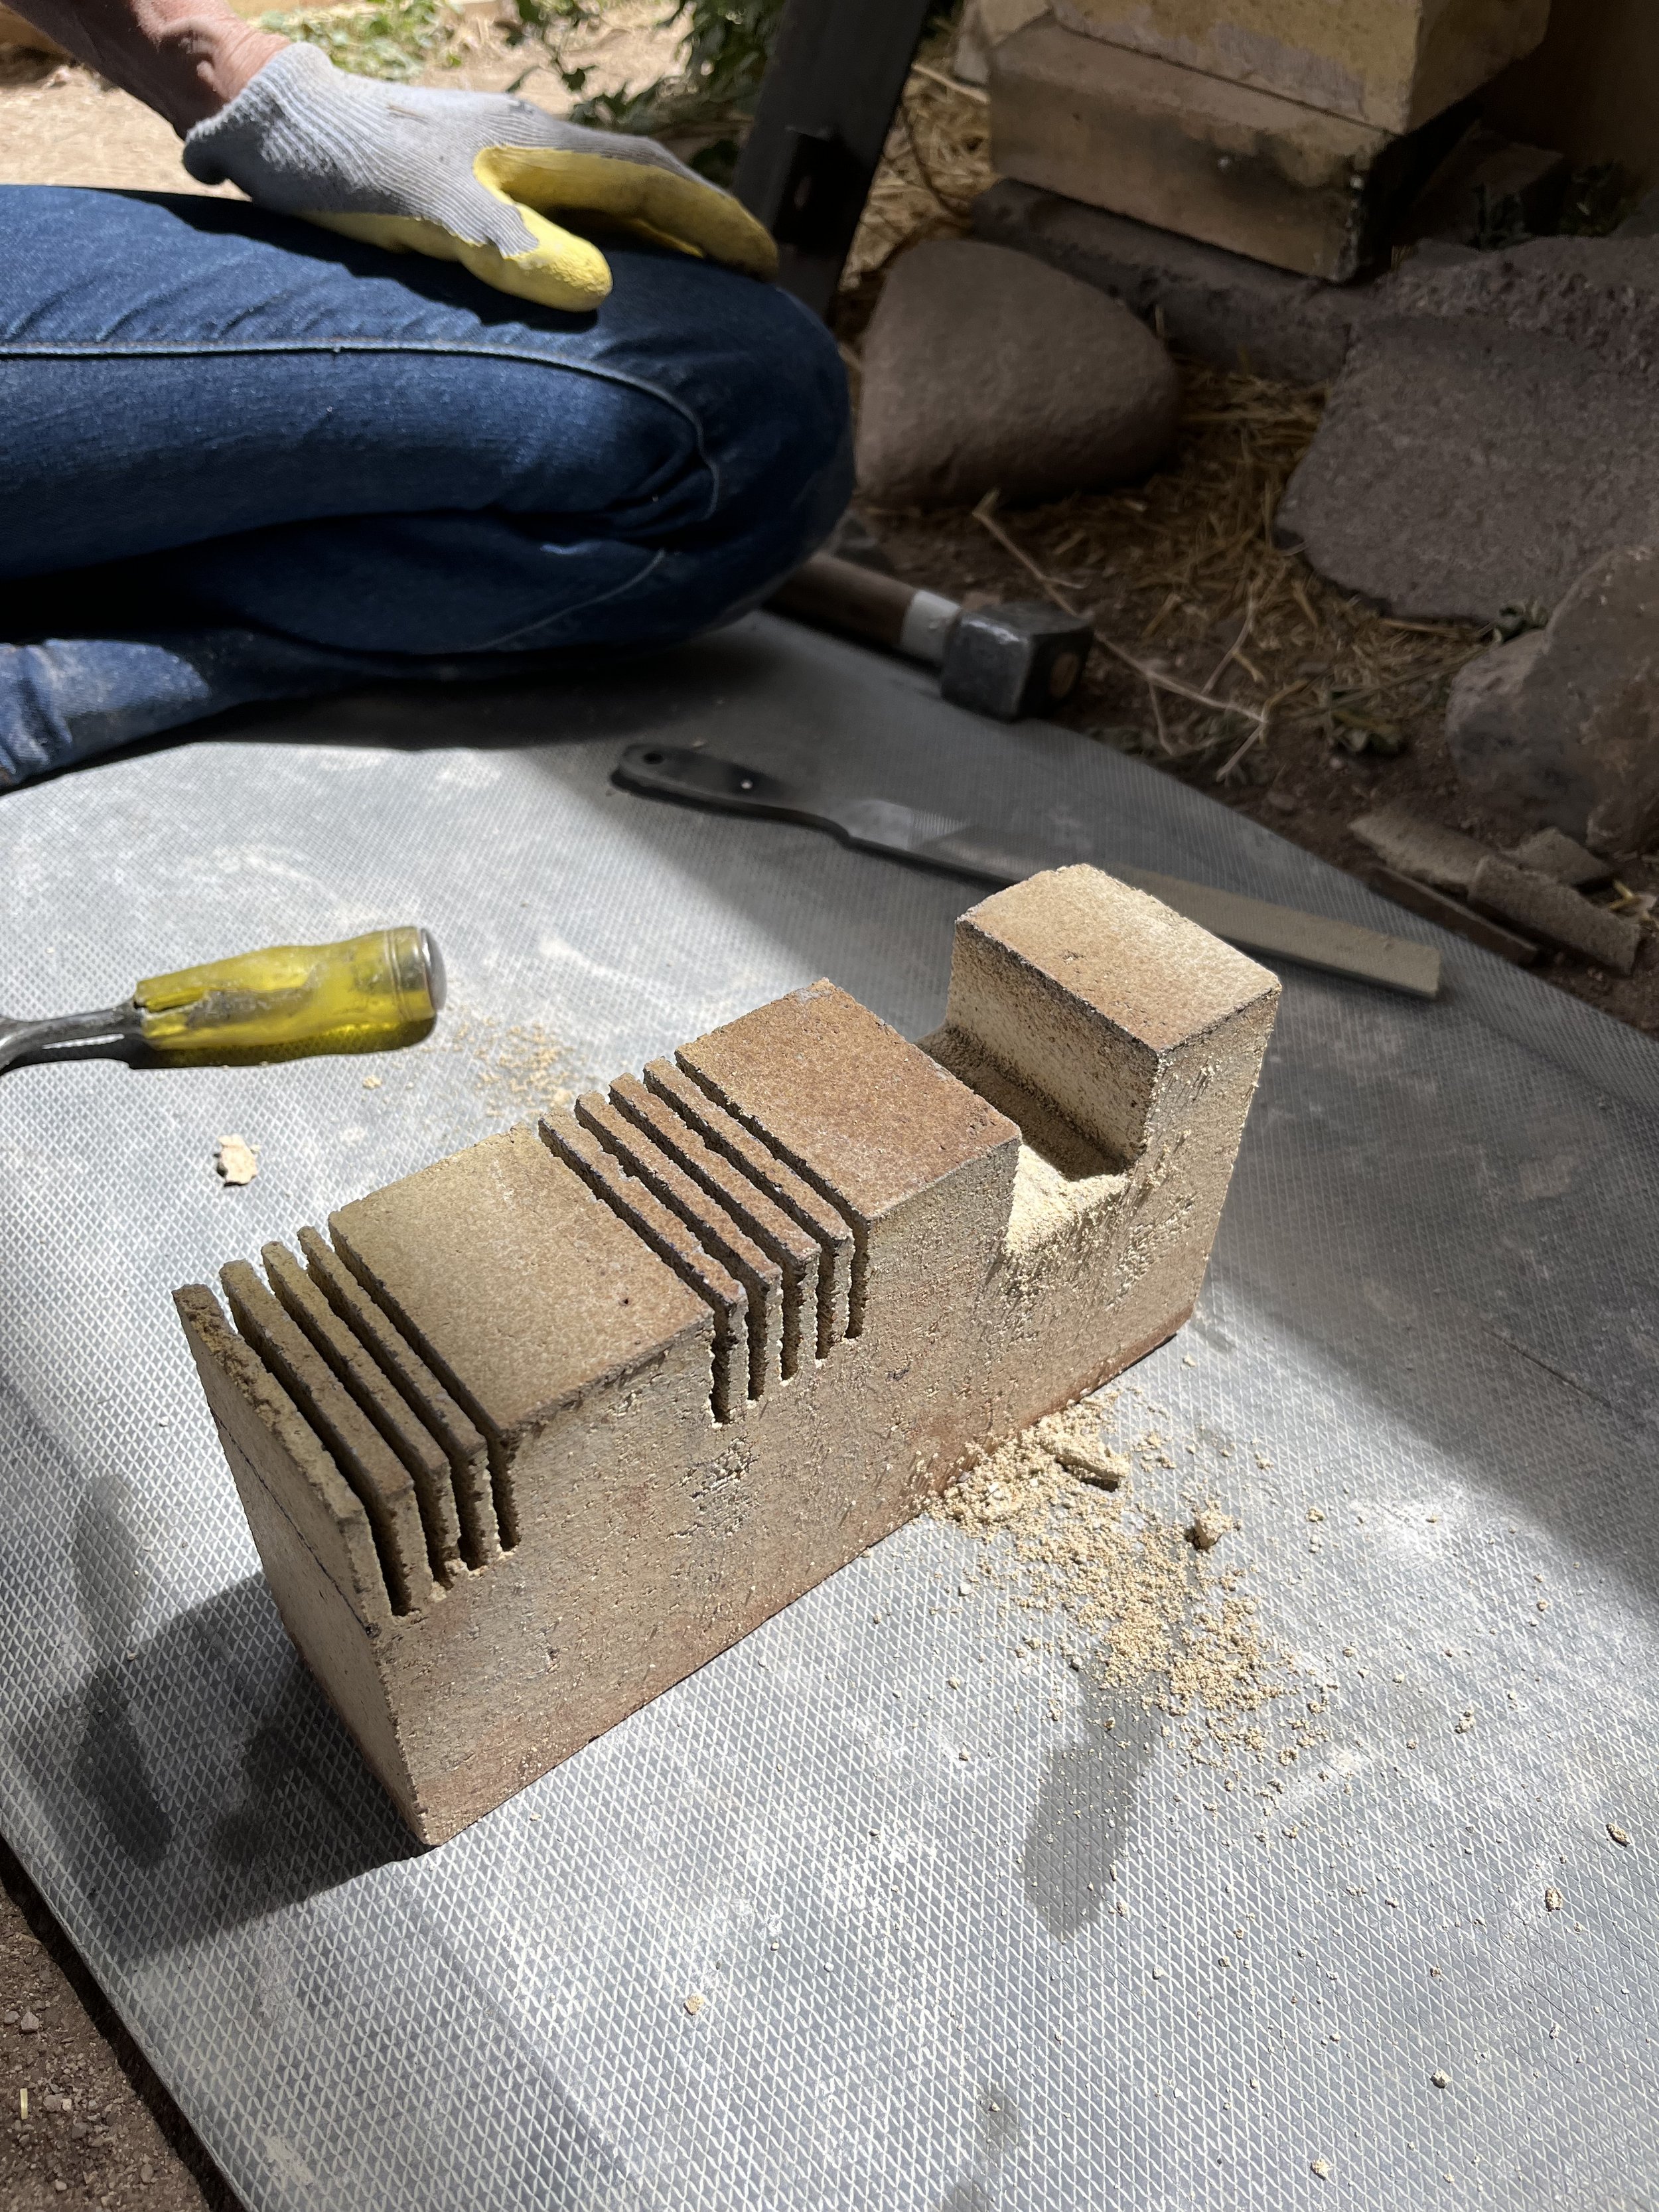
Notching bricks for the grate system. (-photo by Tori)
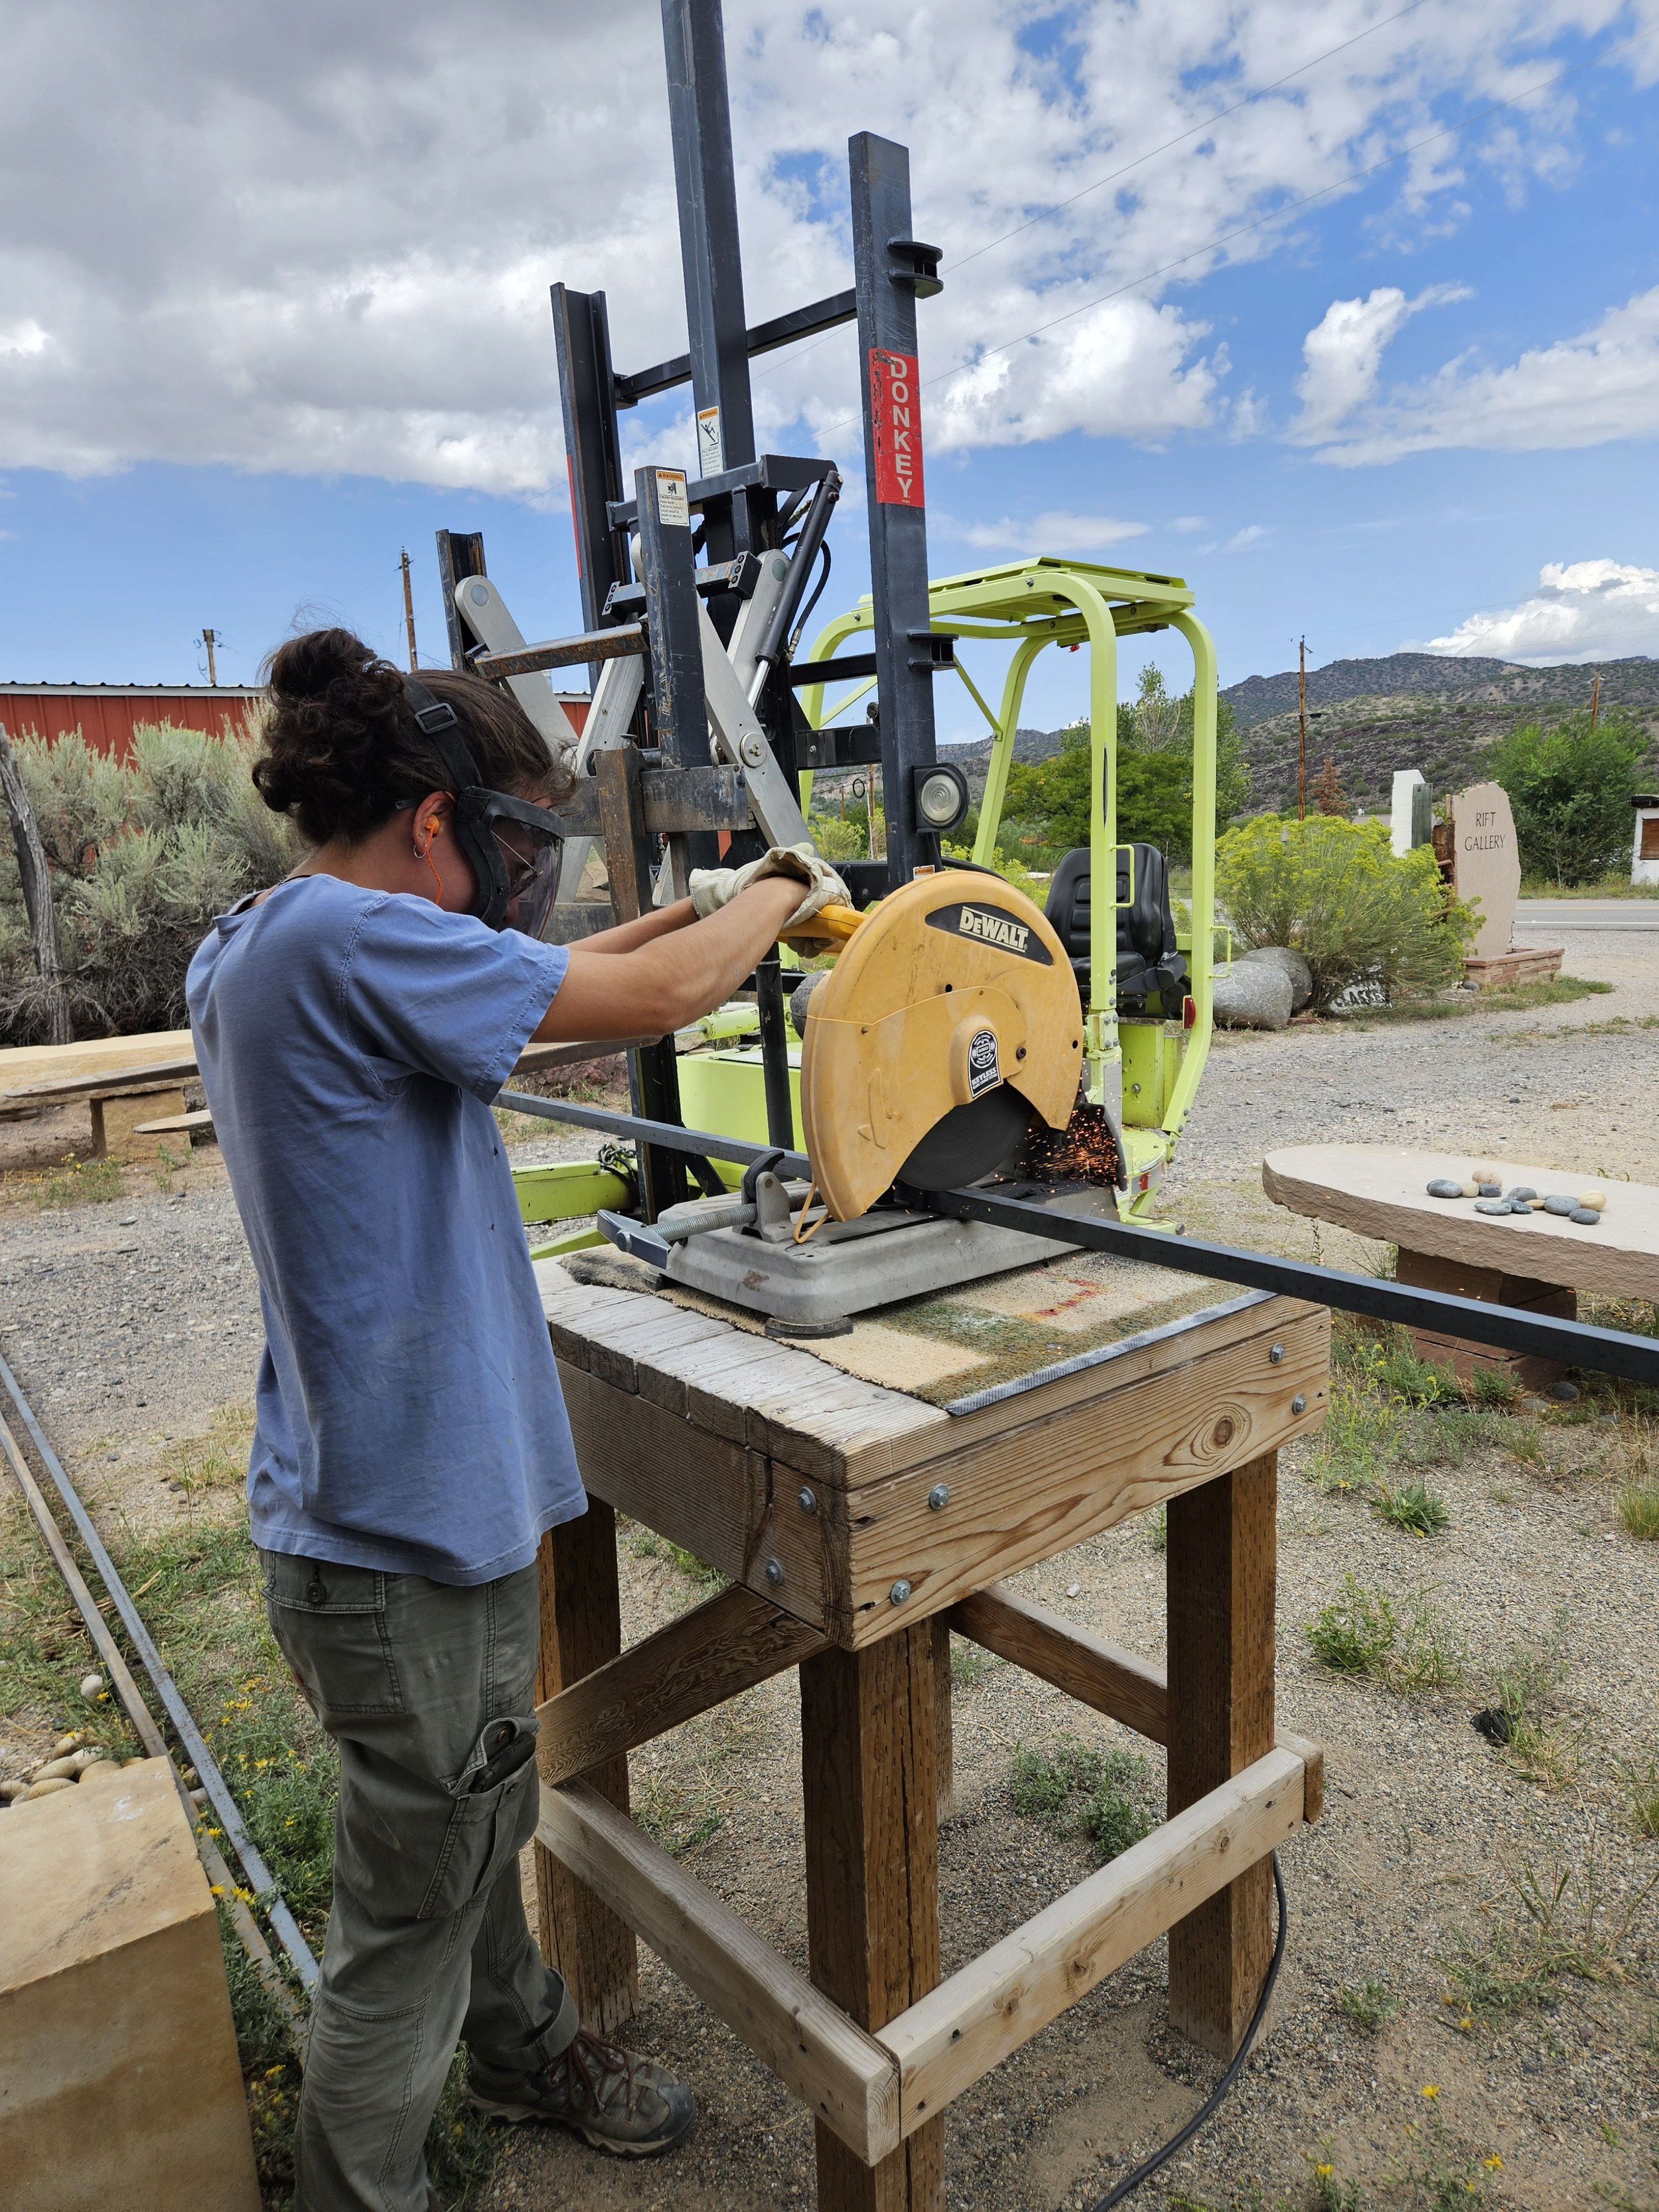
Tori and I cut the grate bars to the correct length. We used 20' long 1" bar stock, cutting 16 pieces just over 33 inches long, using Mark's metal cutting saw at his shop.
Checking the length of the bars.
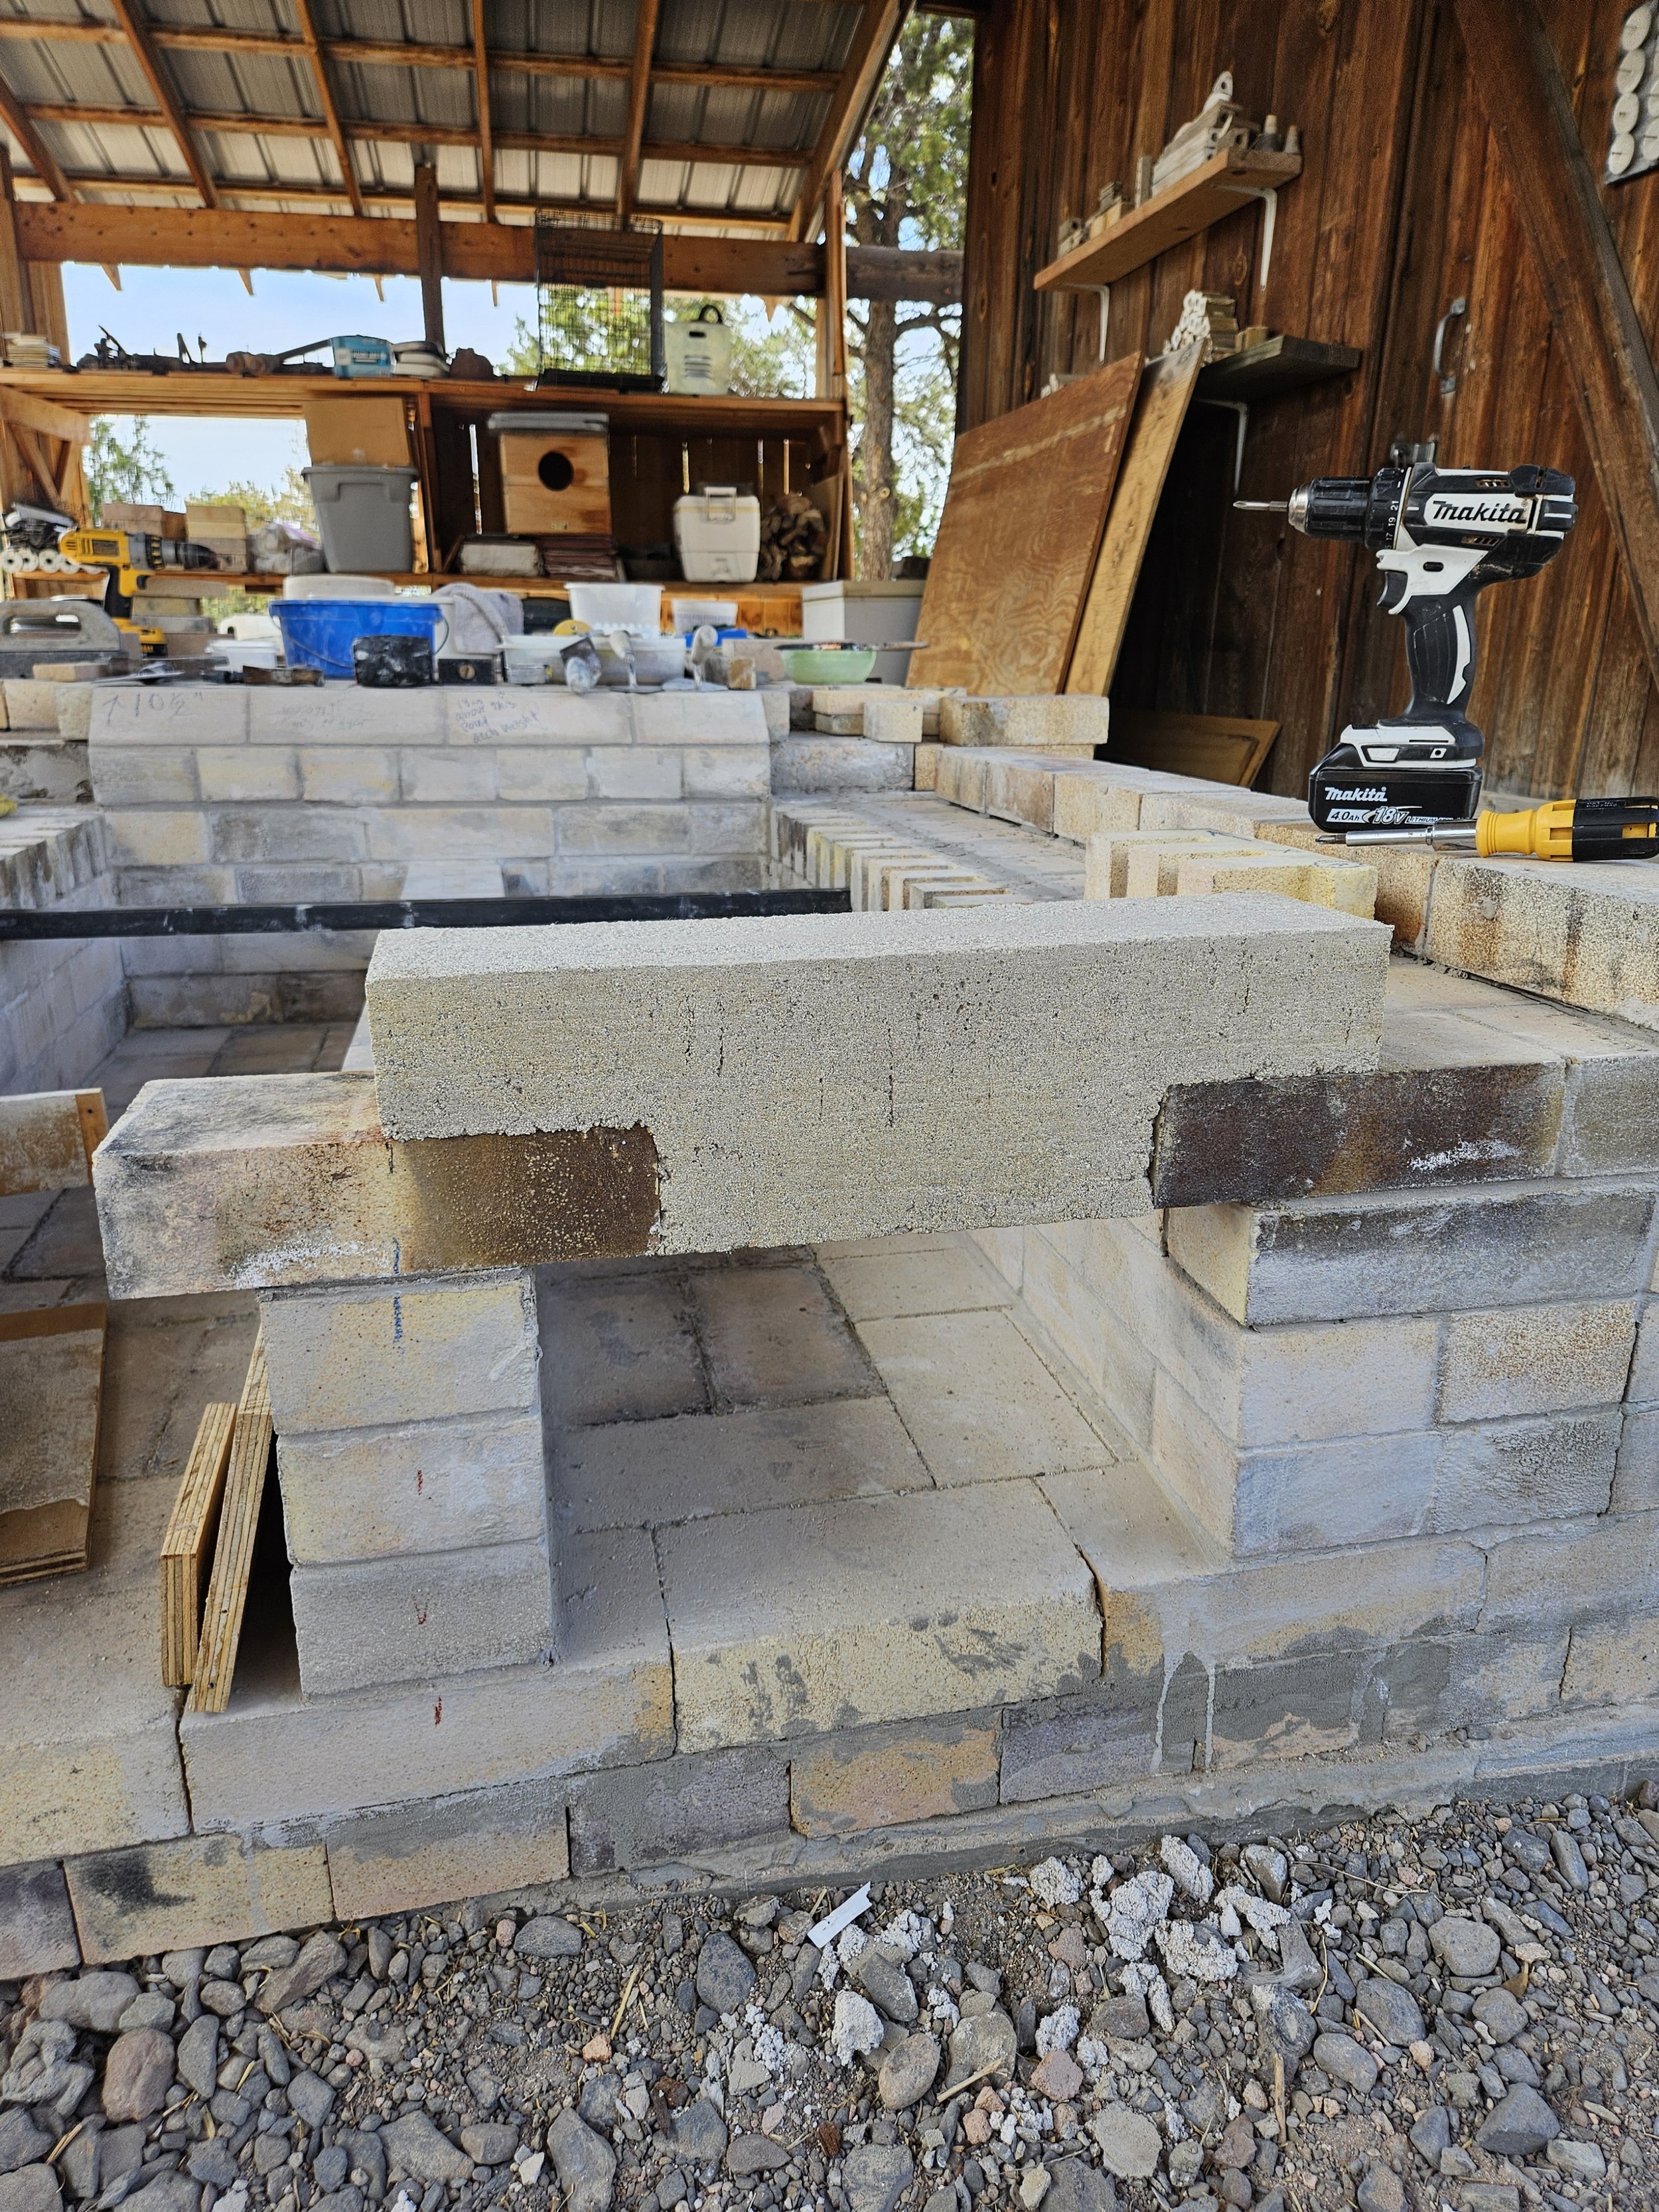
The spans over the ashpit are castable refractory.
First span has been cast, and the form is in place for the left side ashpit span.
Laying the next course over the notched bricks.

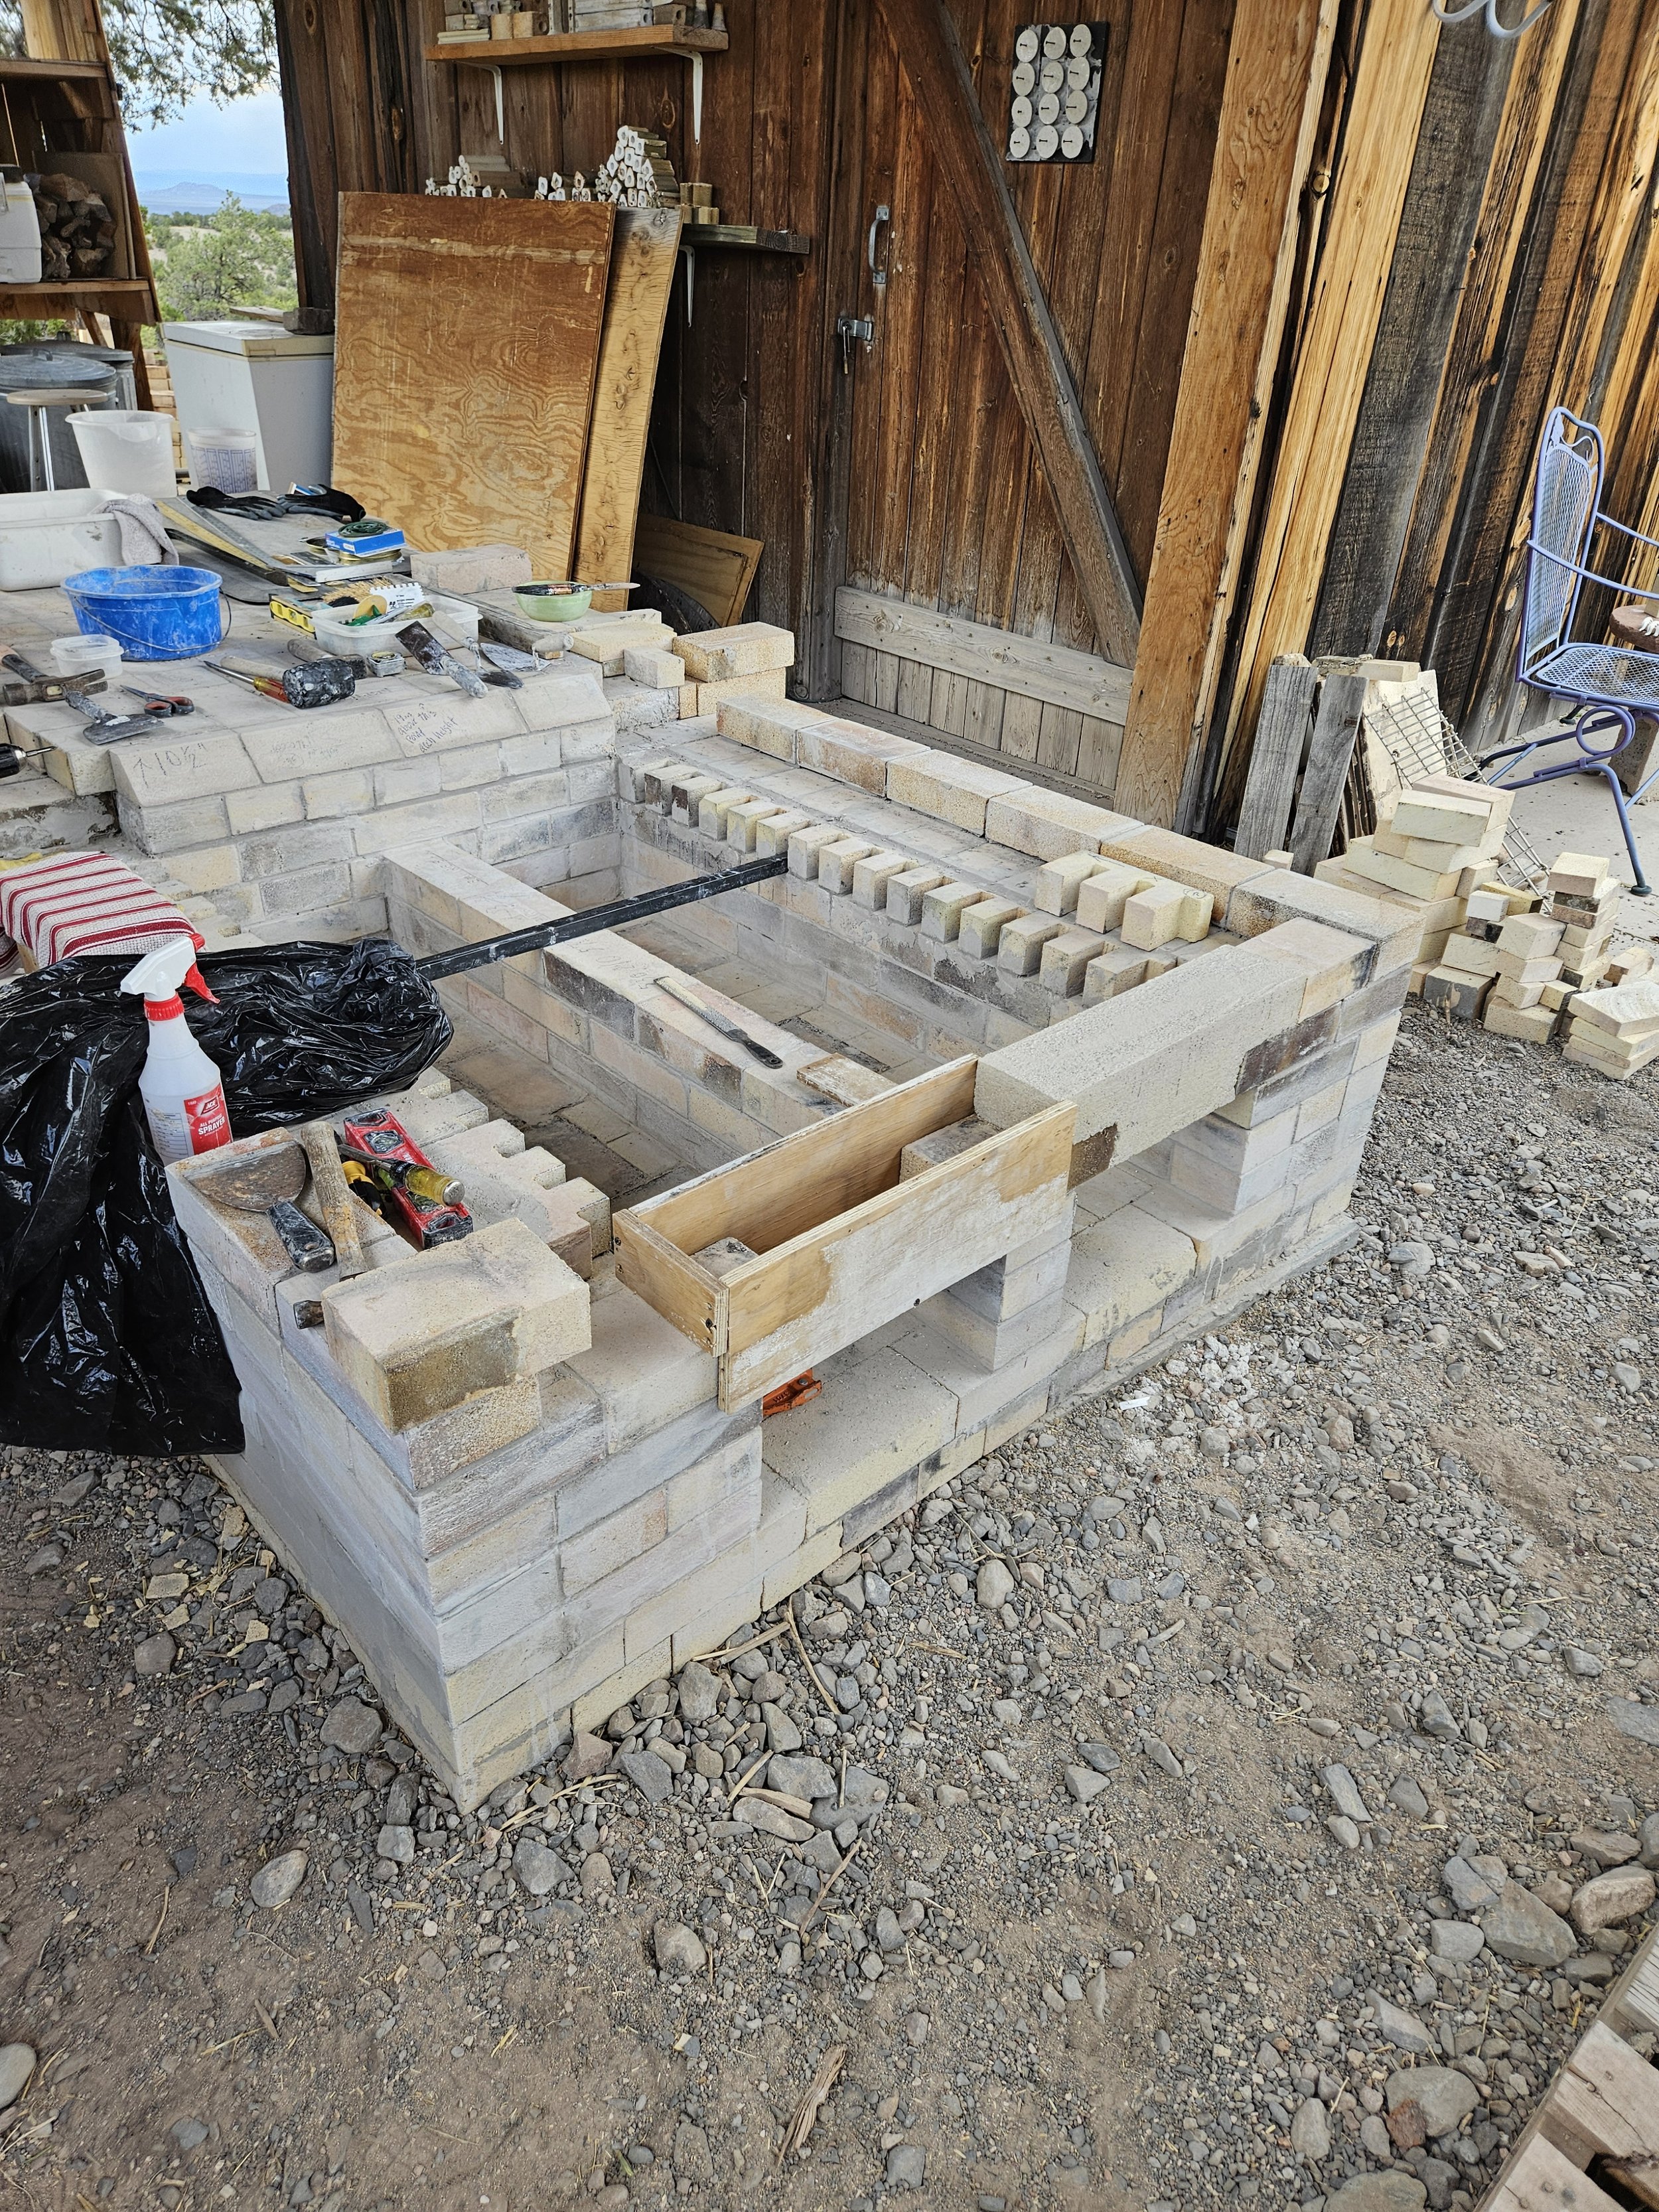
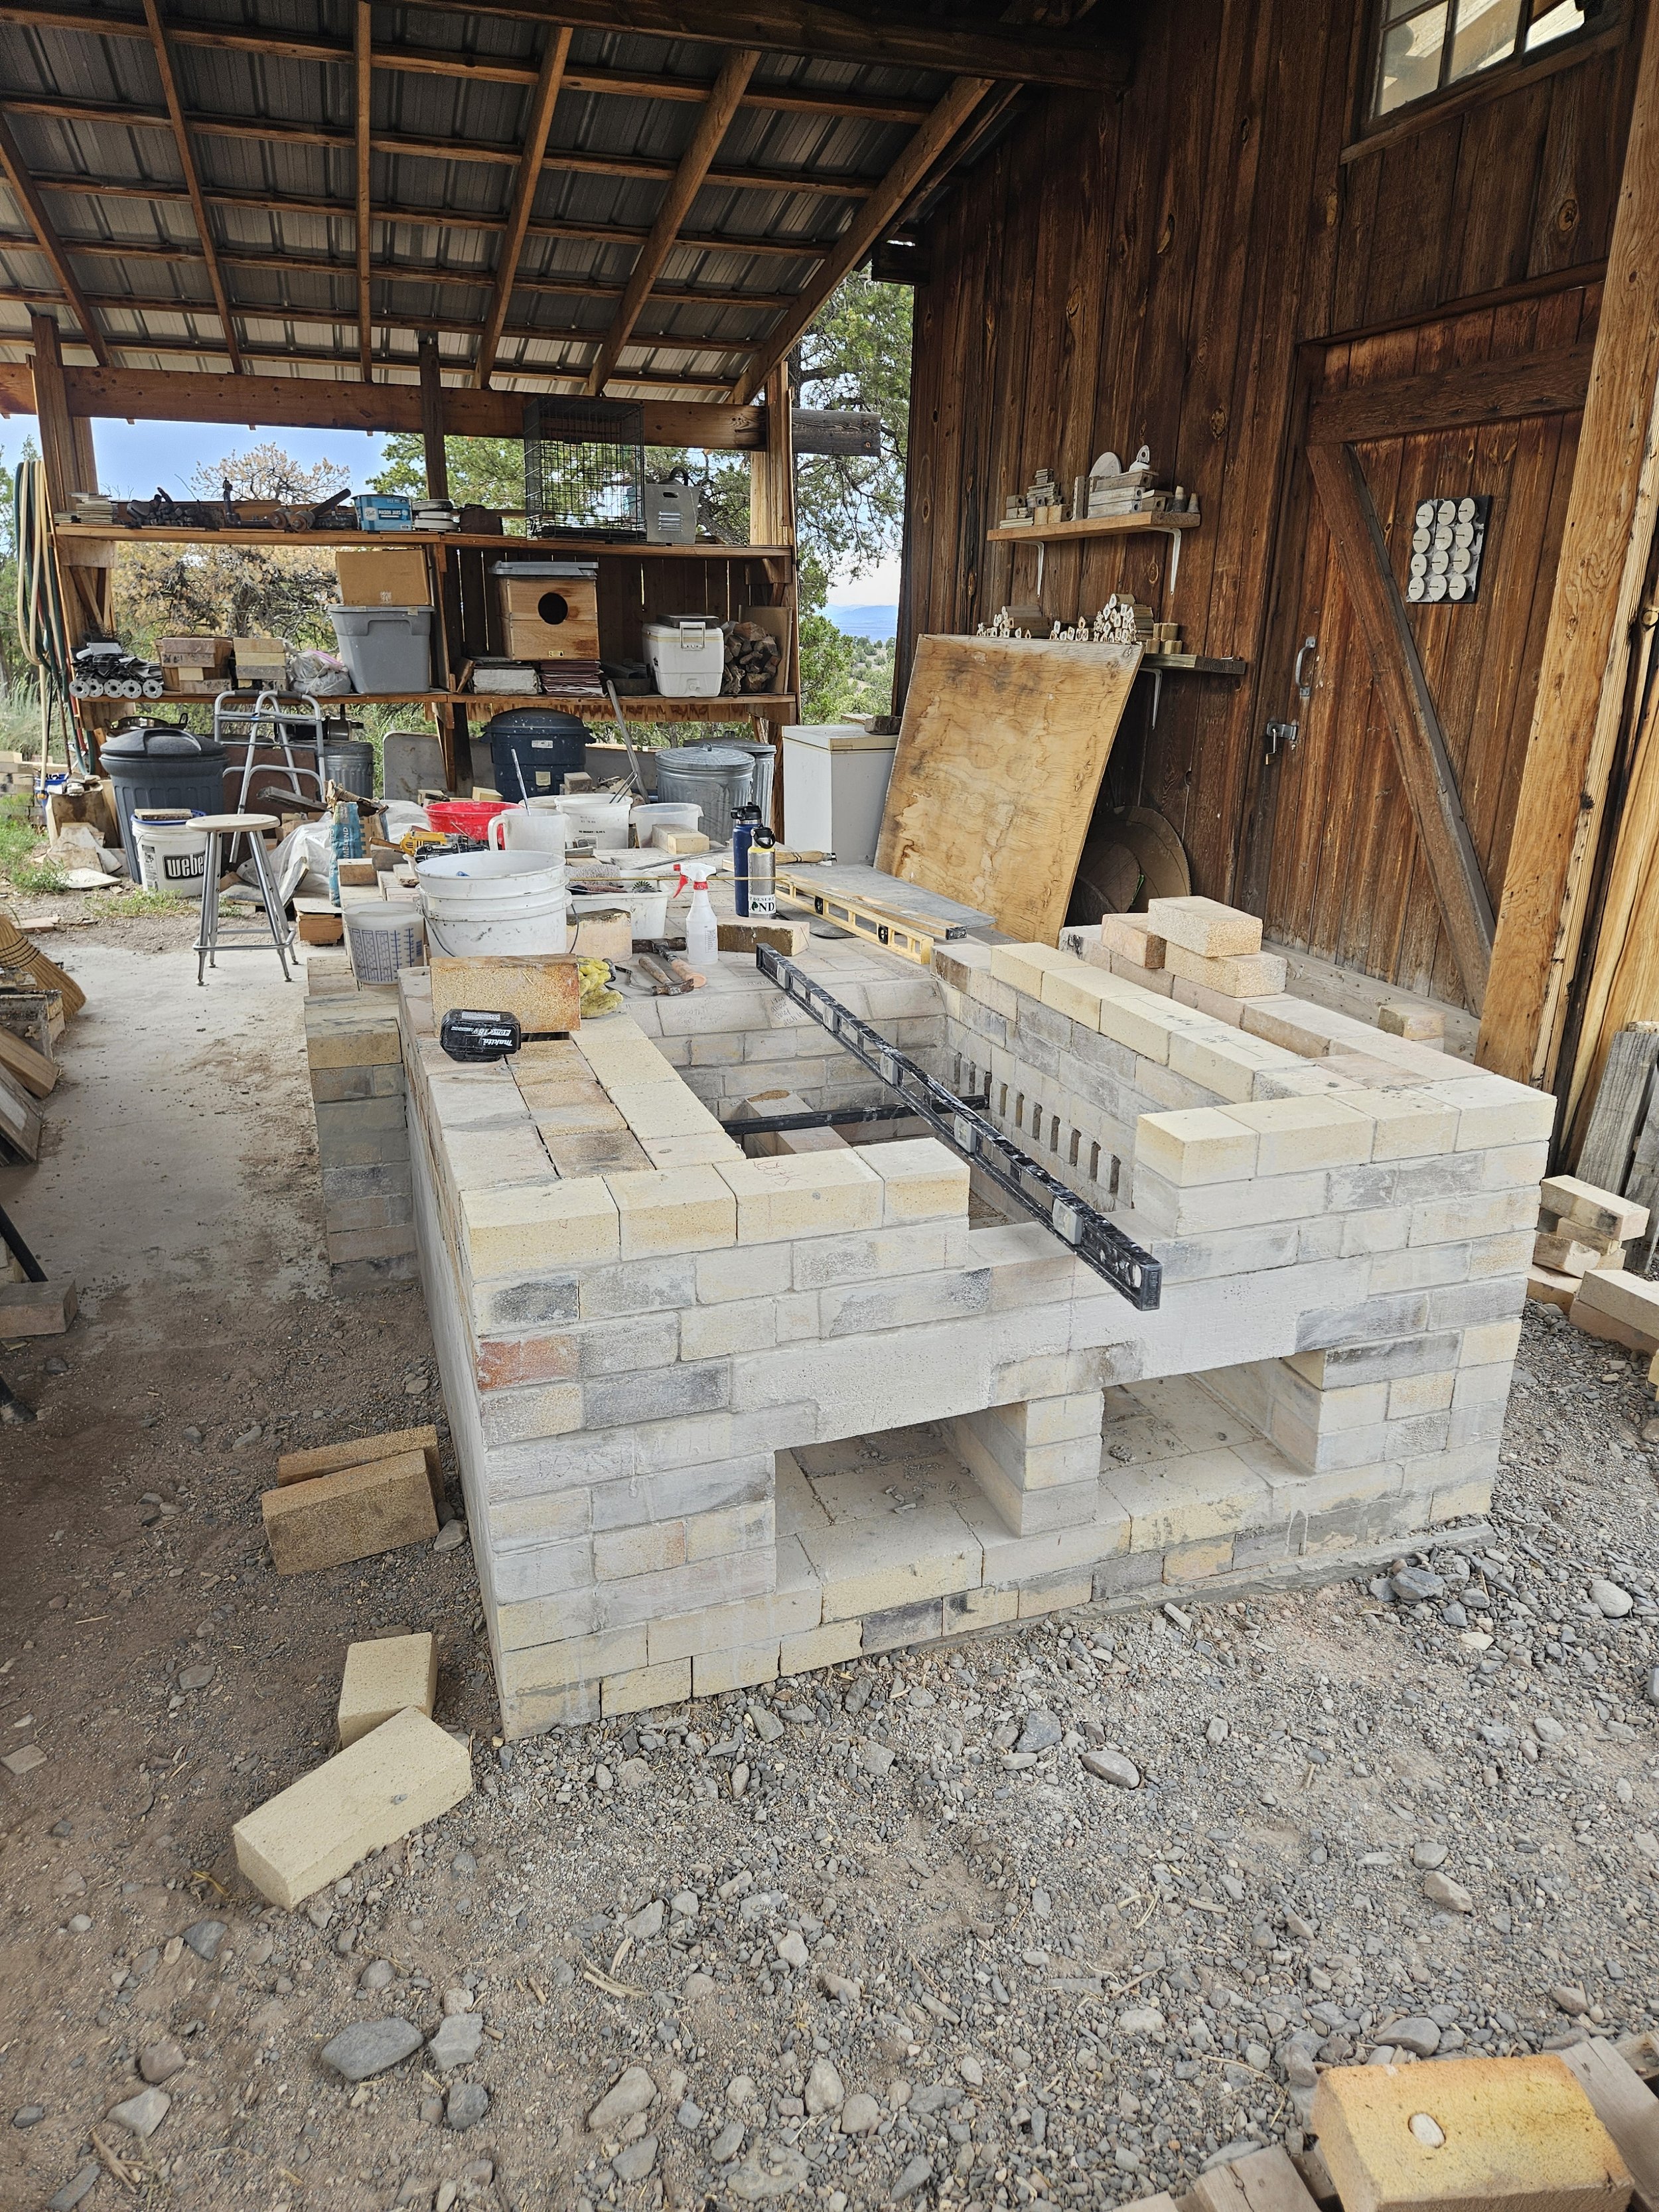
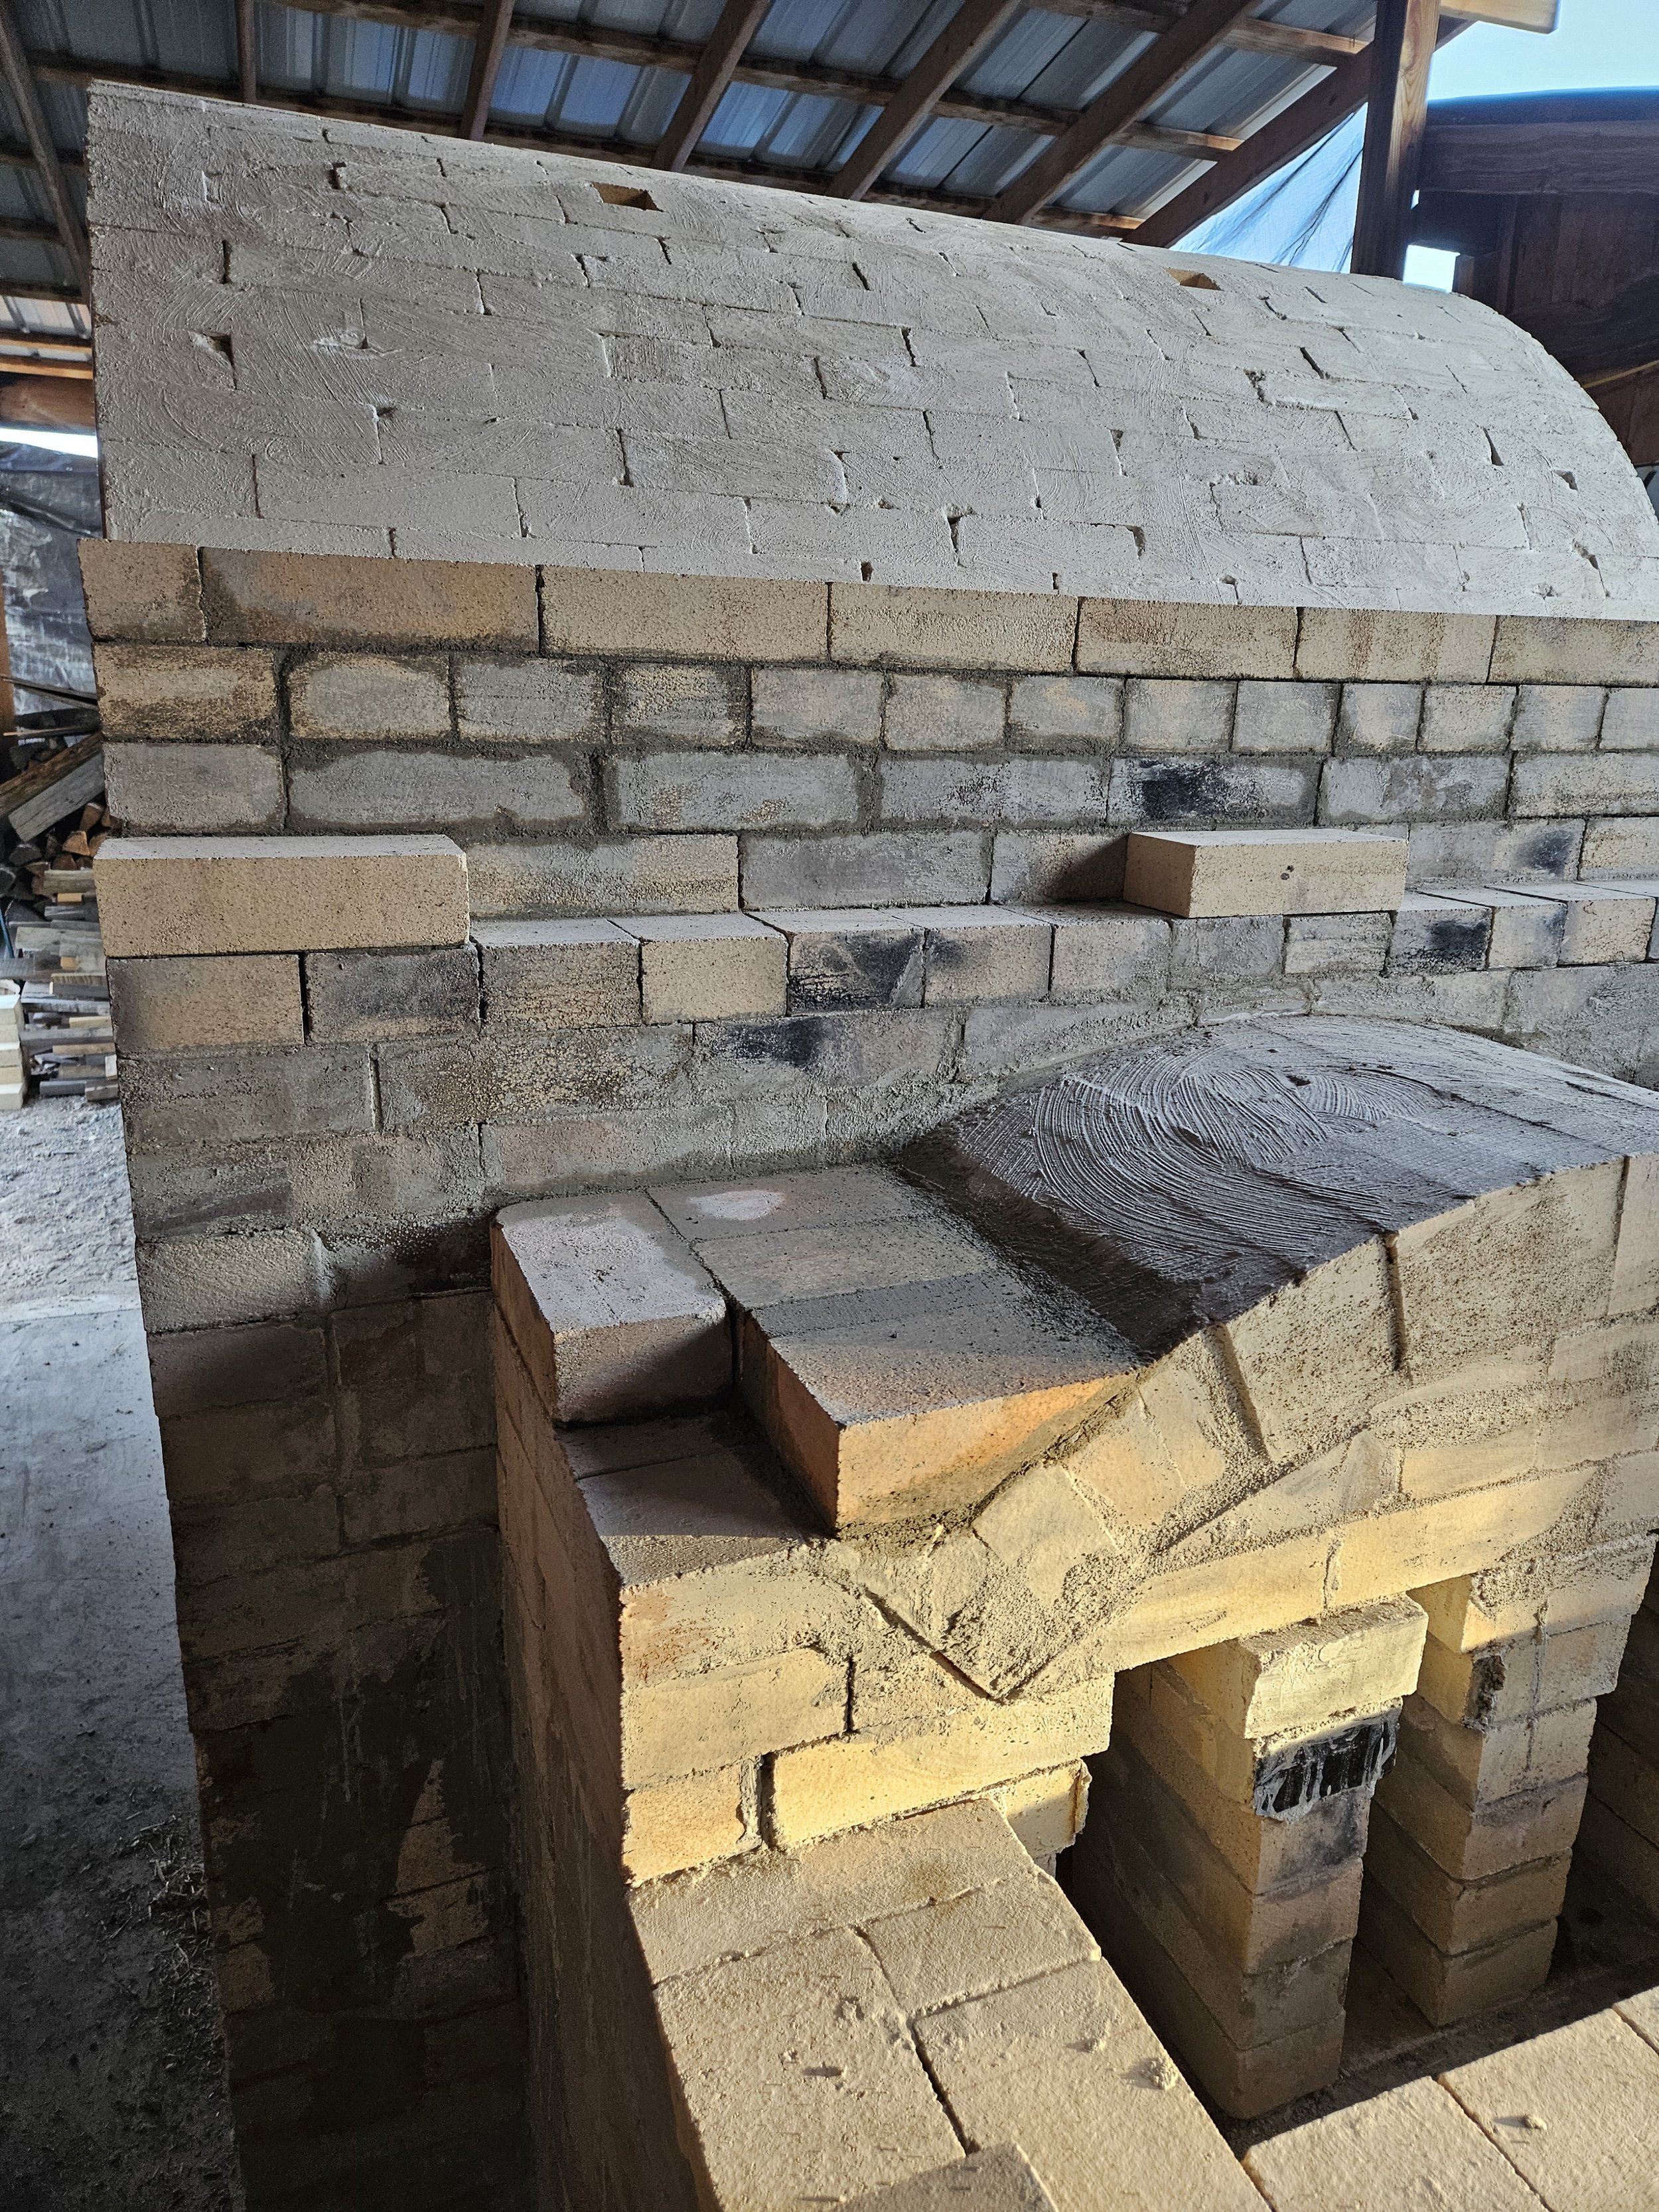
Allowing the castable to cure slowly for strength. This shot also shows the wall leading from firebox into kiln chamber, with a beveled edge on the top course to facilitate flame movement into the kiln chamber.
Continuation of the firebox walls.
Firebox continued.
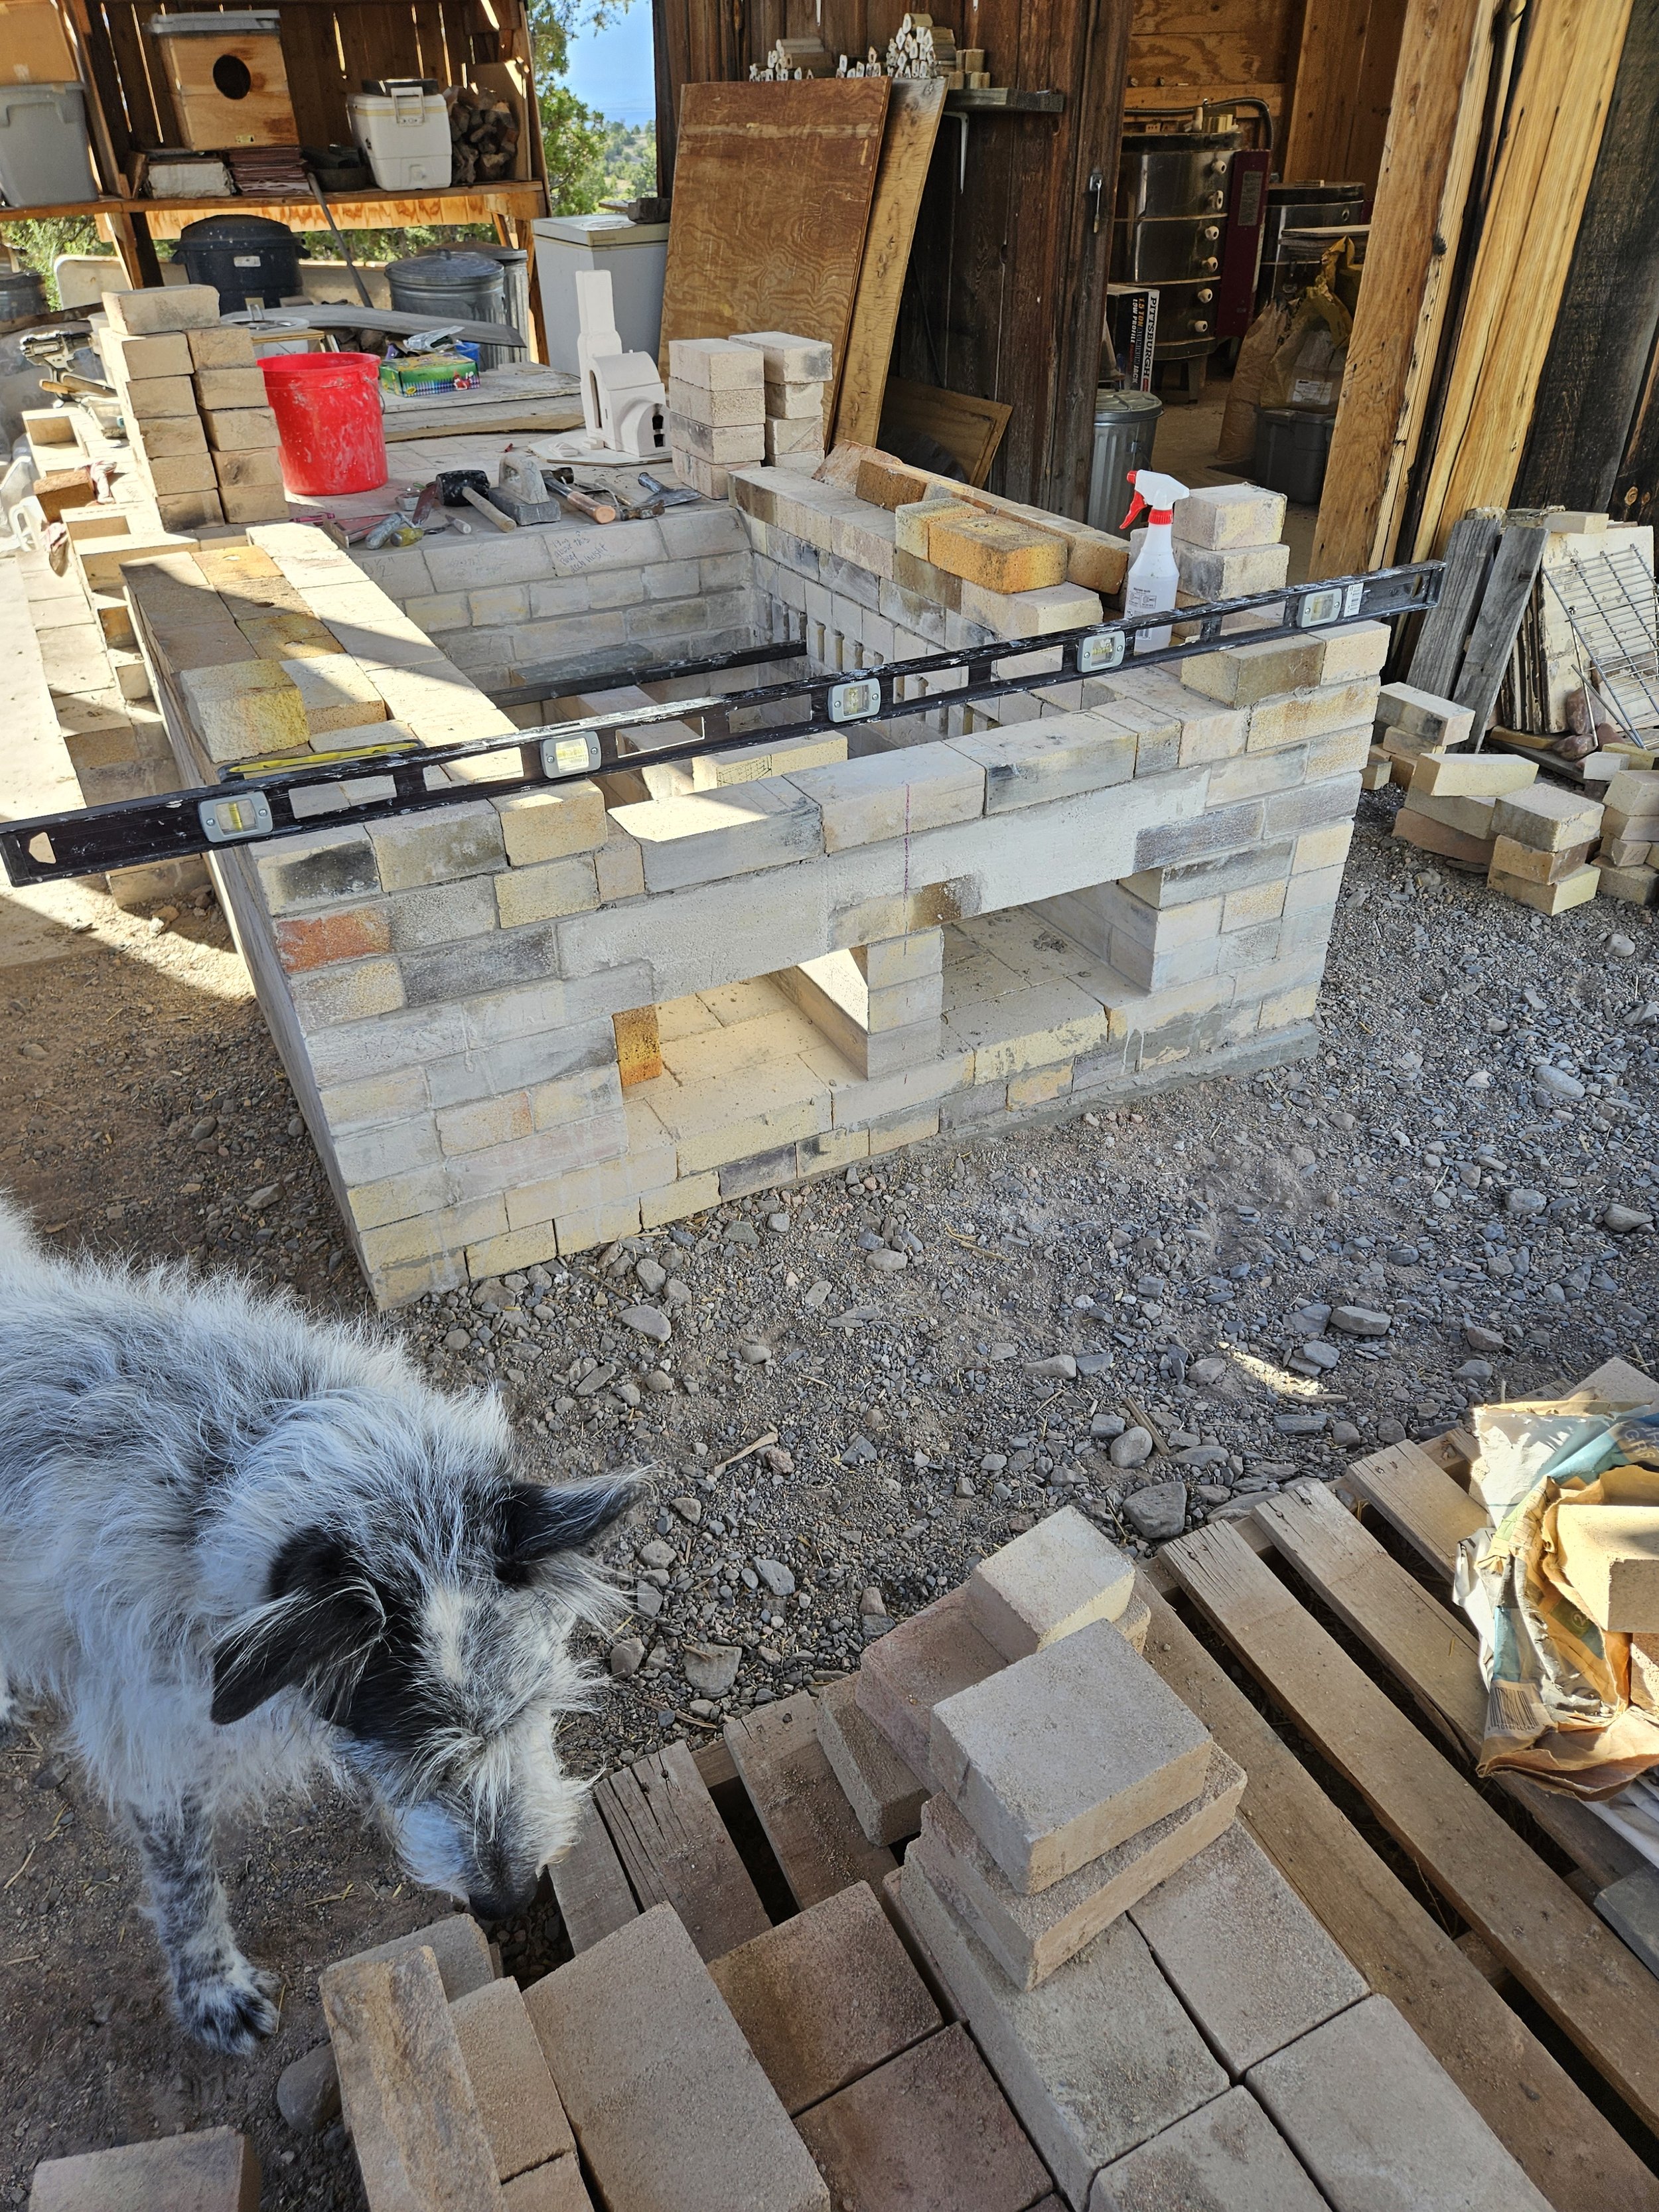
Detail of where the firebox and the kiln chamber will intersect and be tied together with a double wall. Proper construction of areas where two sections (firebox and kiln chamber, kiln chamber and collection box, etc.) meet is crucial. (-photo by Tori)
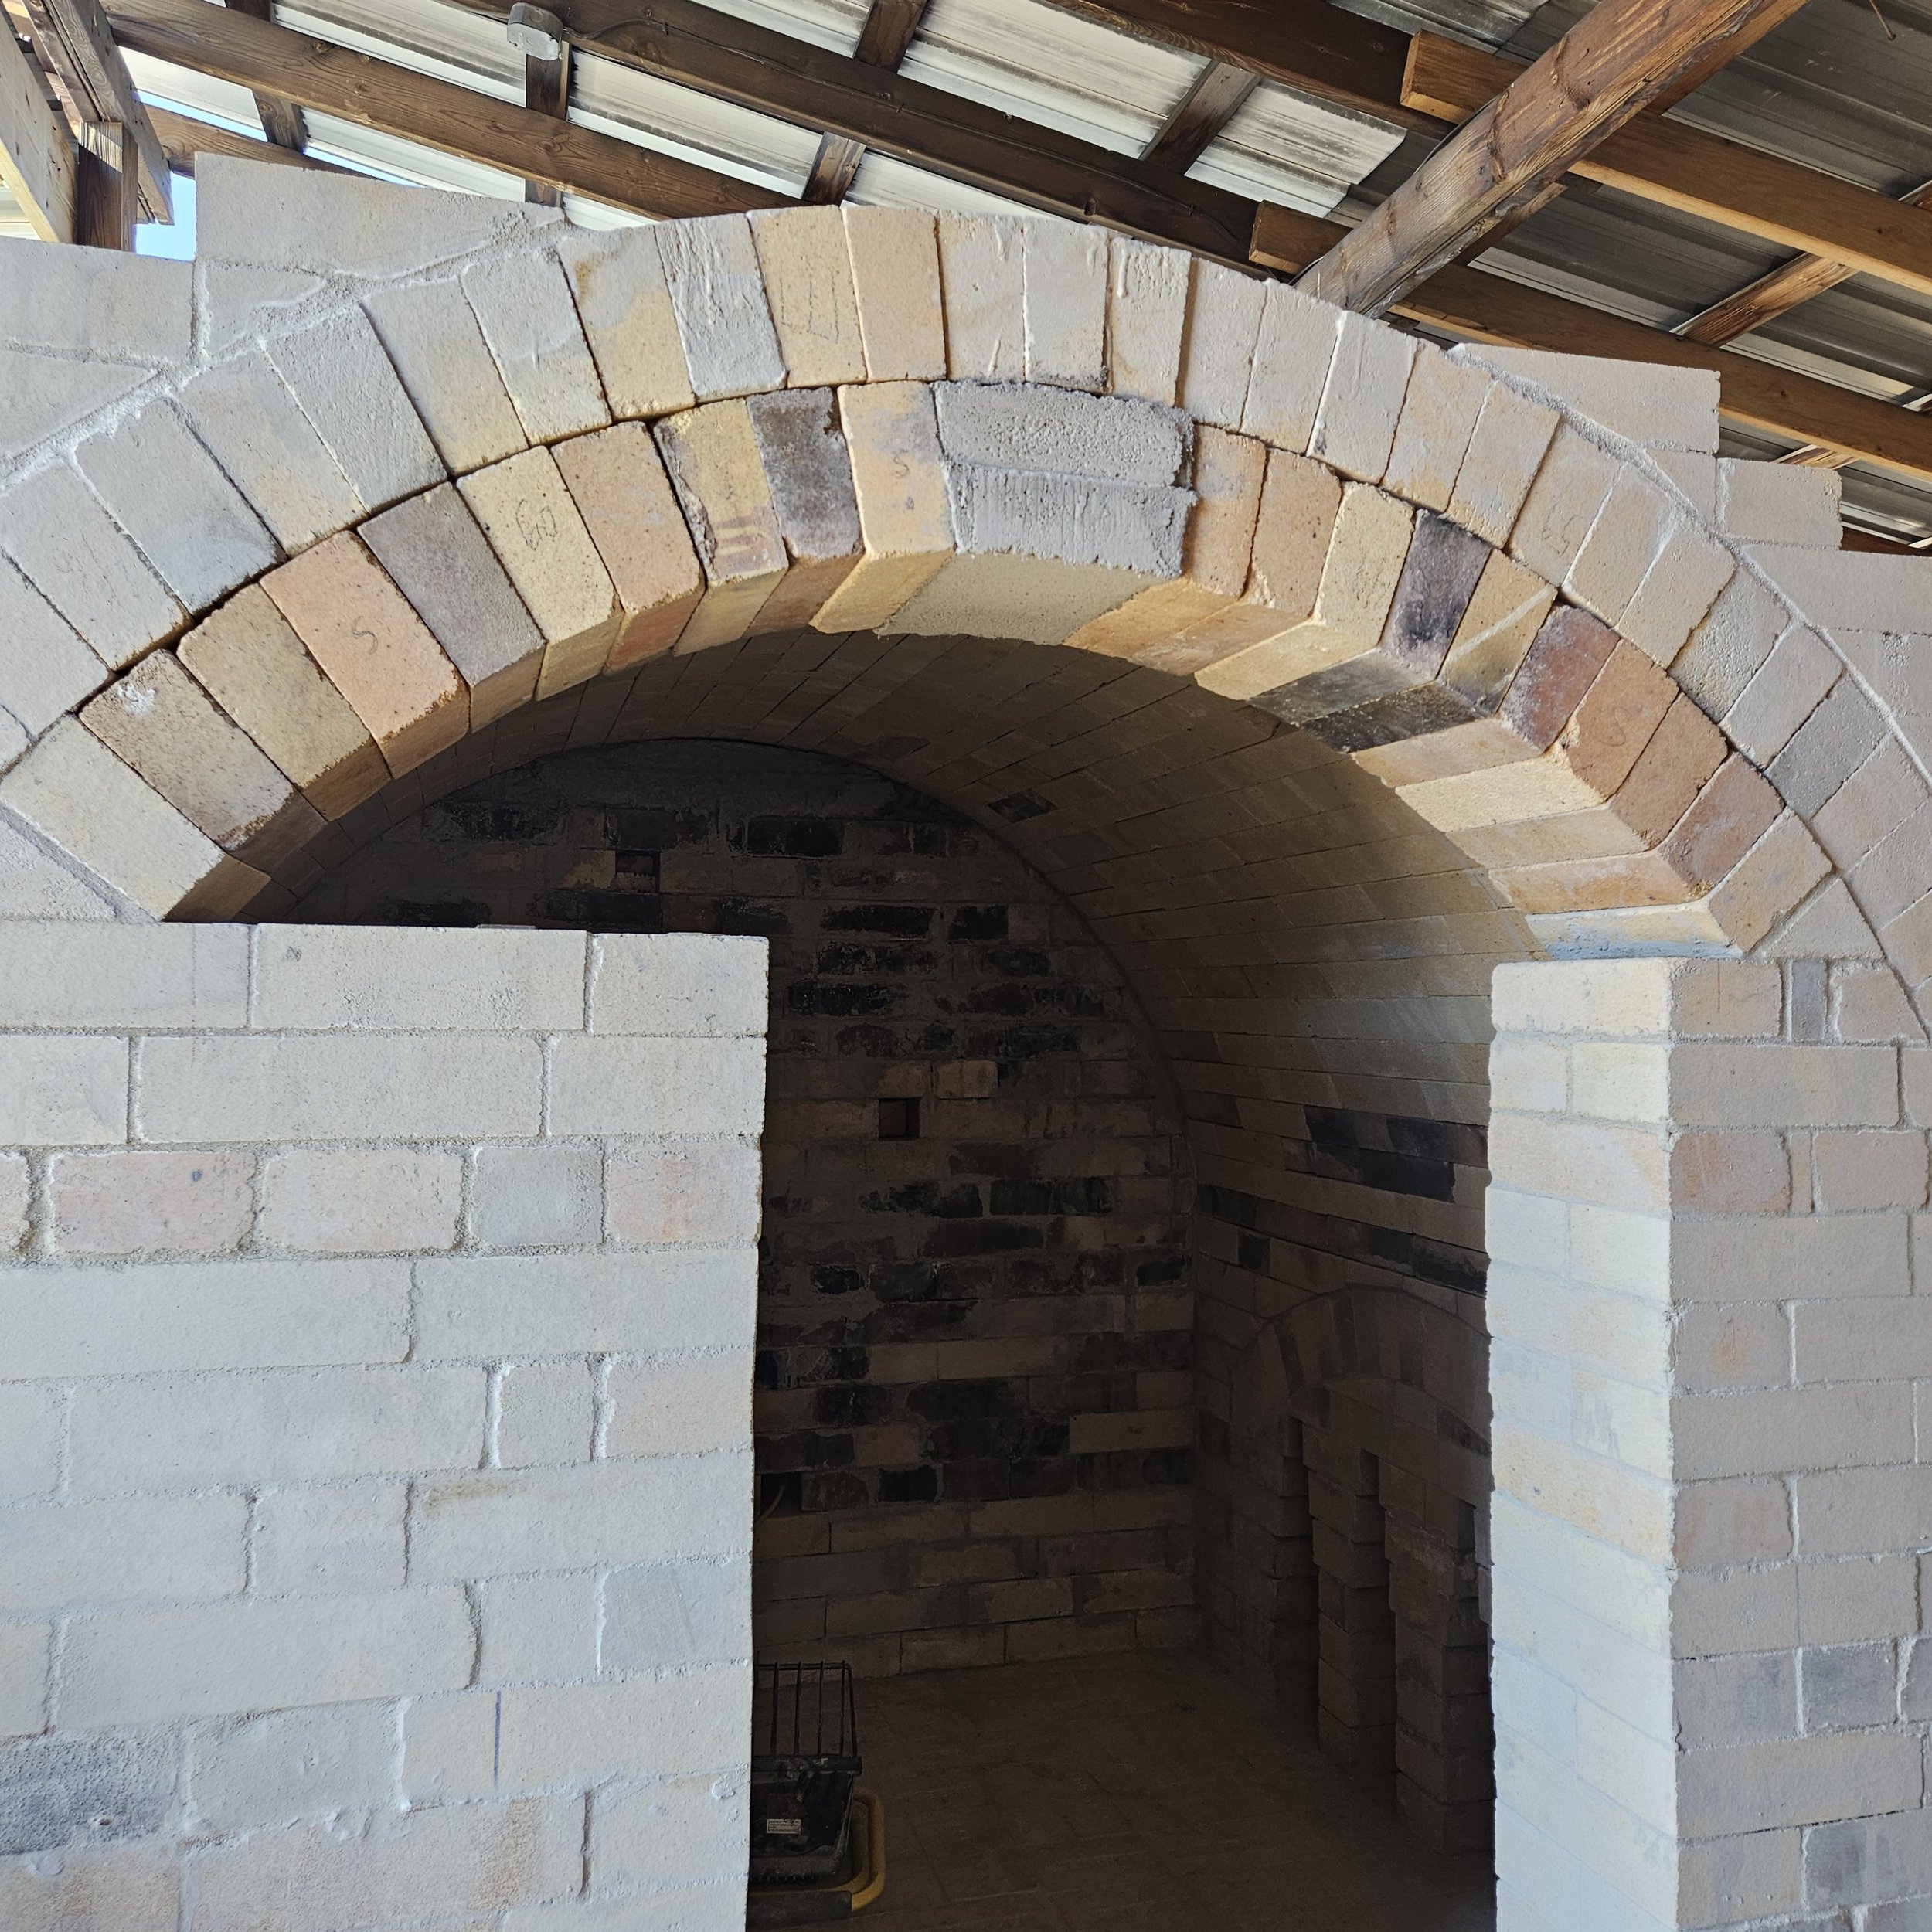
Arch form for firebox in place, with a test ring set up for any adjustments. For both the firebox arch and the kiln chamber arch, I decided on a Roman arch (also called a semi-circular or barrel arch), for strength, flame circulation, and beauty. The Roman arch has an awesome presence.
Another view of the arch form and test ring.
Arch form in place.

Laying the arch bricks.
Arch awaiting keystone.
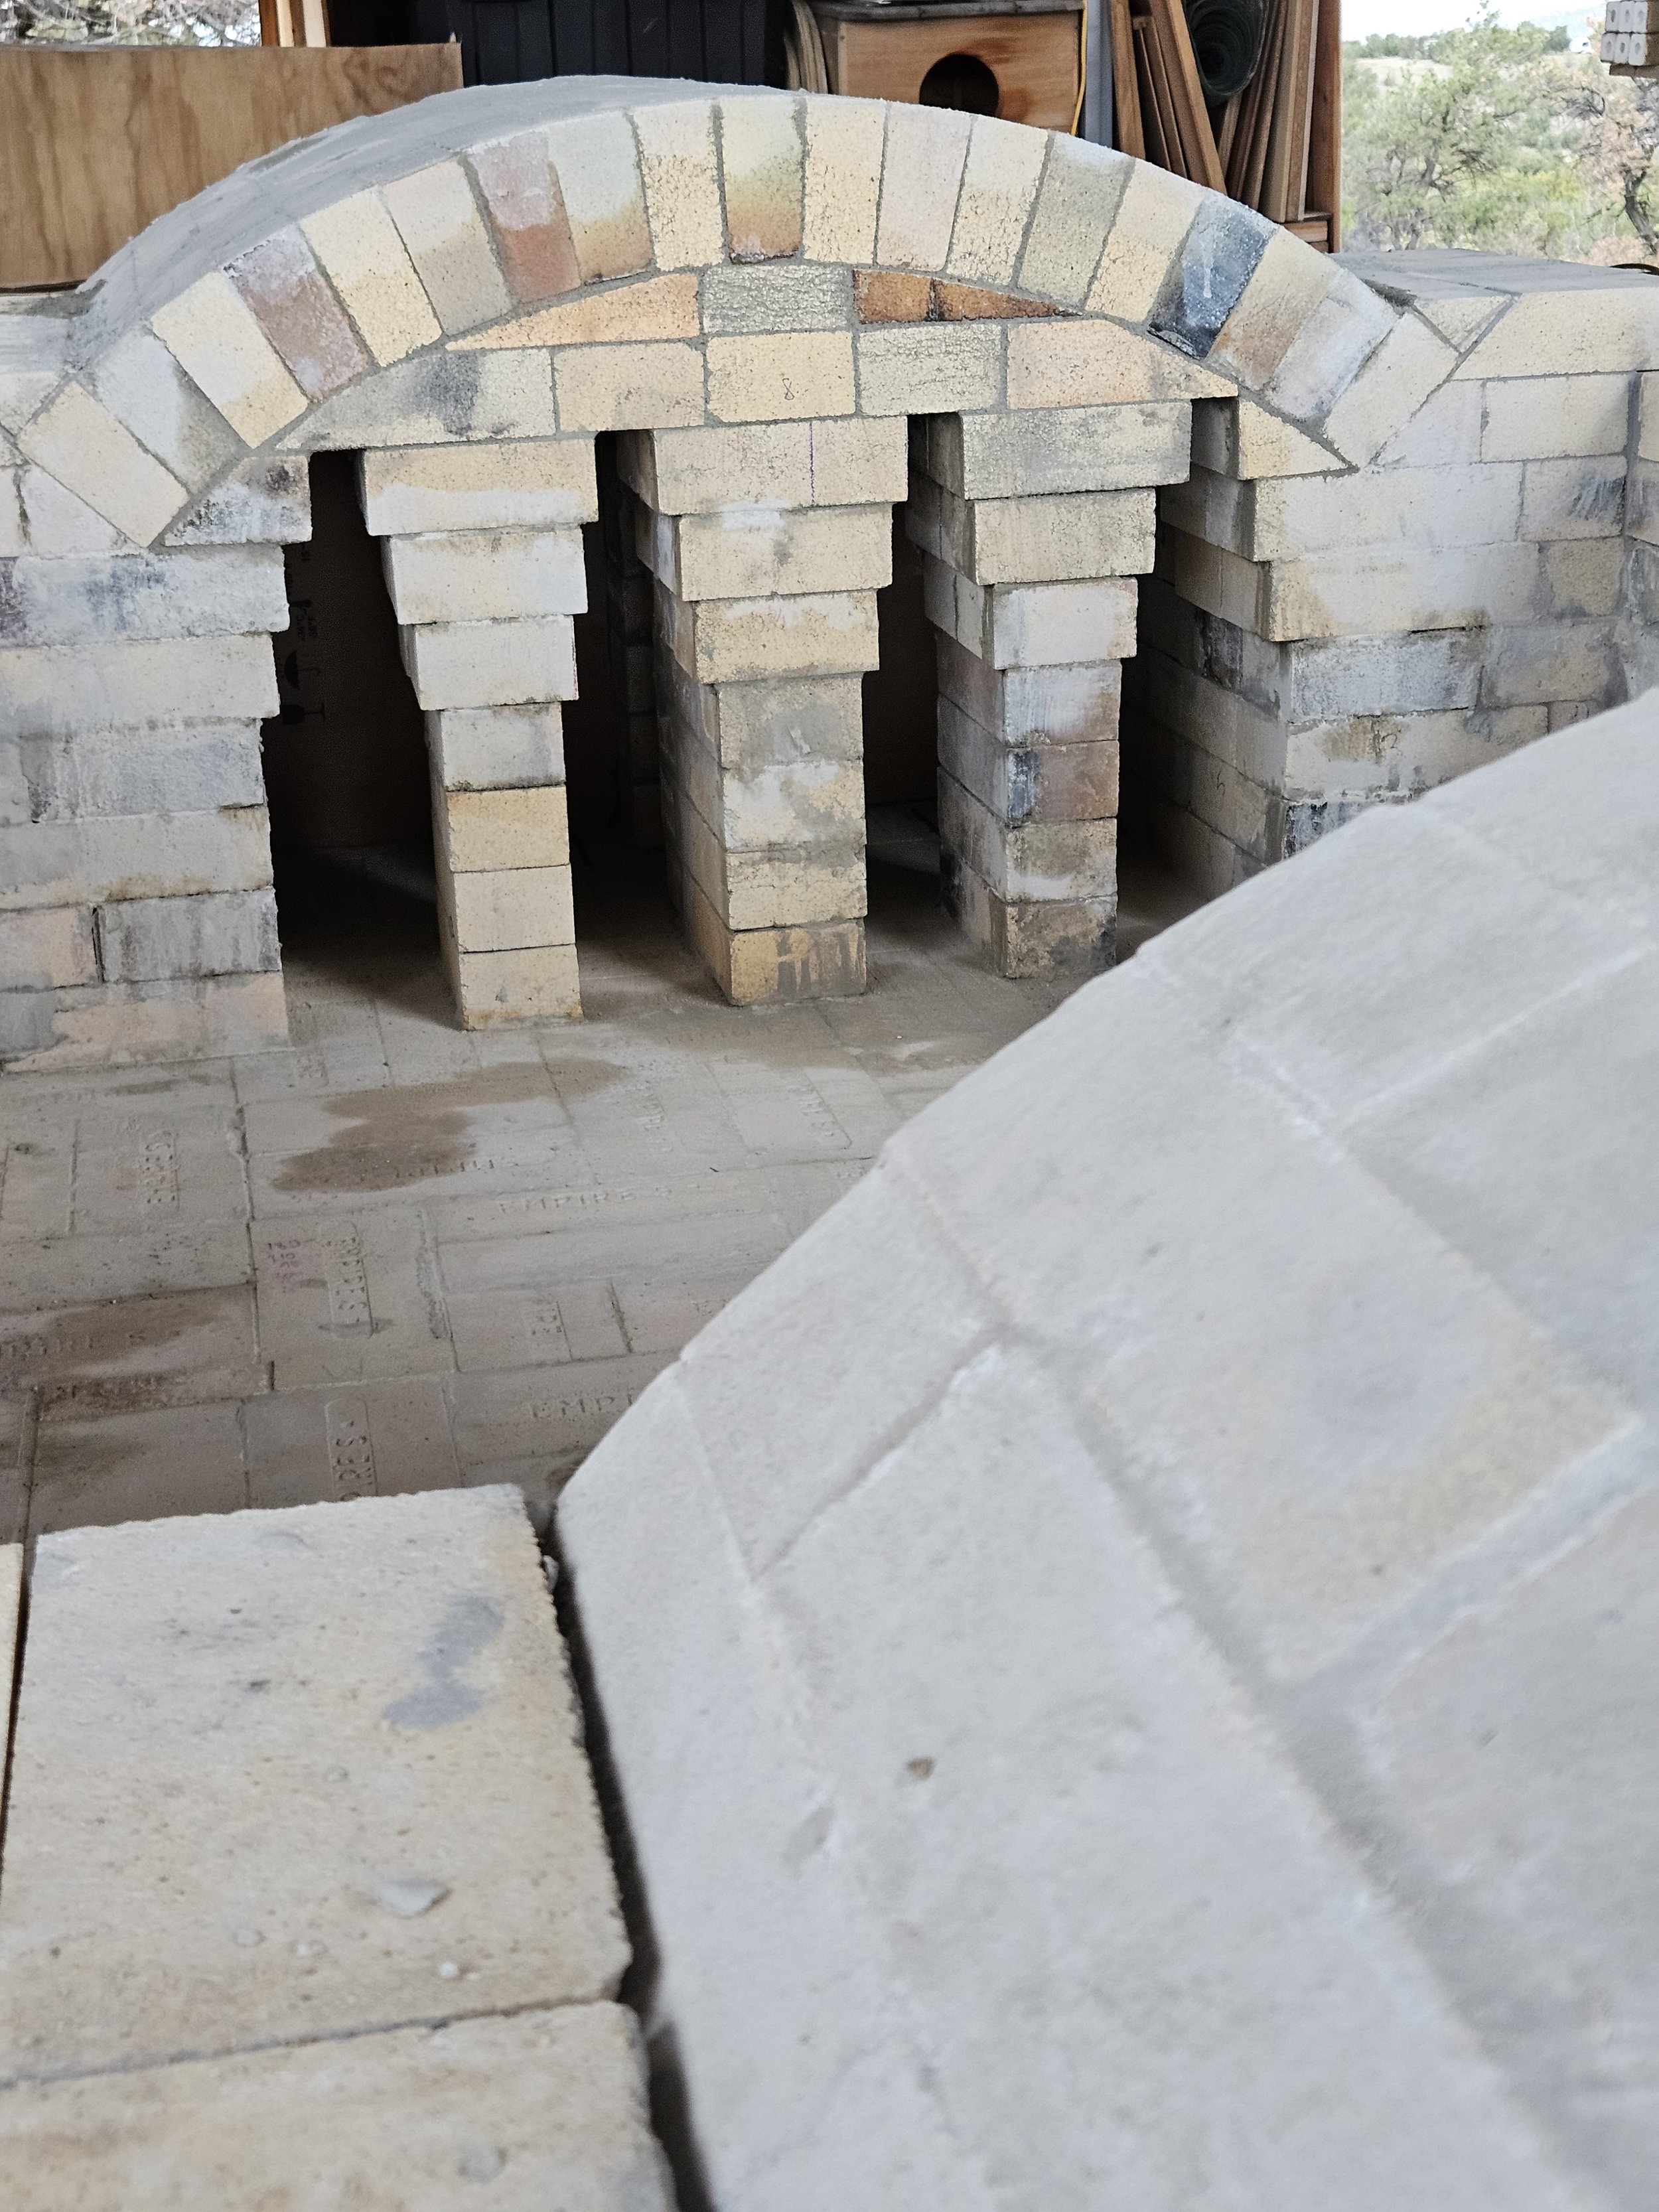
Firebox arch complete.
Arch form removed, and work continues to fill in the end with an opening for the stoke port door.

Casting the stoke port door span.

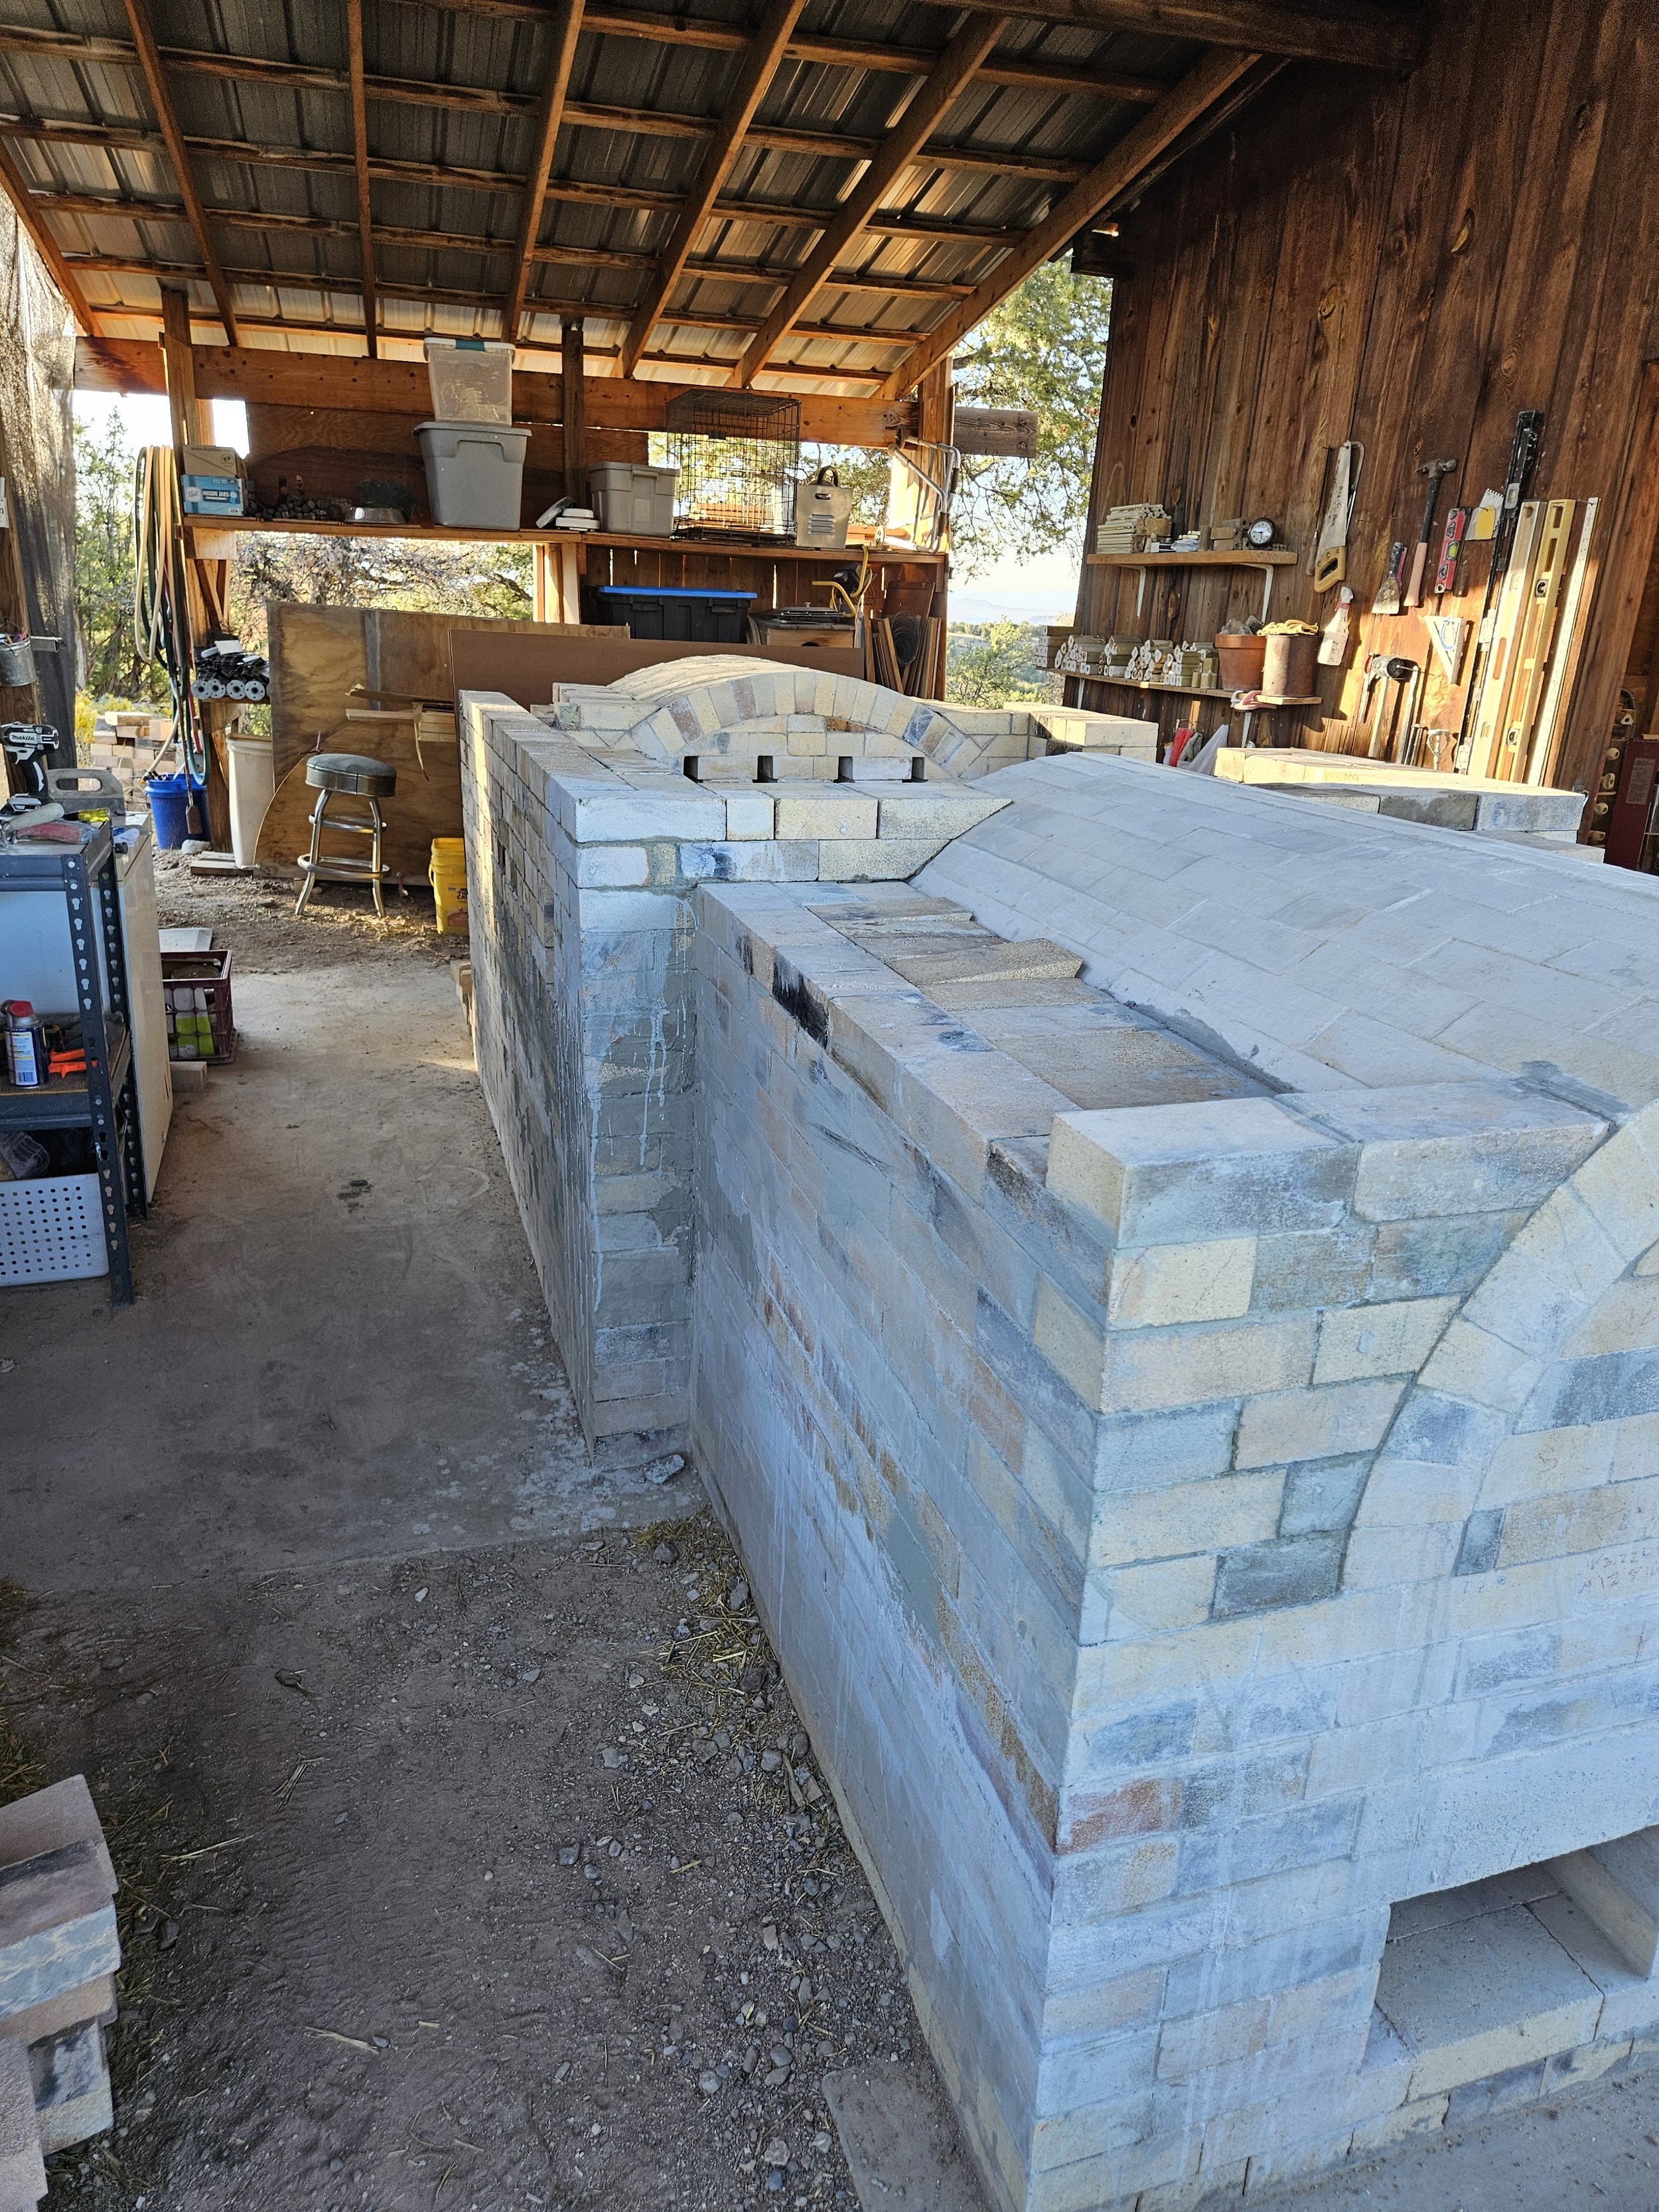
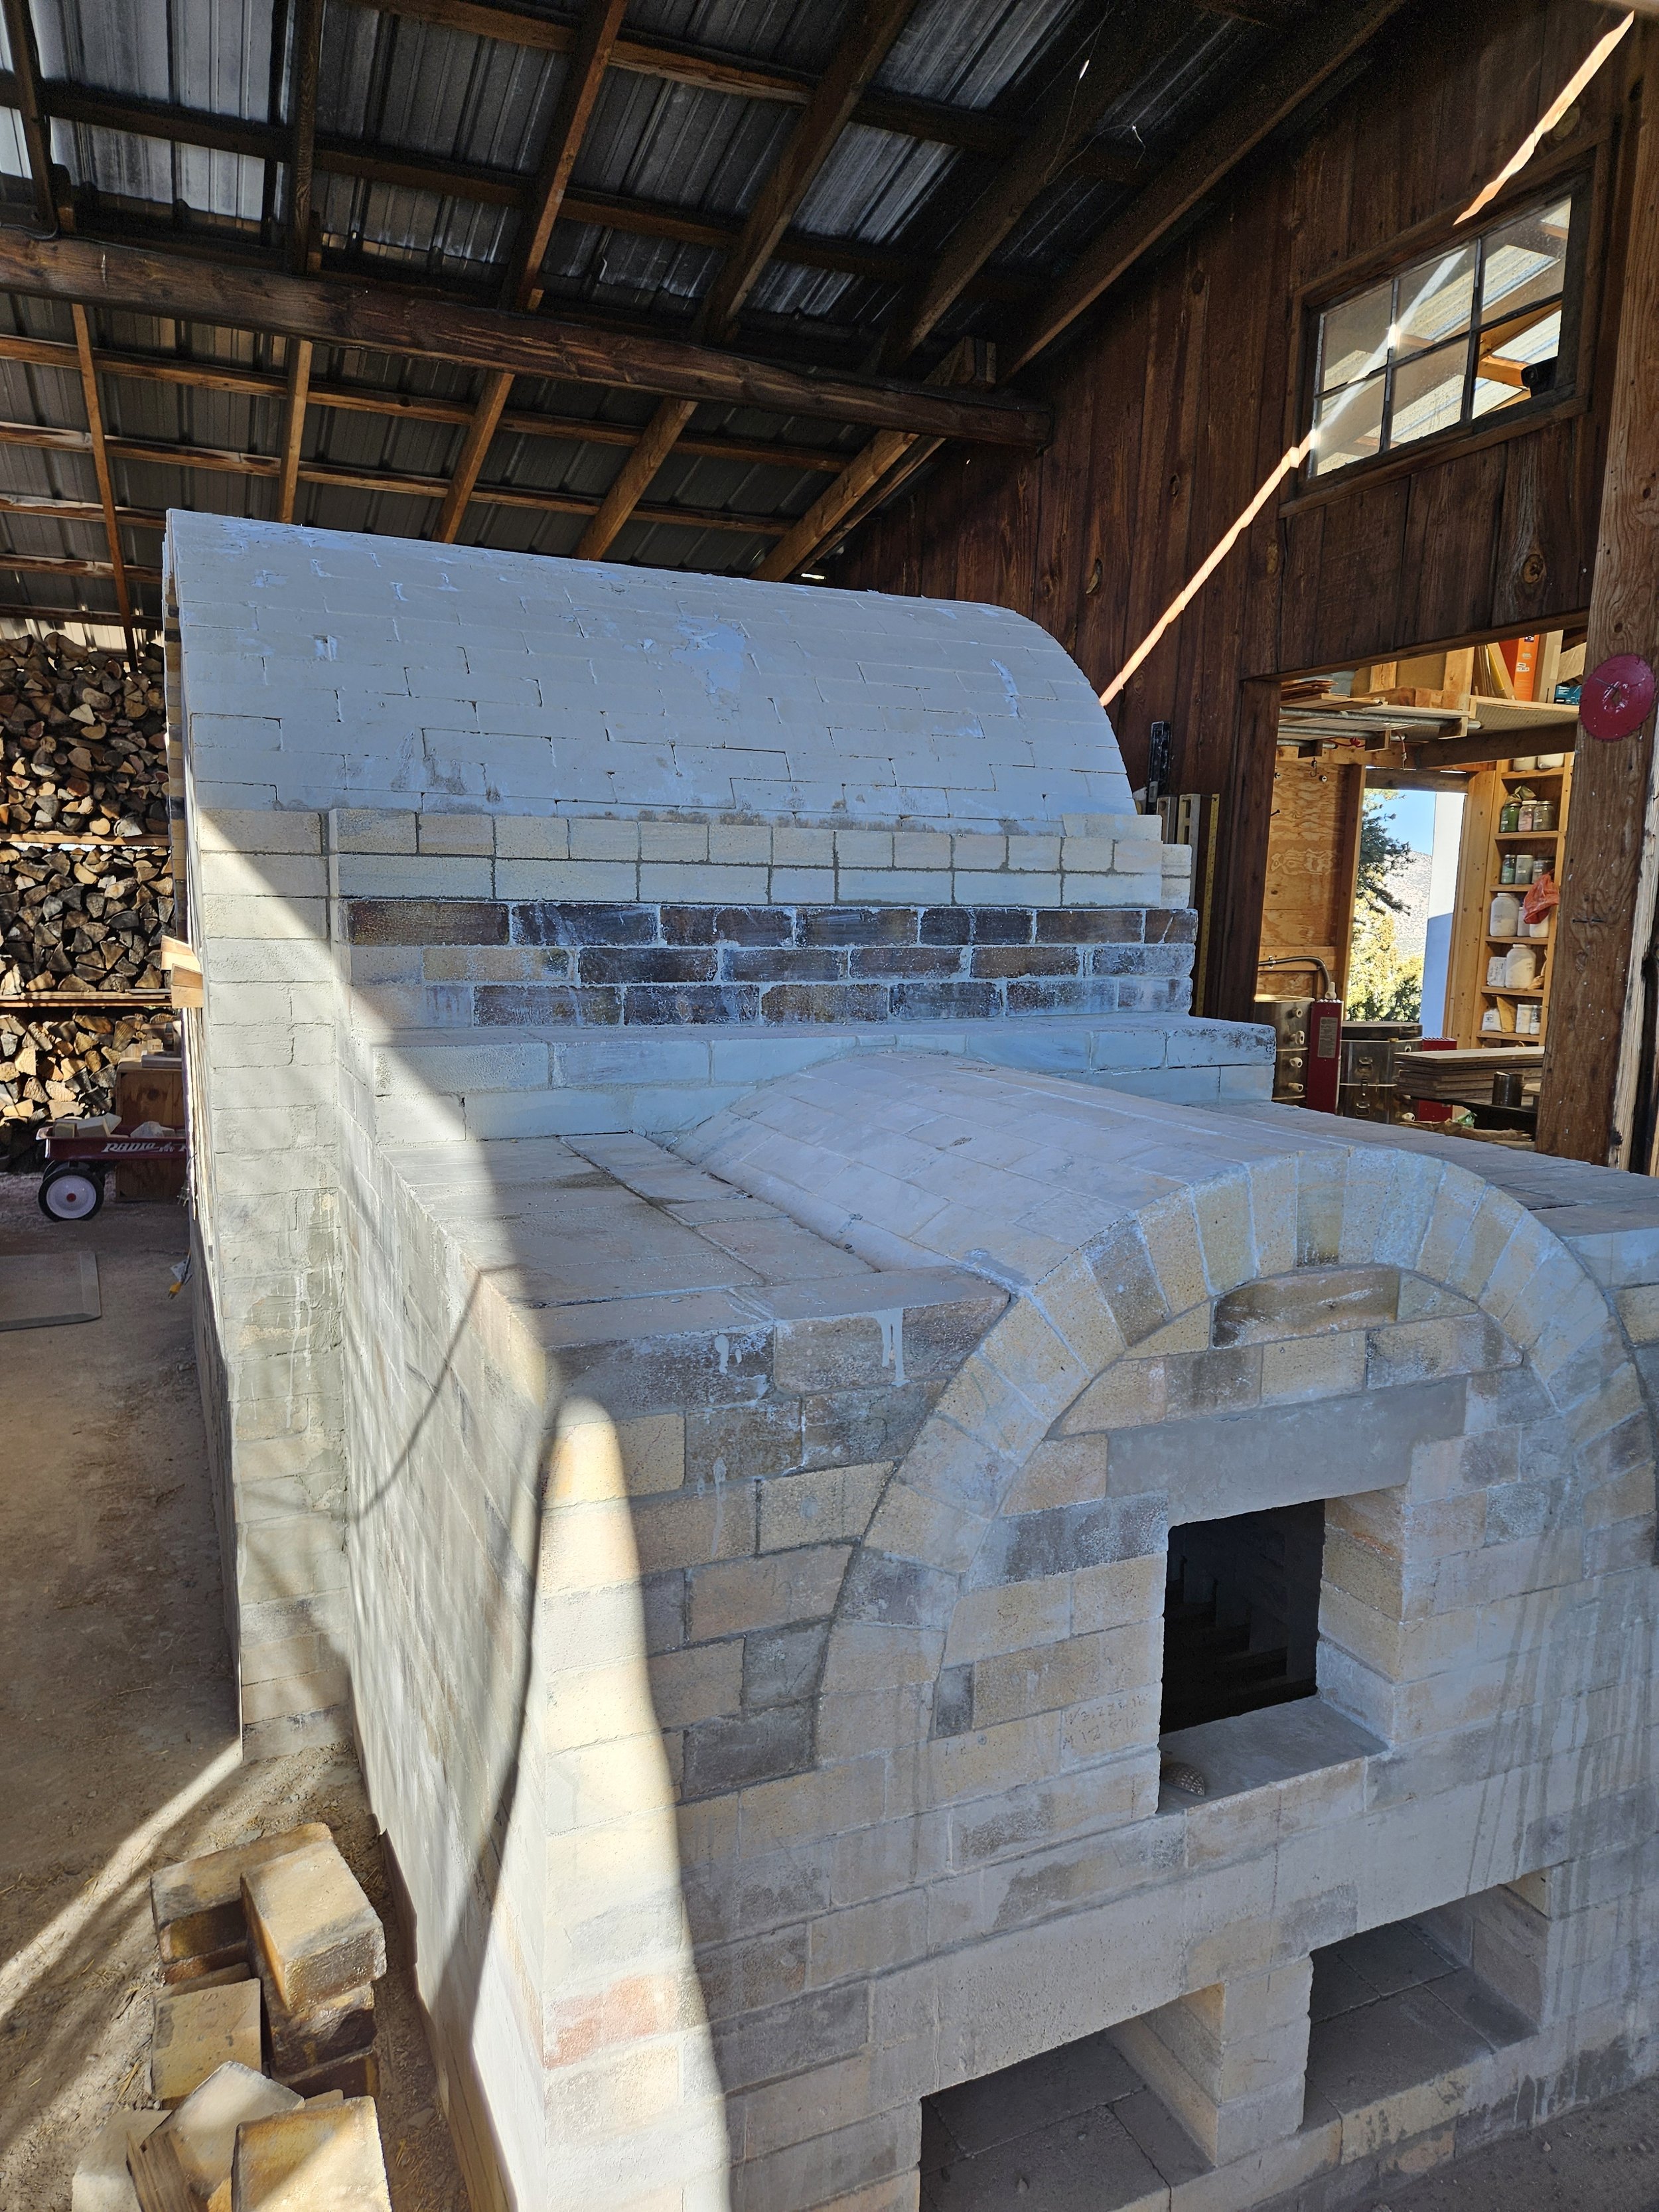
Firebox arch and door end complete, with buttressing begun.

The firebox arch with buttress walls under construction. The front wall includes stoke port at a convenient stoking height, and two air inlet ports below the grate area that can be cleaned out easily. The door from the original kiln will be used for this kiln as well.
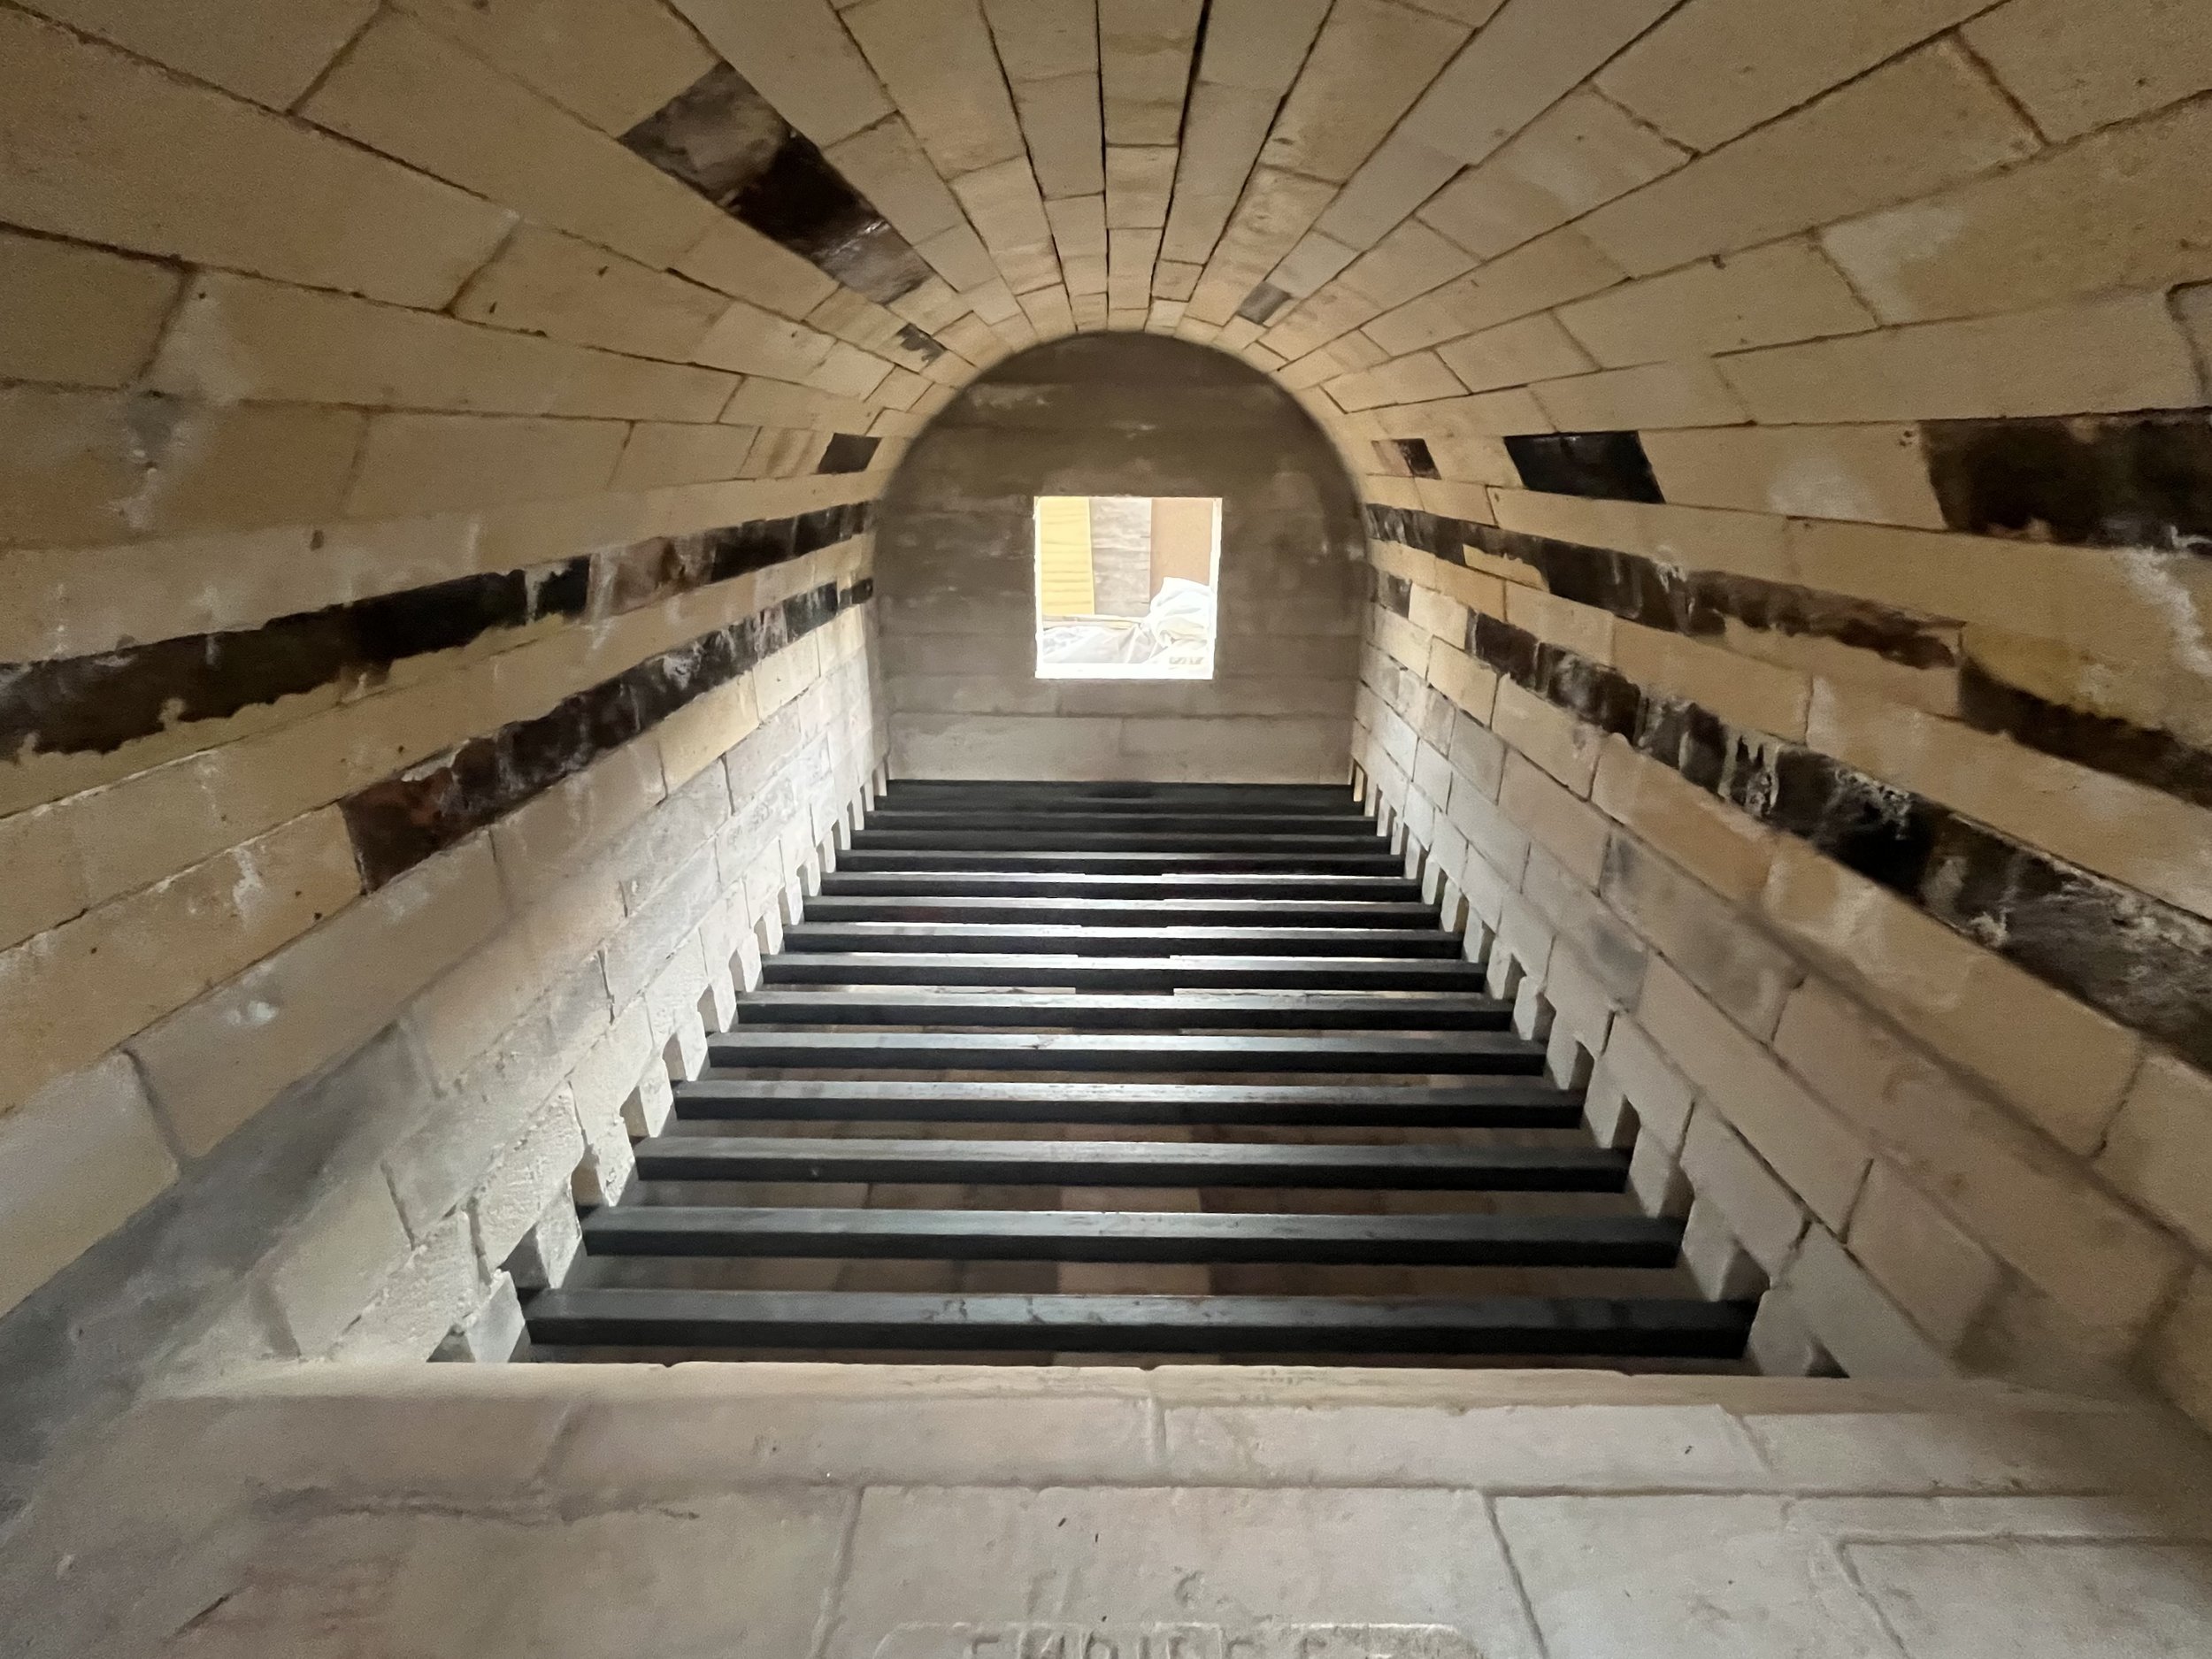
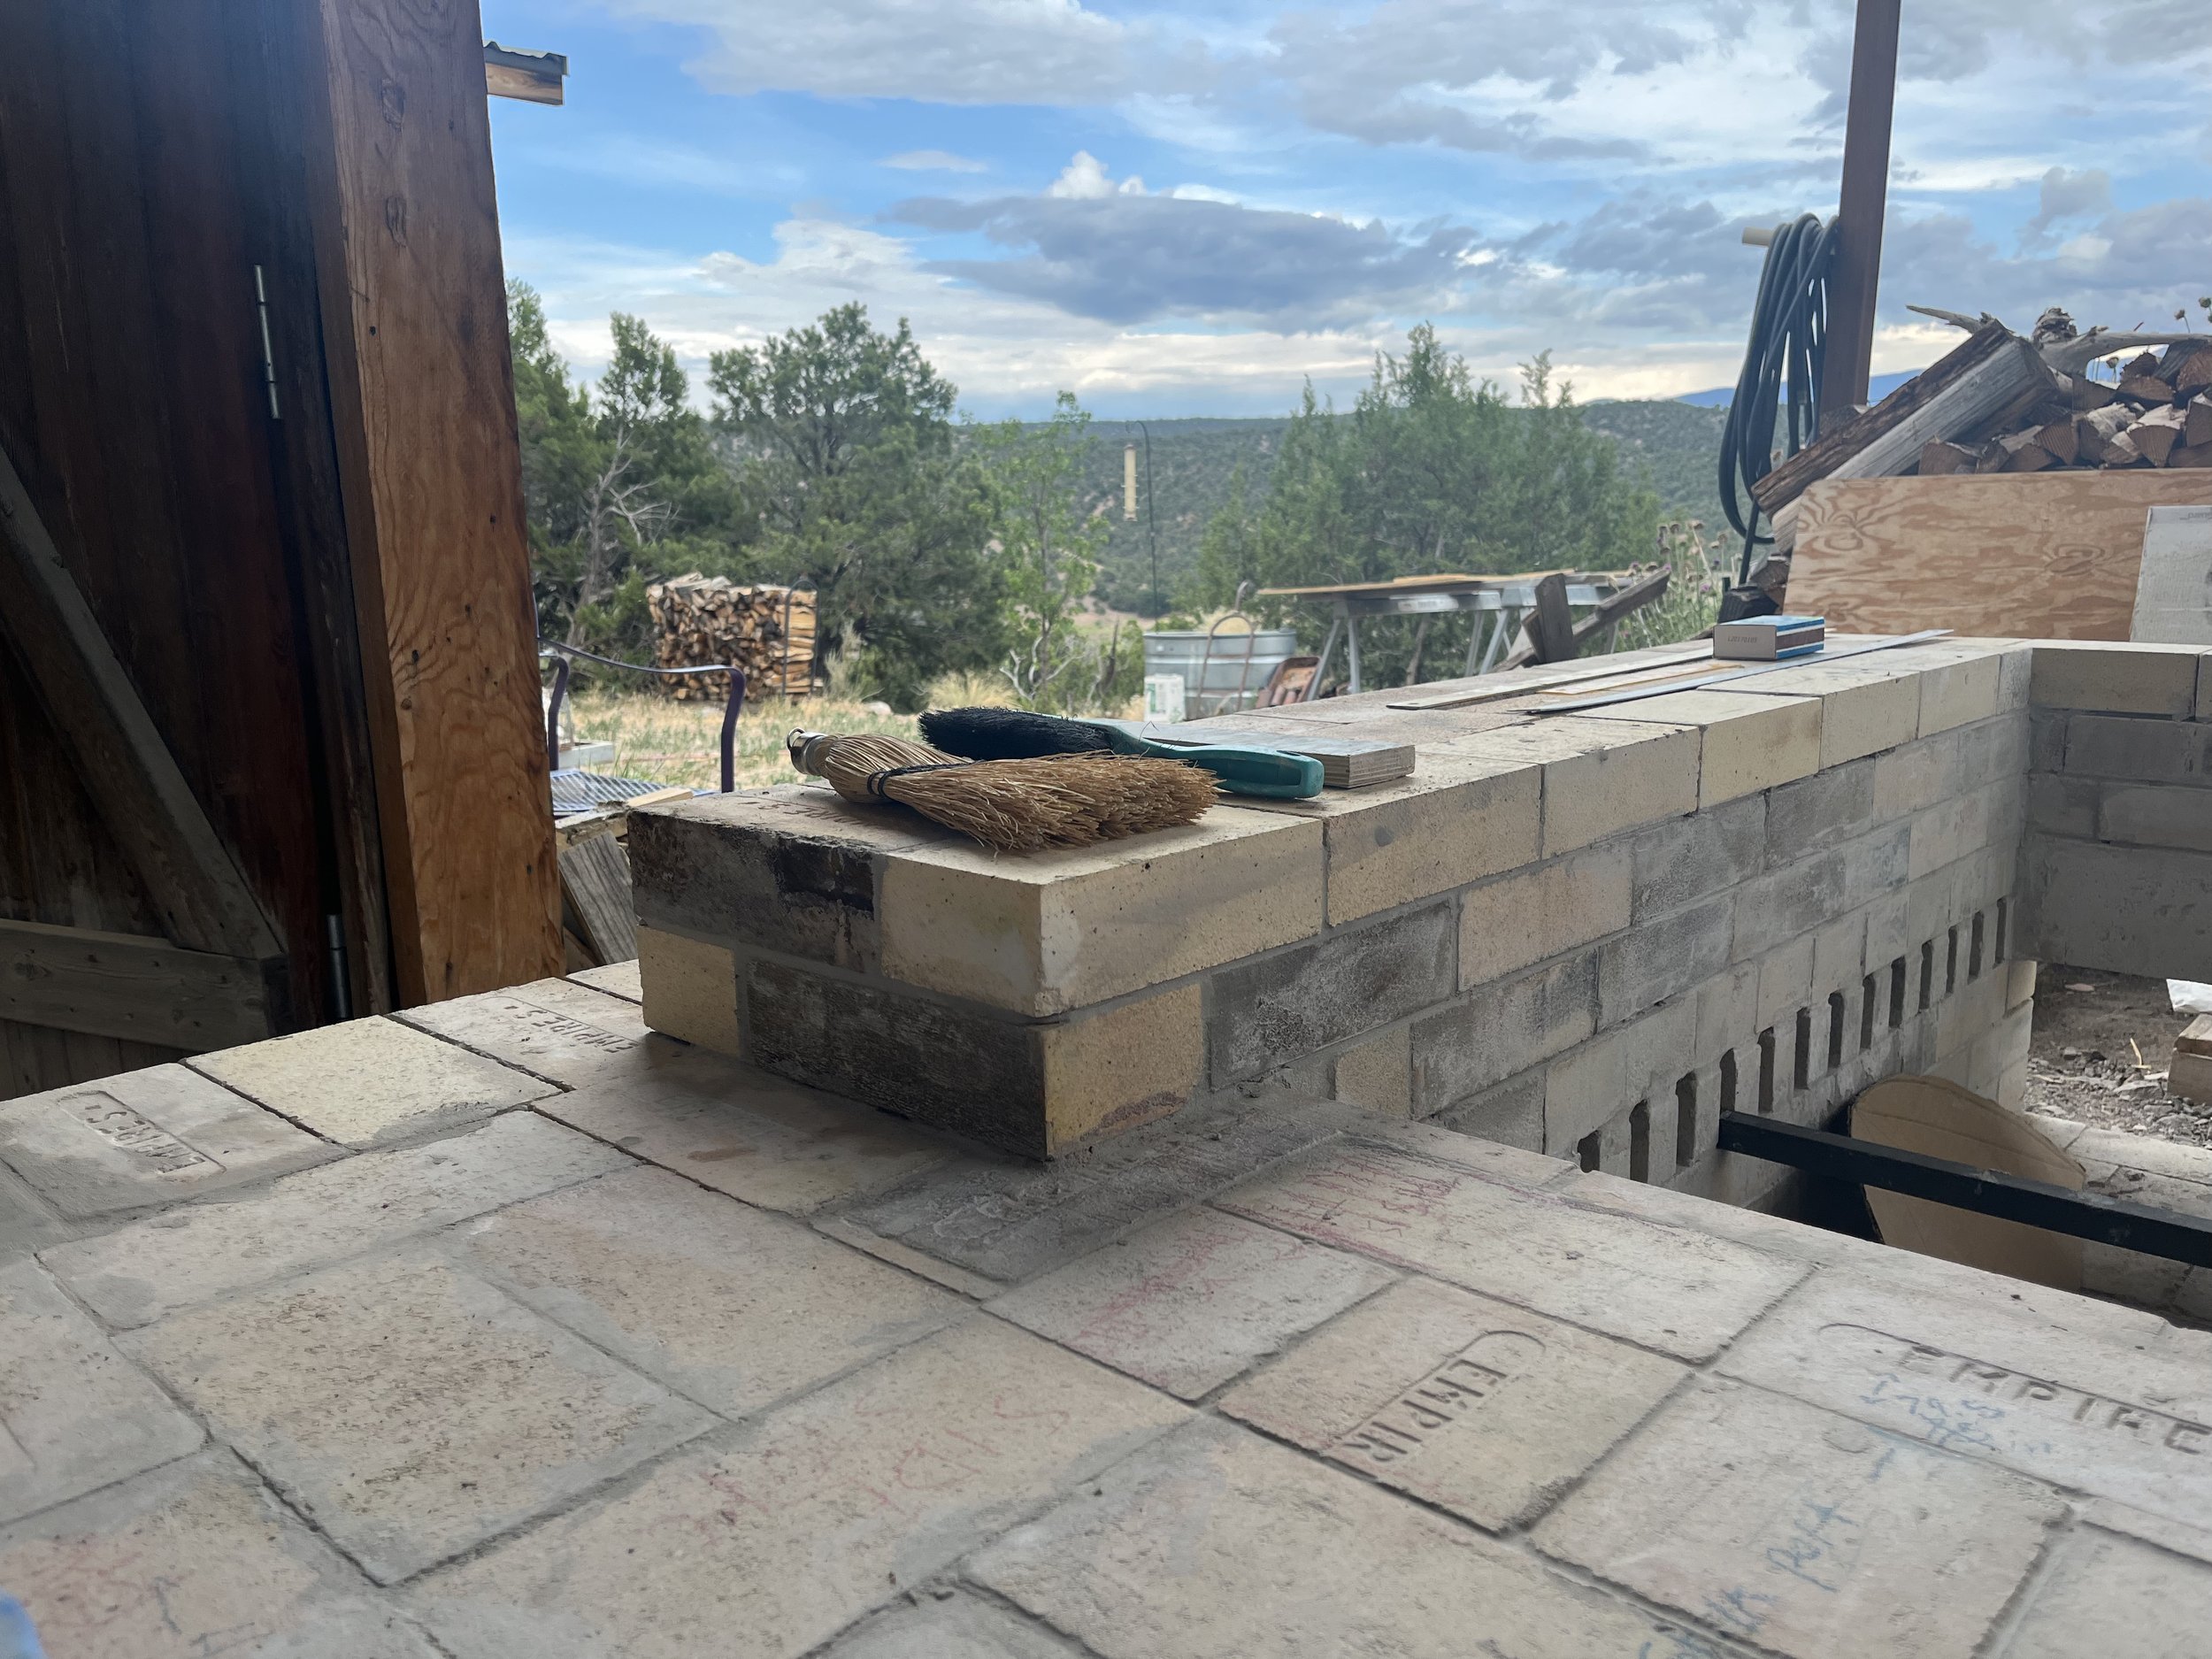
The firebox chamber, looking toward the stoke port outward, with individual grate bars over a central row of bricks, notched into the structure on either side. This design allows for individual grate bars to be removed and replaced as their structural integrity declines. Each piece is 1" bar stock.
Pad for the chimney freshly poured. (-photo by Tori)
Layout for the collection box and vertical dampers. (-photo by Tori)

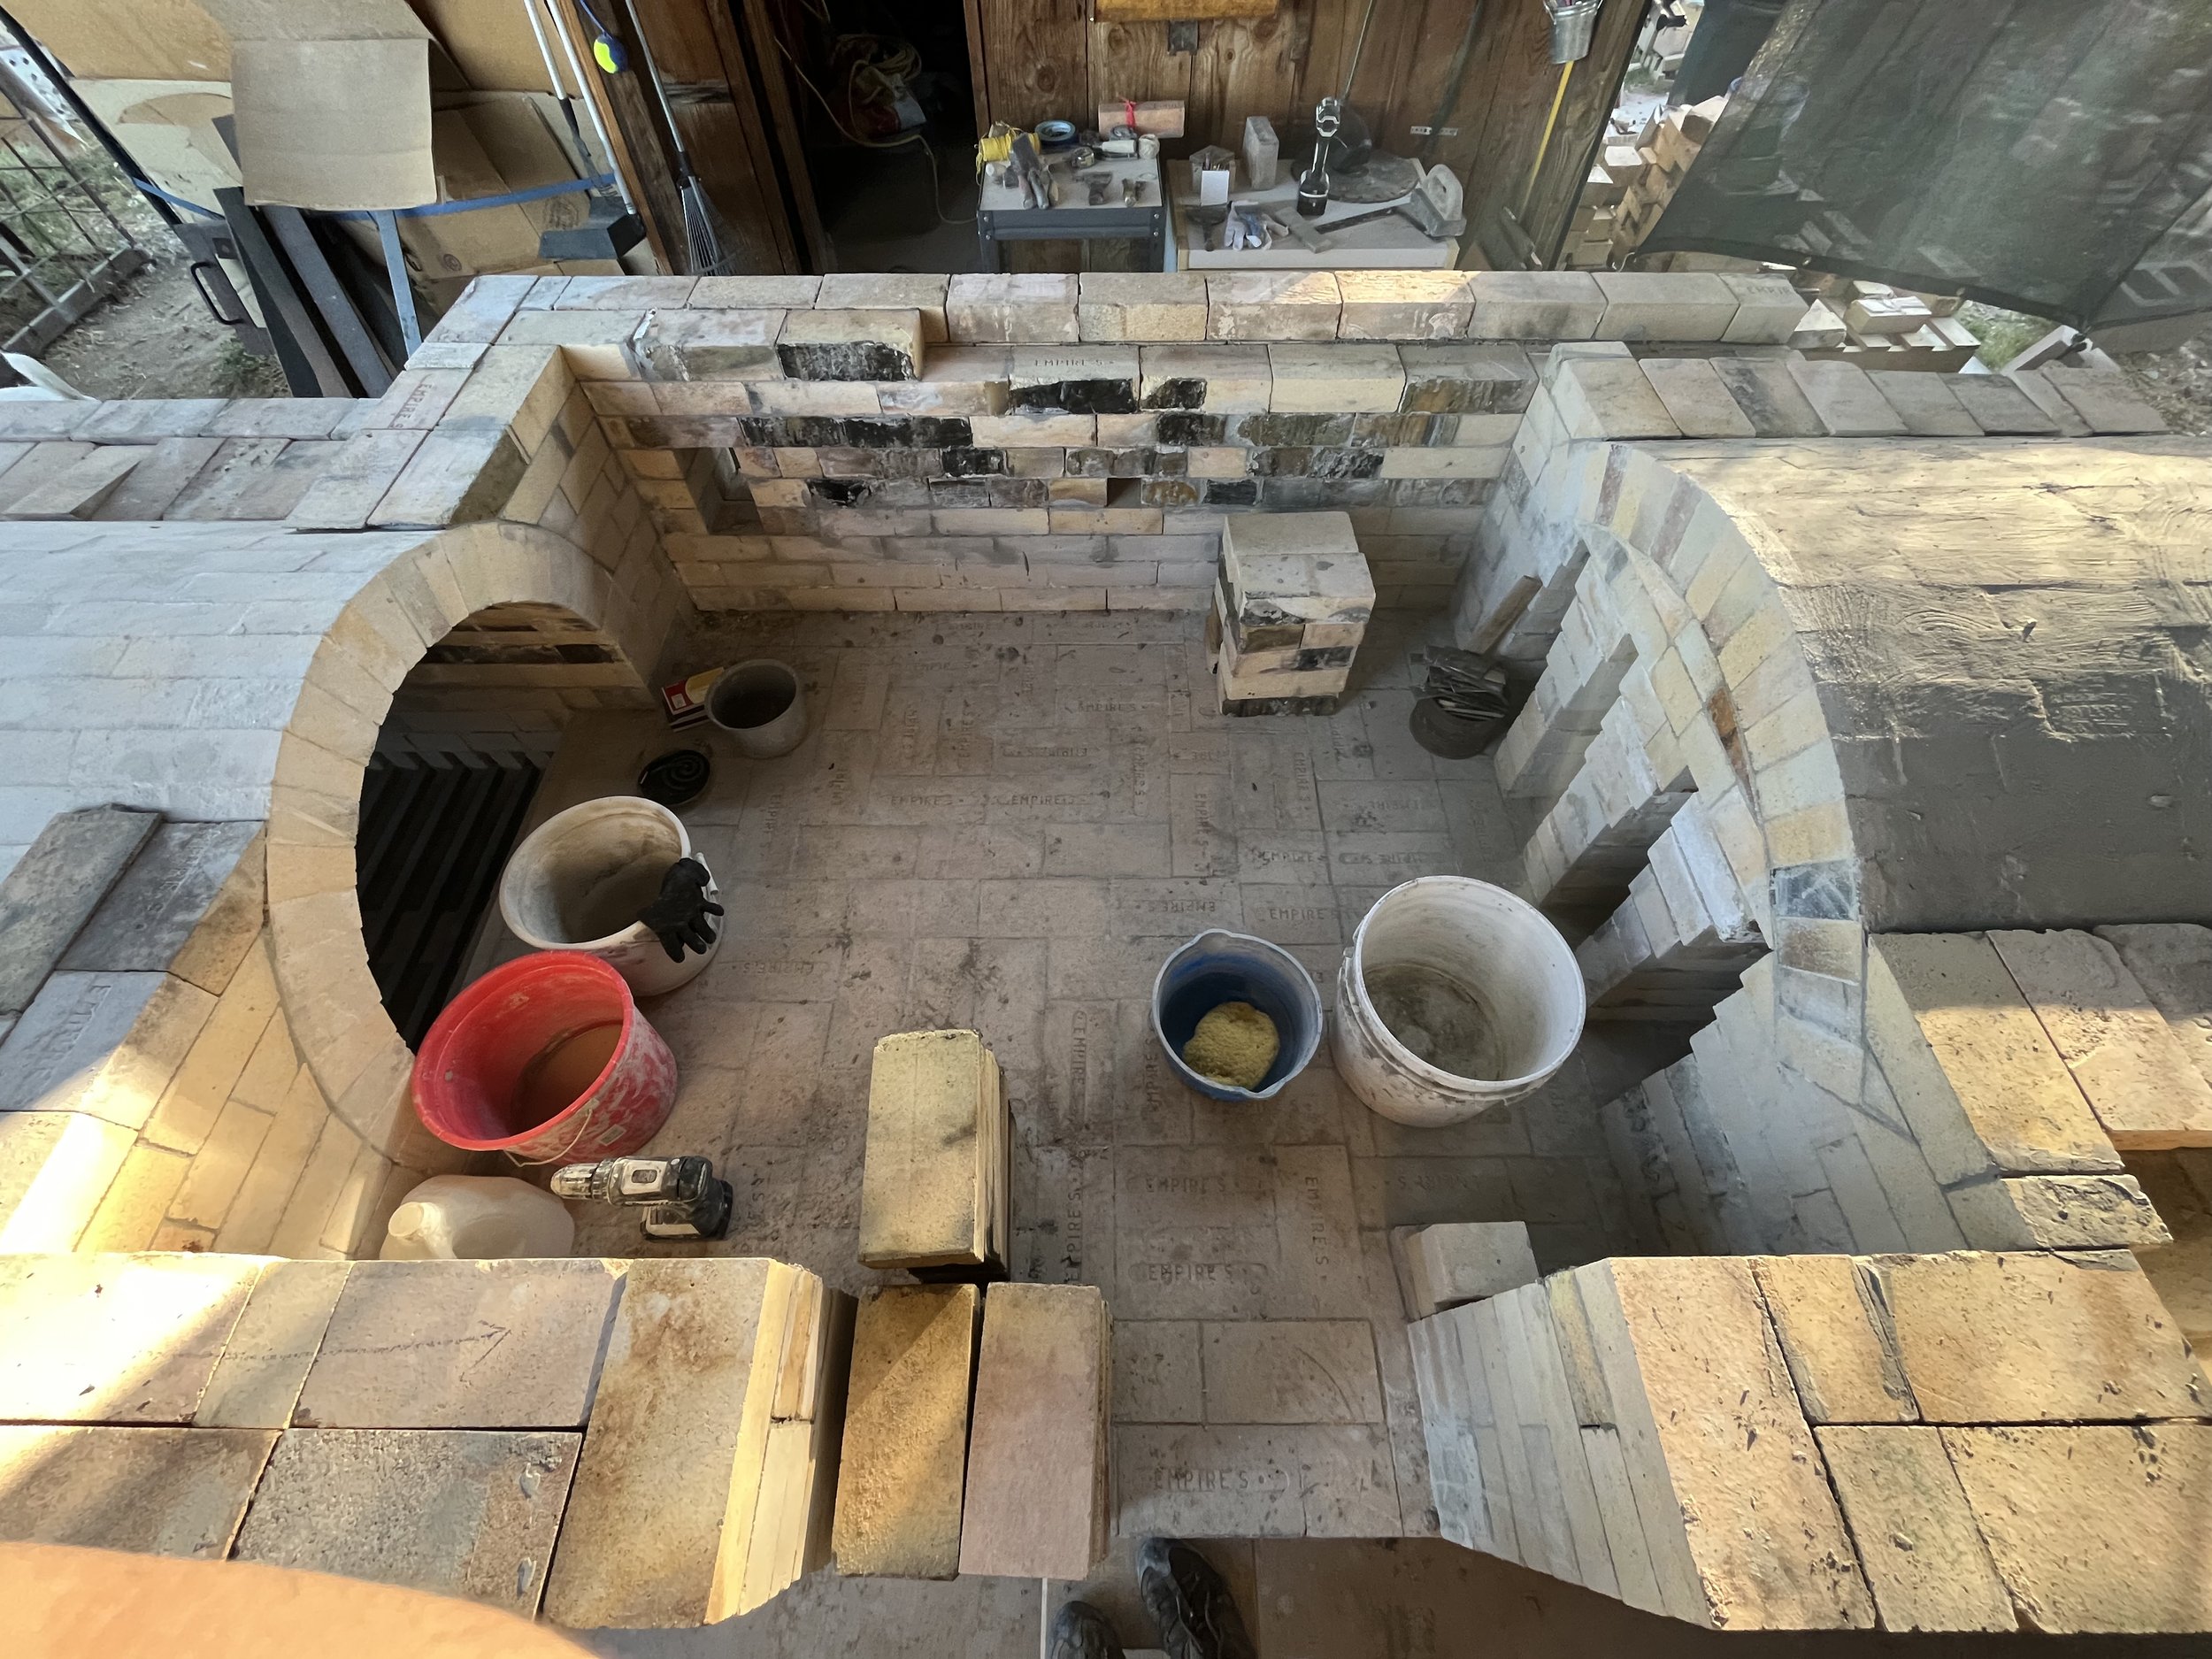
Relieving arch for the chimney to rest on, with corbelling layout for the exit flues. The relieving arch, a segmental or sprung arch with a relatively high rise, was decided on after lengthy discussion with Mark. I think it is a great solution.
Inside the collection box there is another corbelled pillar for good measure, just to tie everything together. (-photo by Tori)
Corbelled exit flues completed and the relieving arch filled in. It was Randy Johnston's suggestion, during a friendly visit, to make the exit flues on the far left and right slightly wider than the central flues, to counteract the natural tendency of flame to form a peak (like a candle flame).
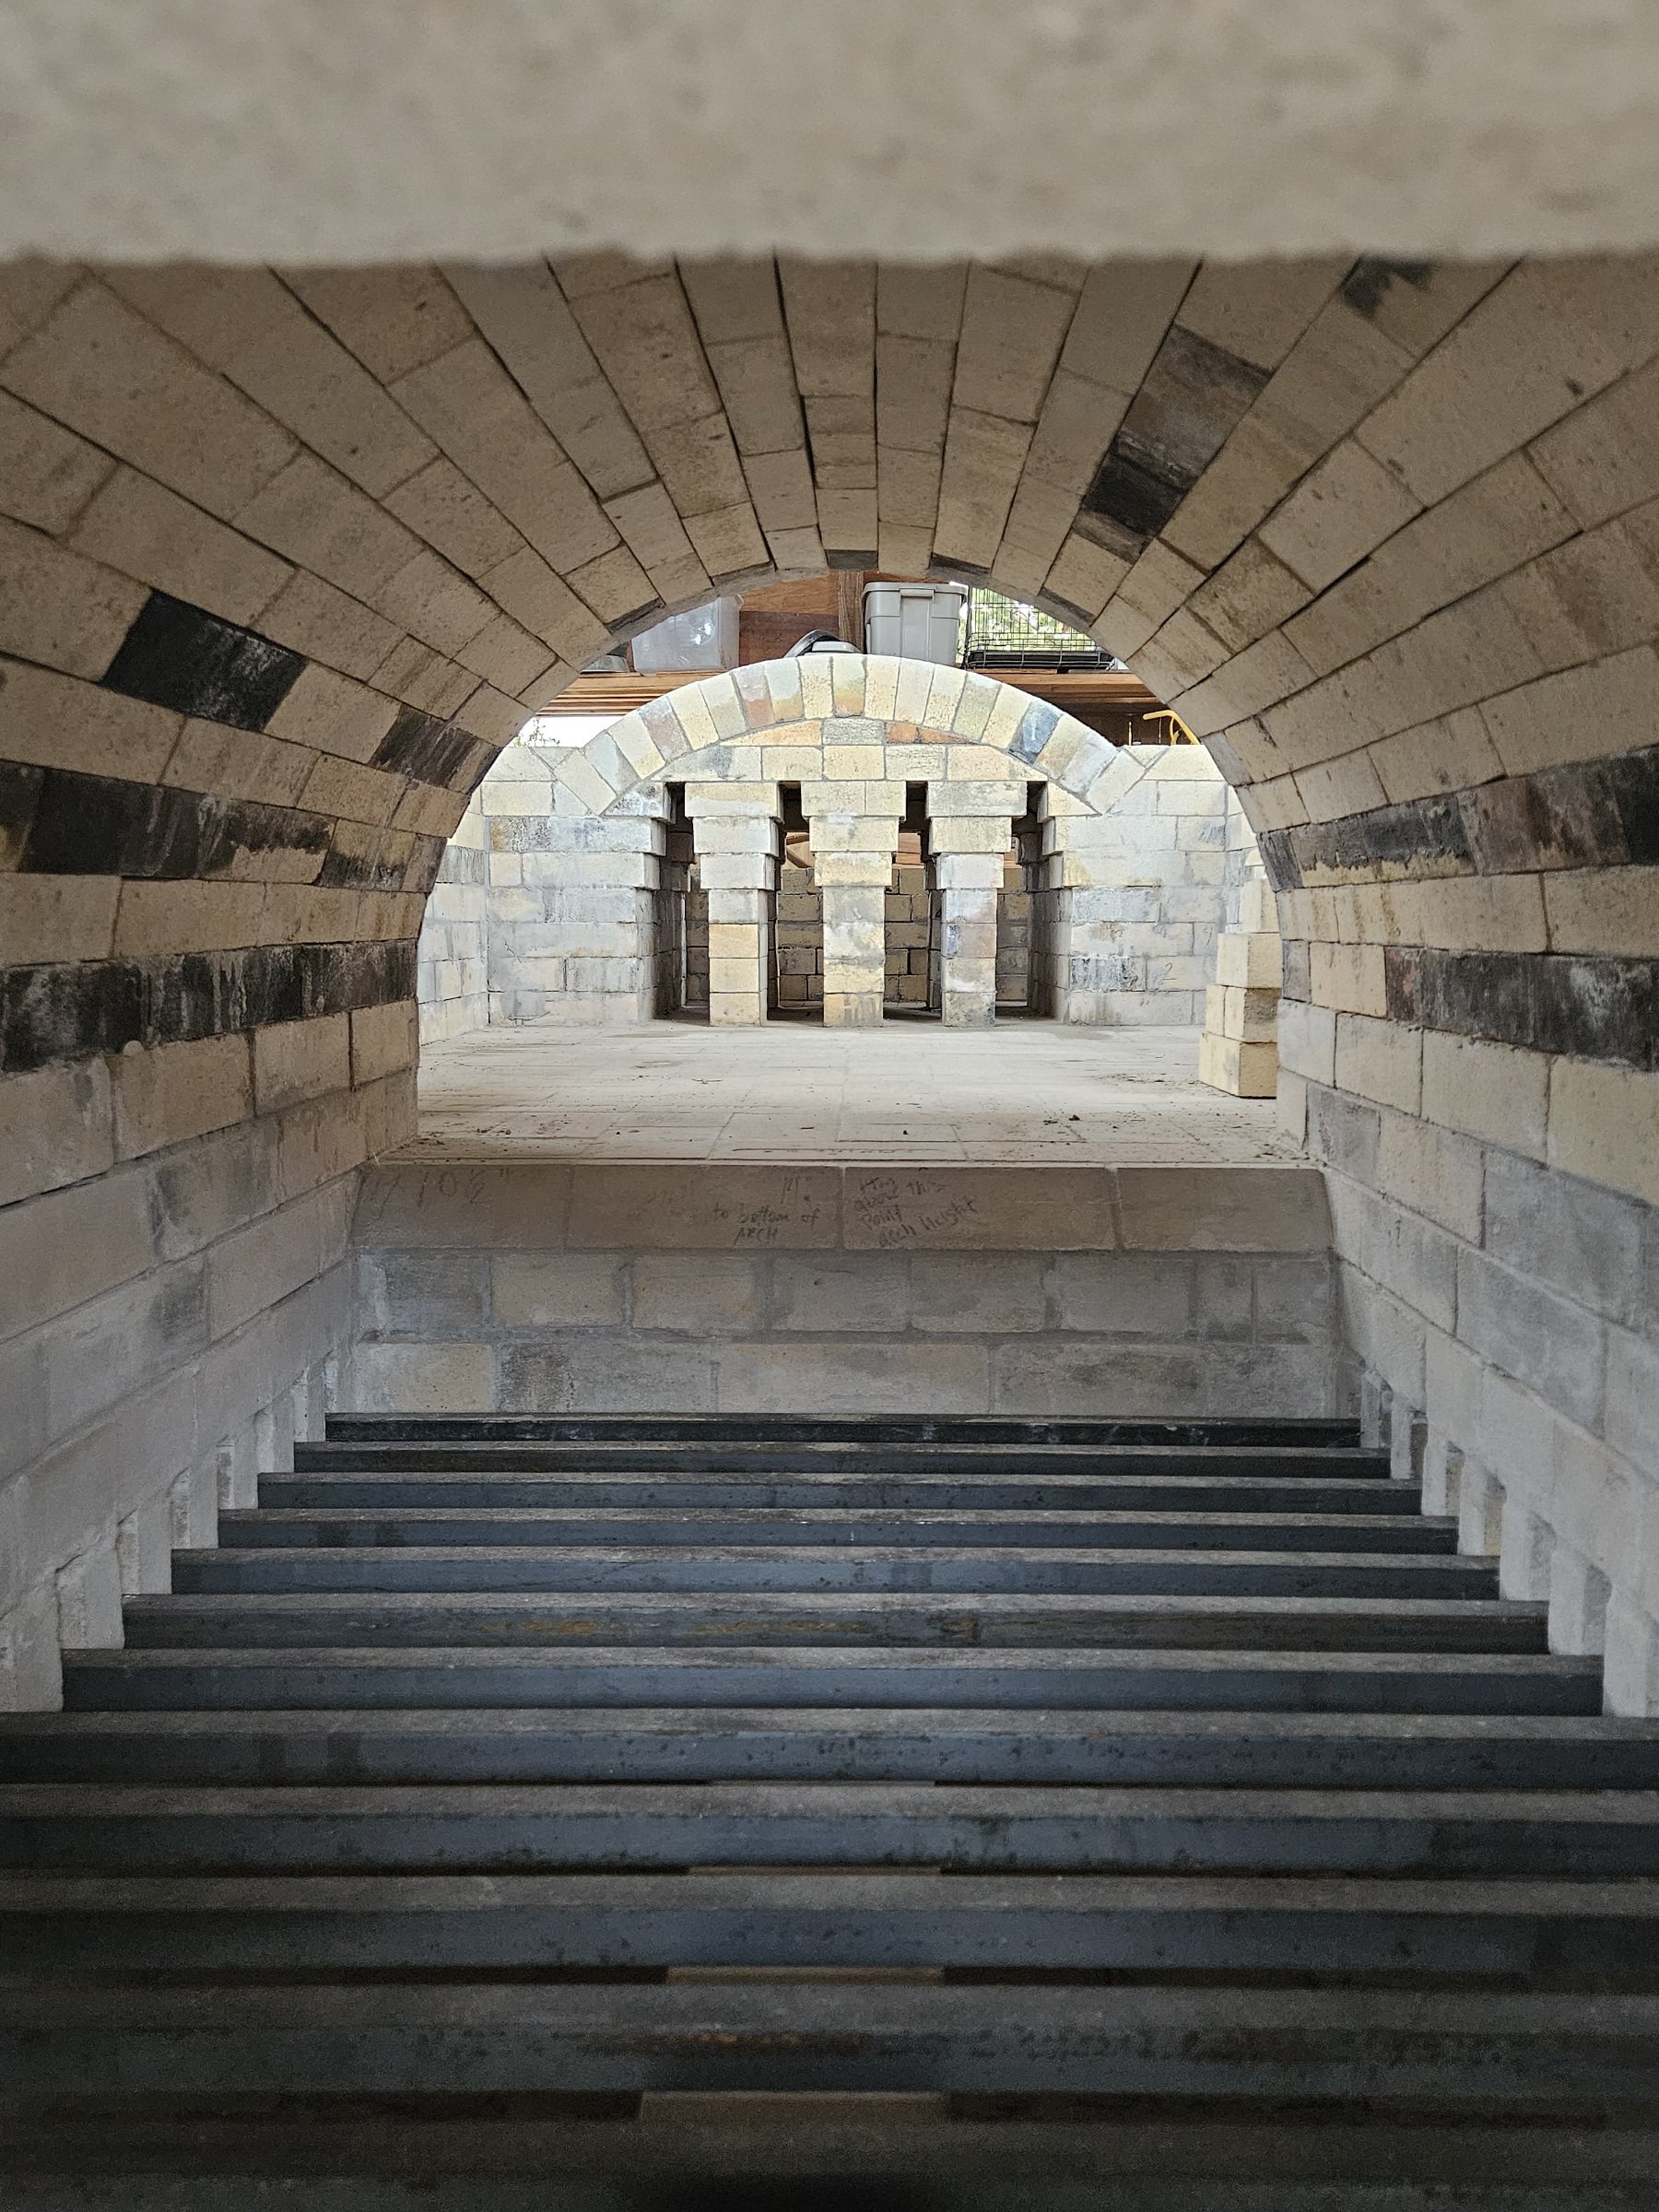
Looking through the stoke port, through the kiln chamber, into the exit flues. Corbelling the flues and then spanning them with a relieving arch results in a stronger base for the chimney, such that if the exit flues ever need to be modified, they are not load bearing and can be removed.
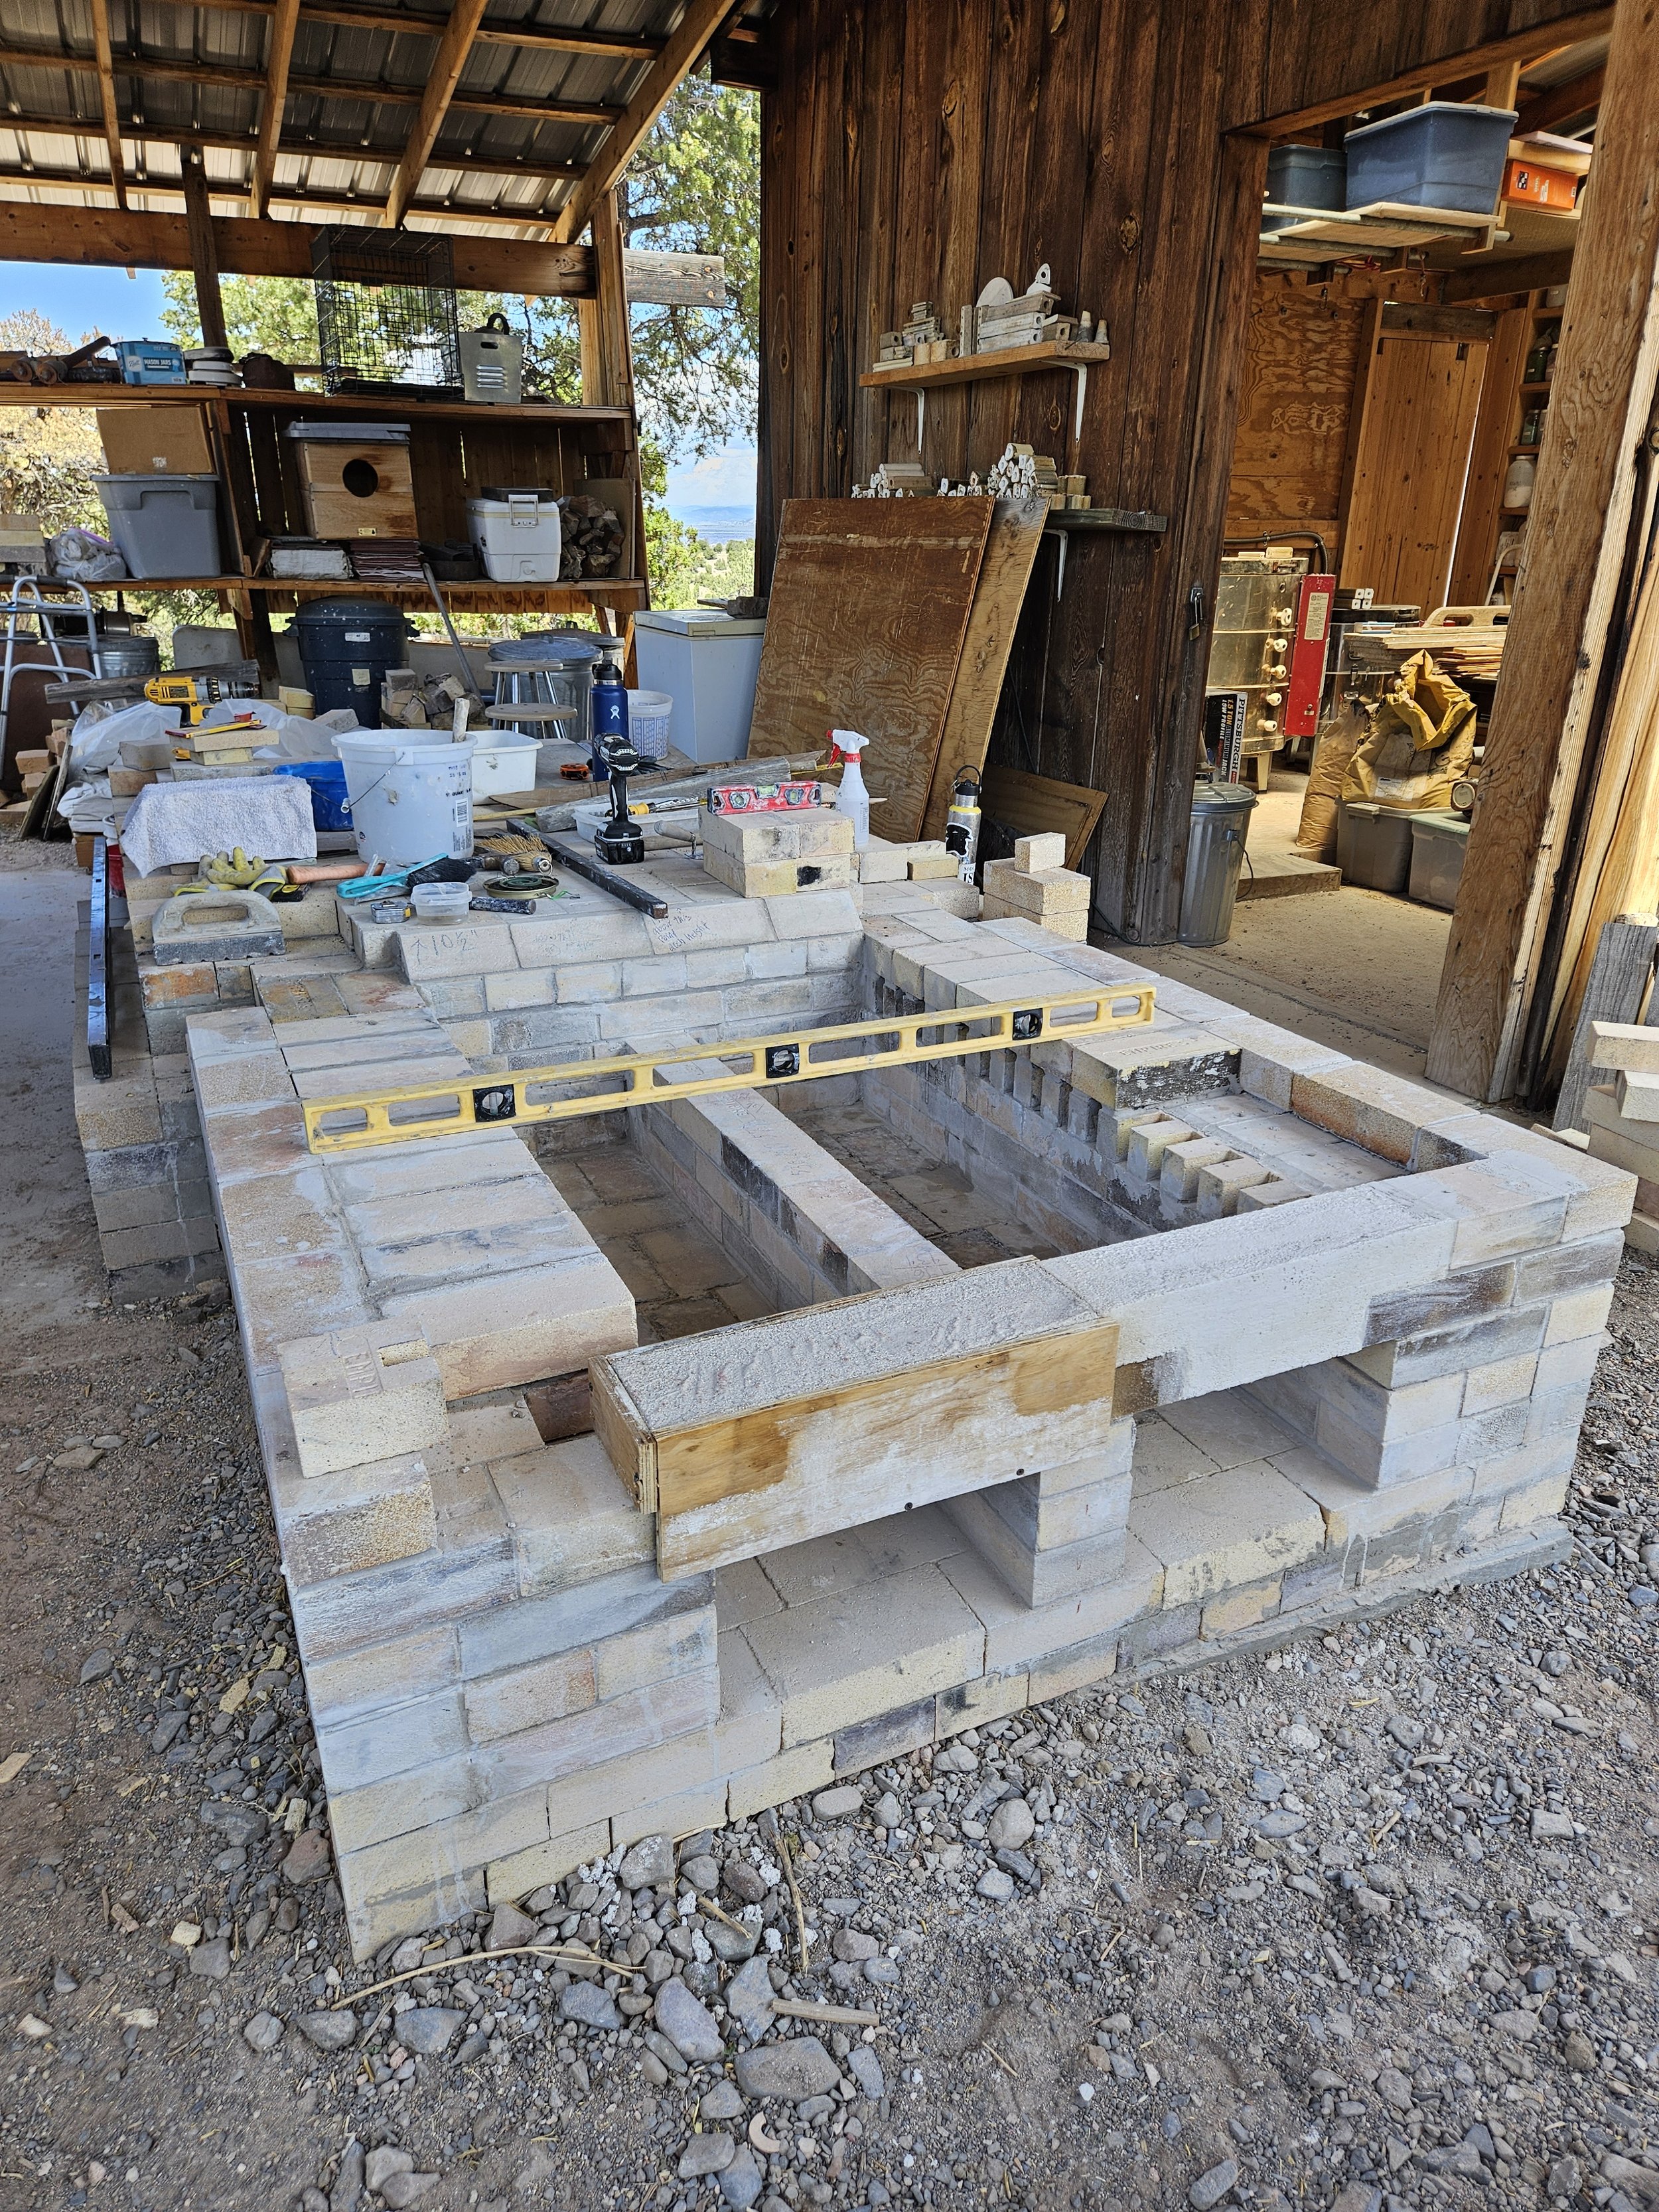
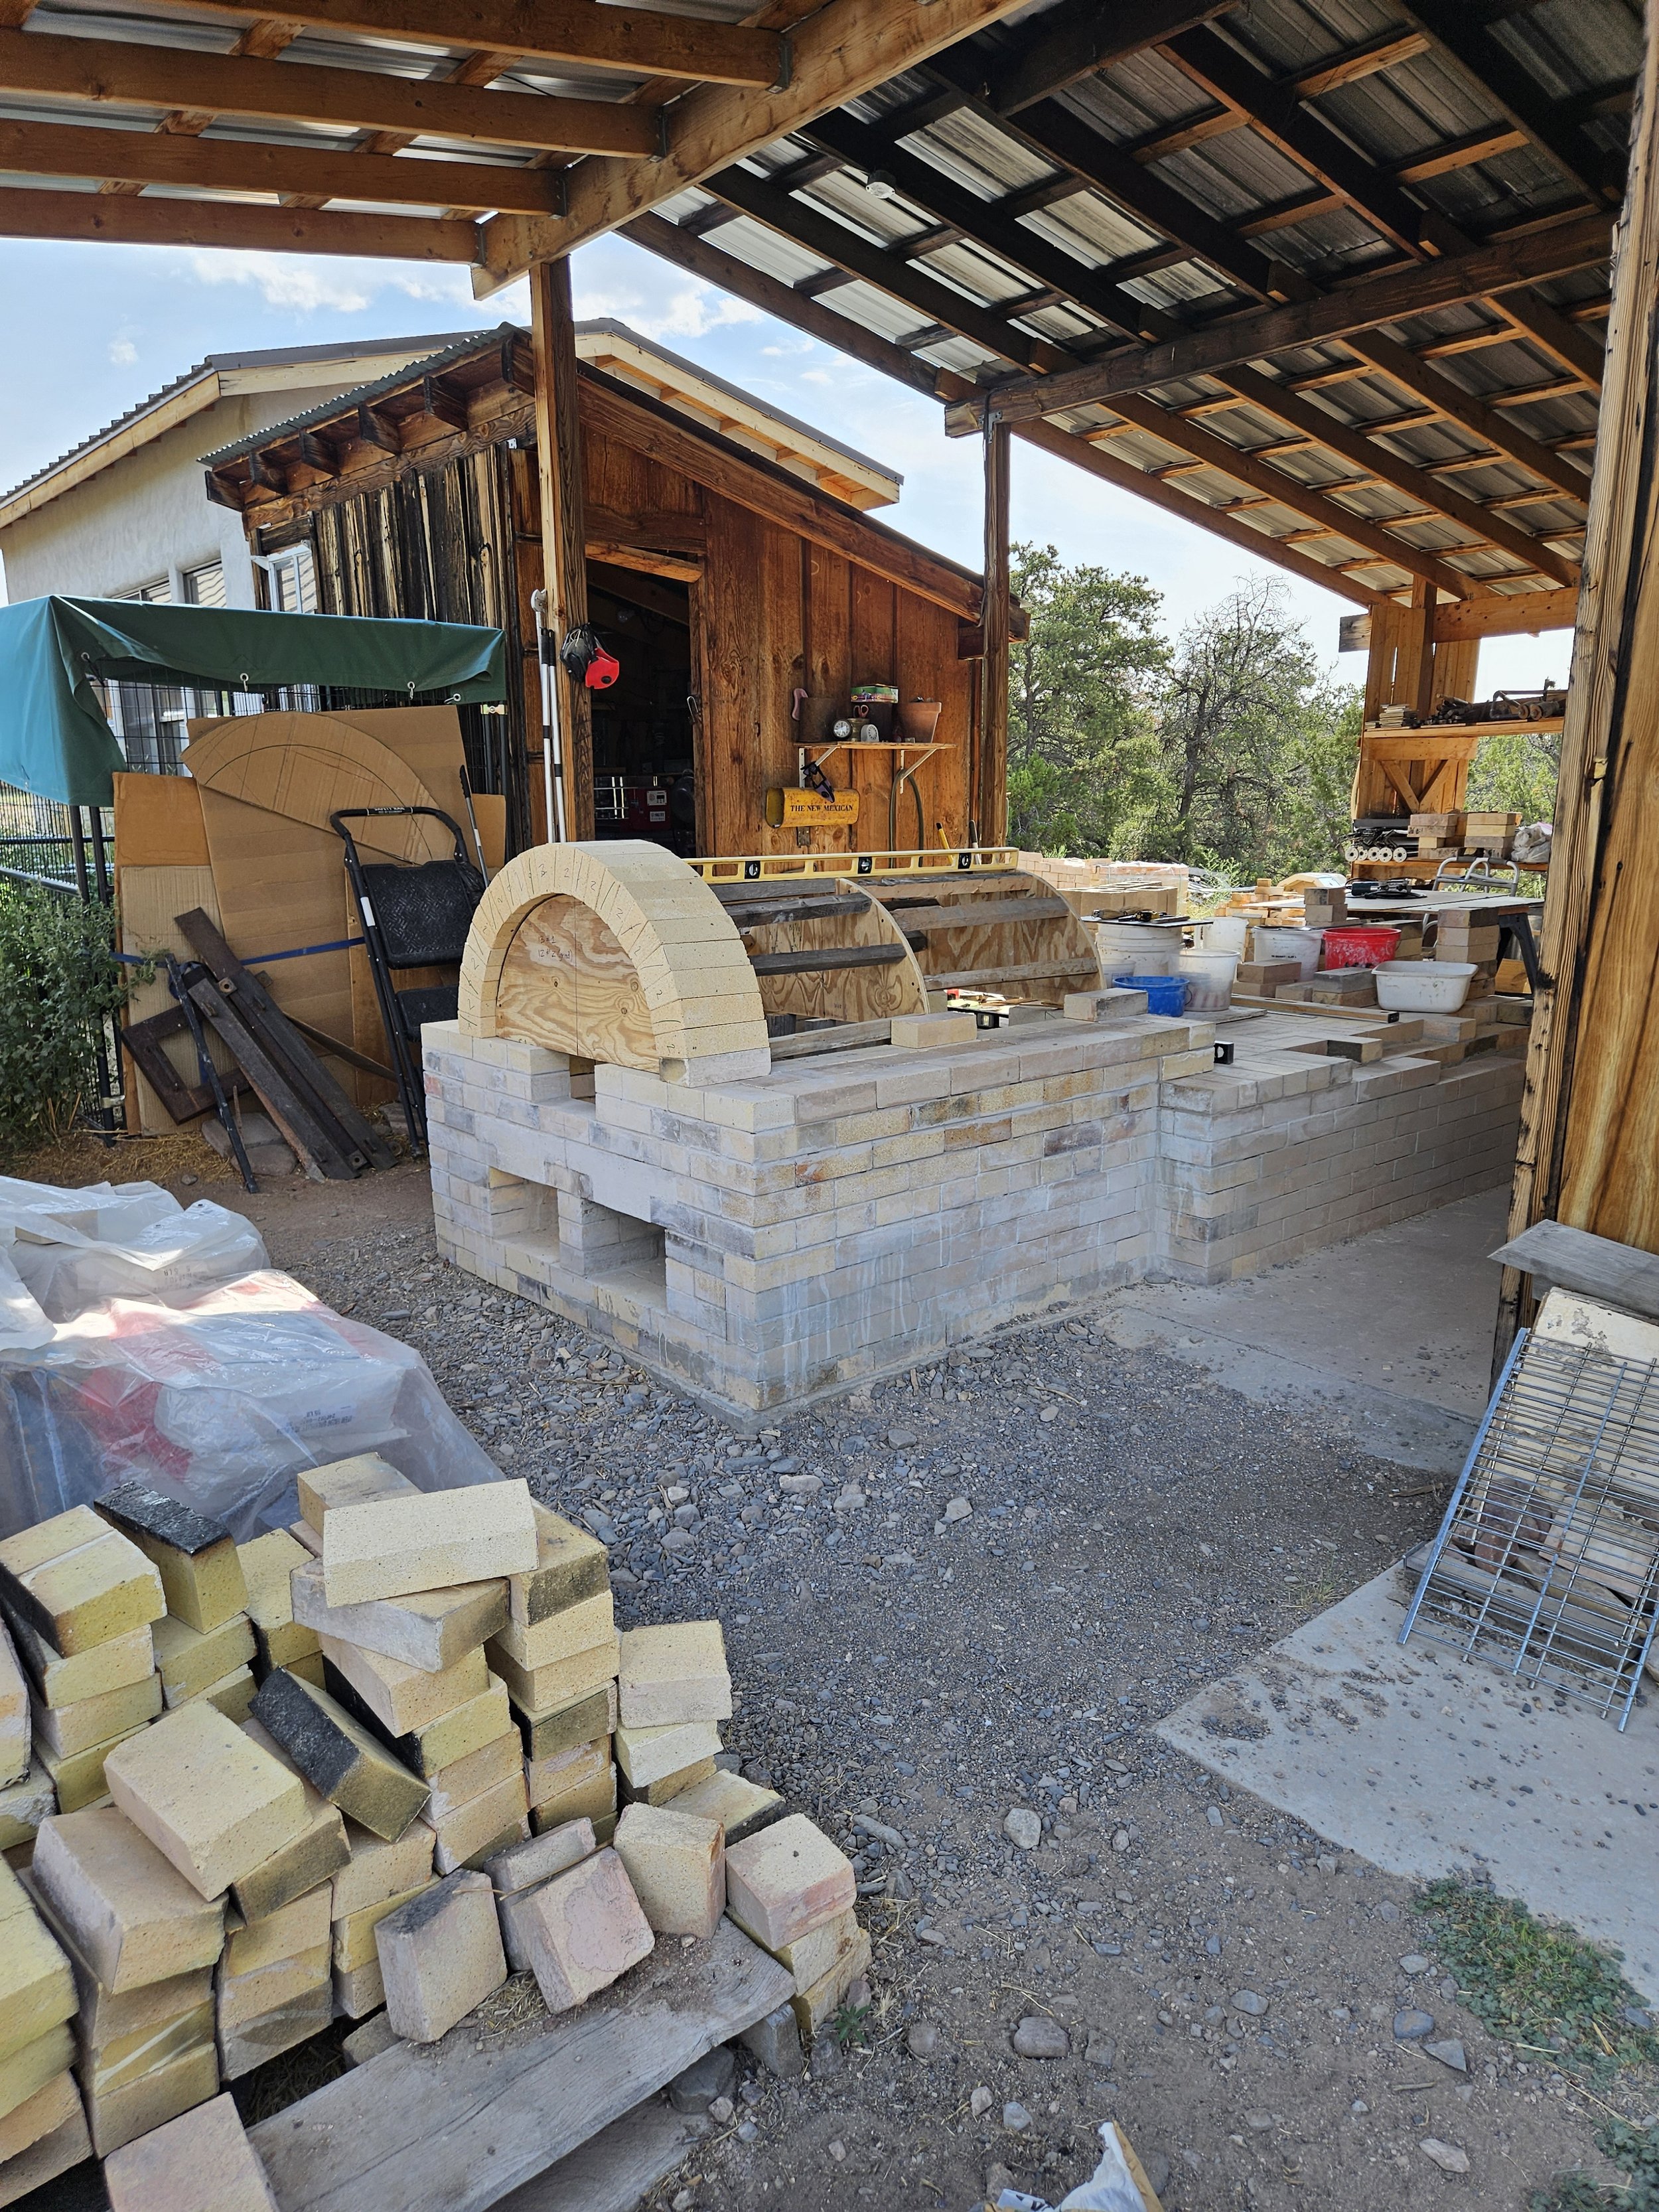
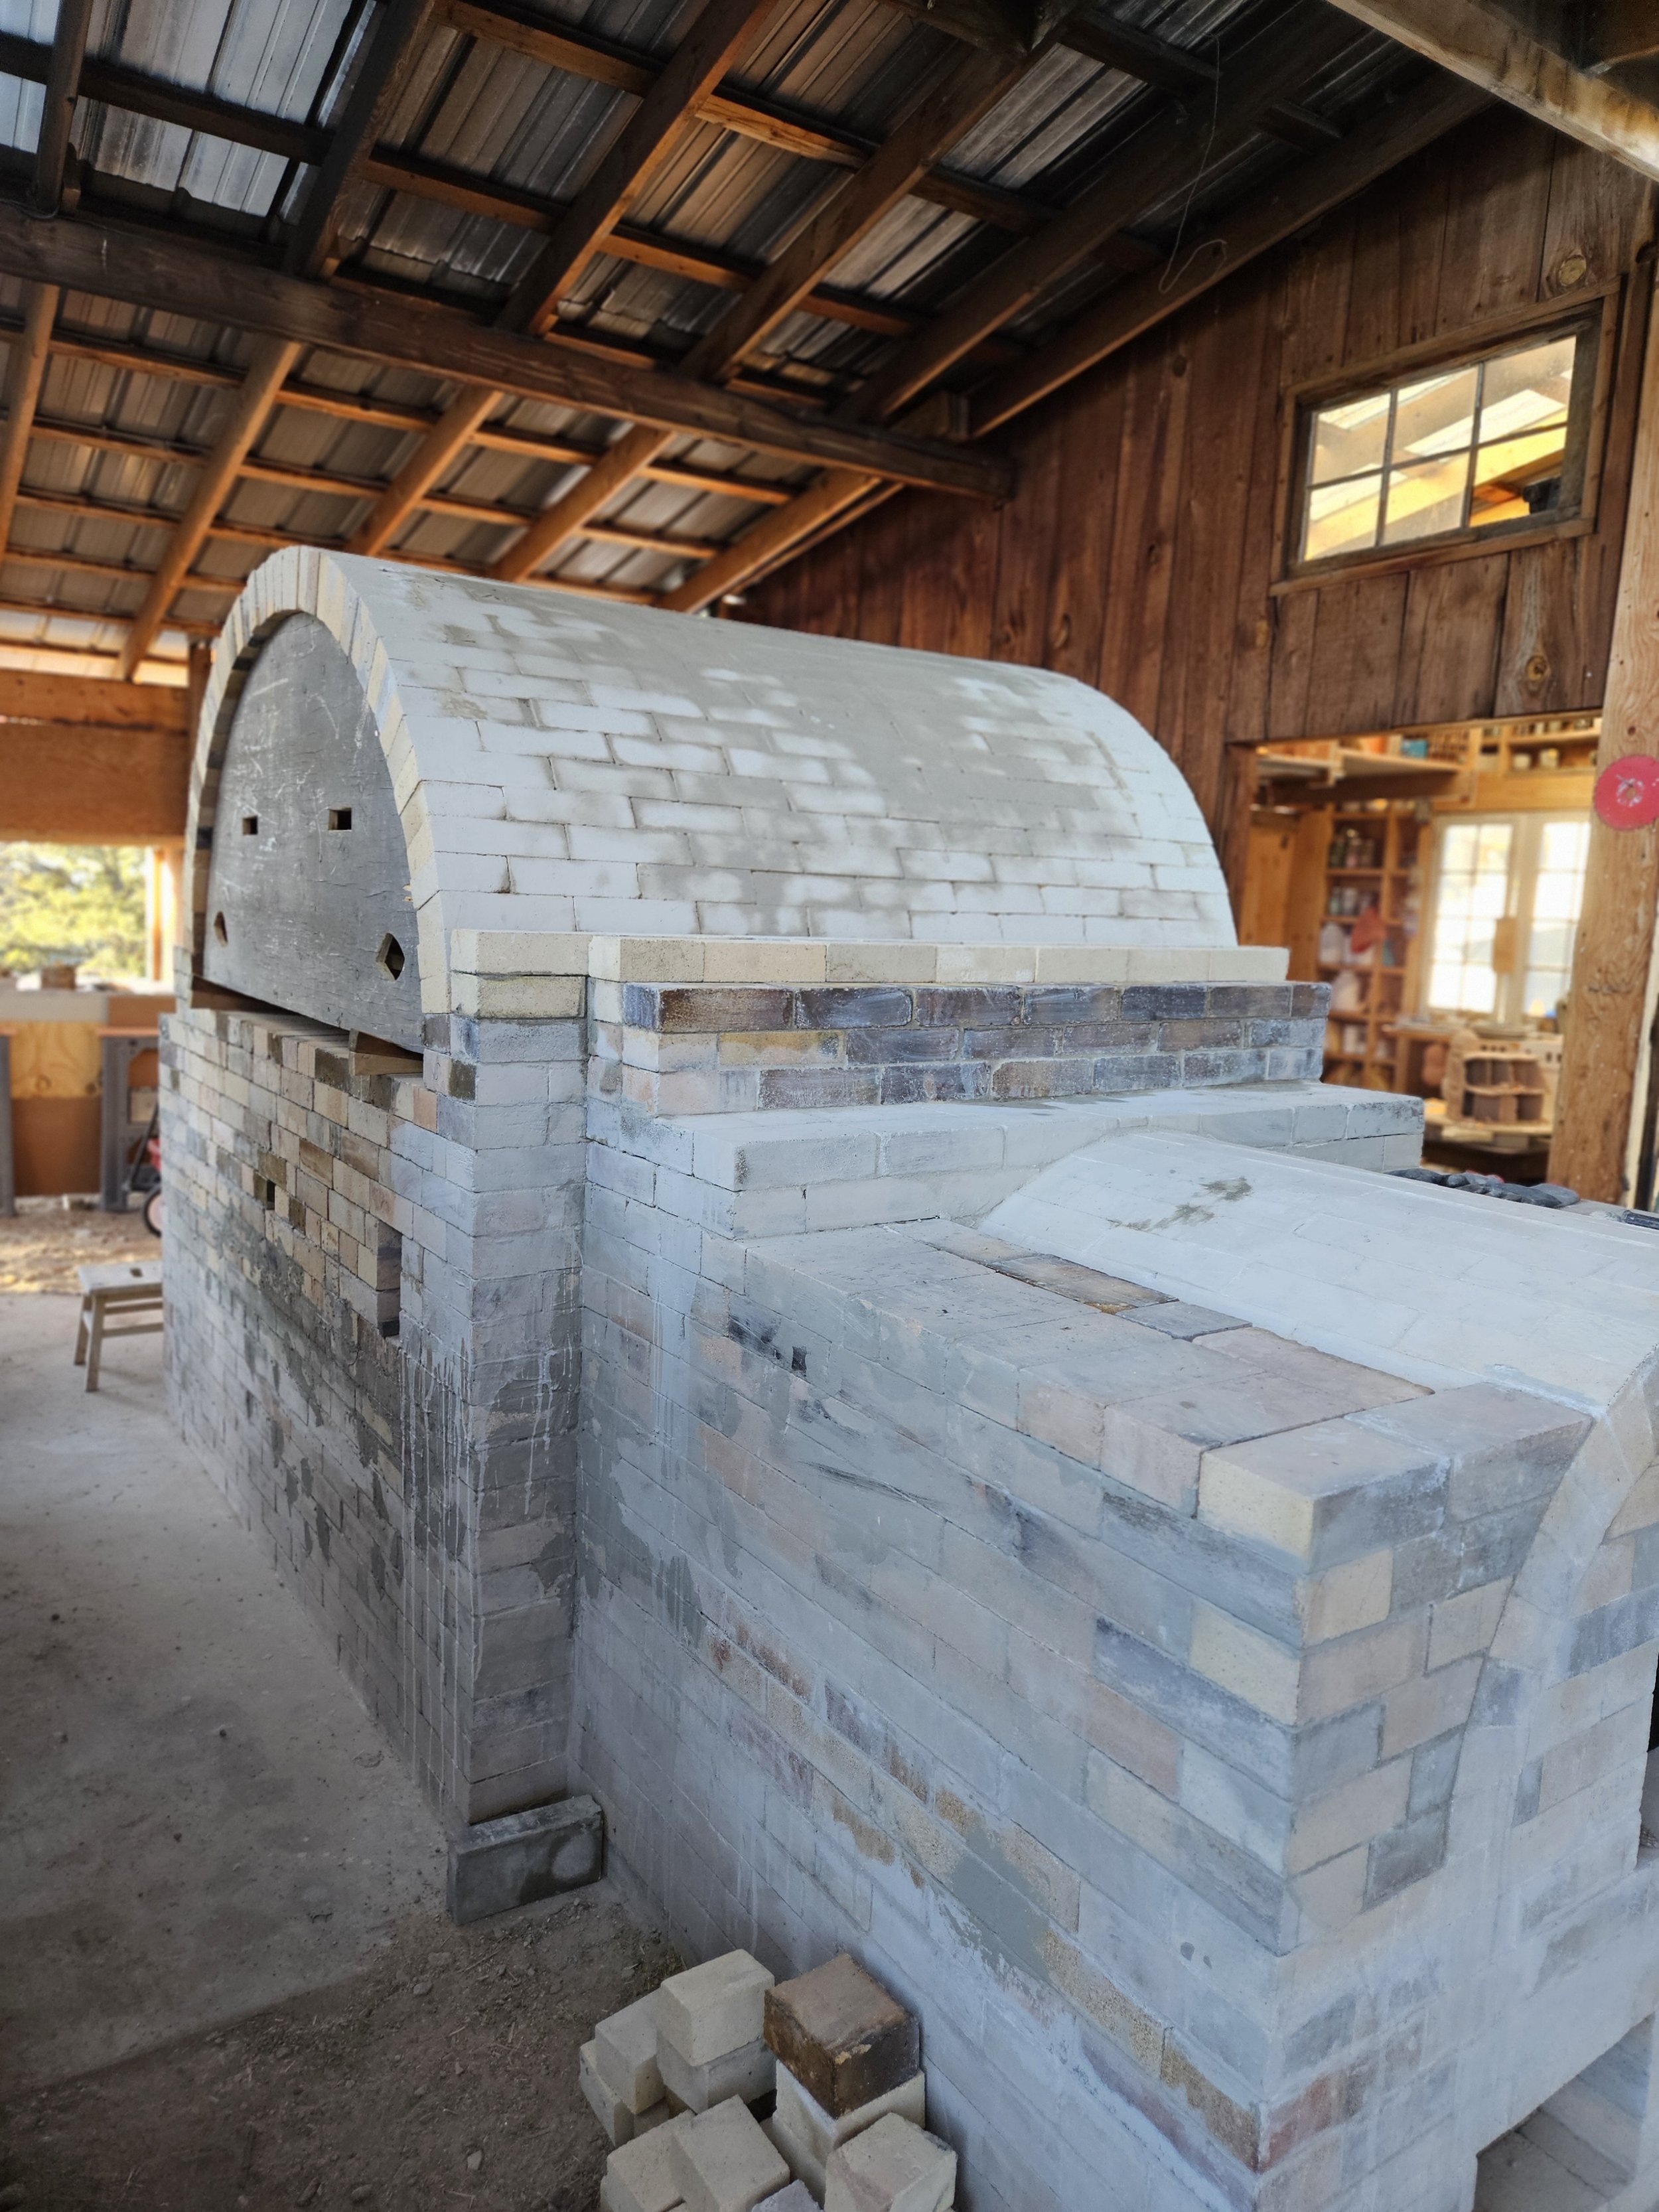
Continuing to build up the kiln chamber walls now that the firebox arch (left) and the collection box arch (right) are complete. (-photo by Tori)
Long view of the firebox with the exit flues leading to the collection box.

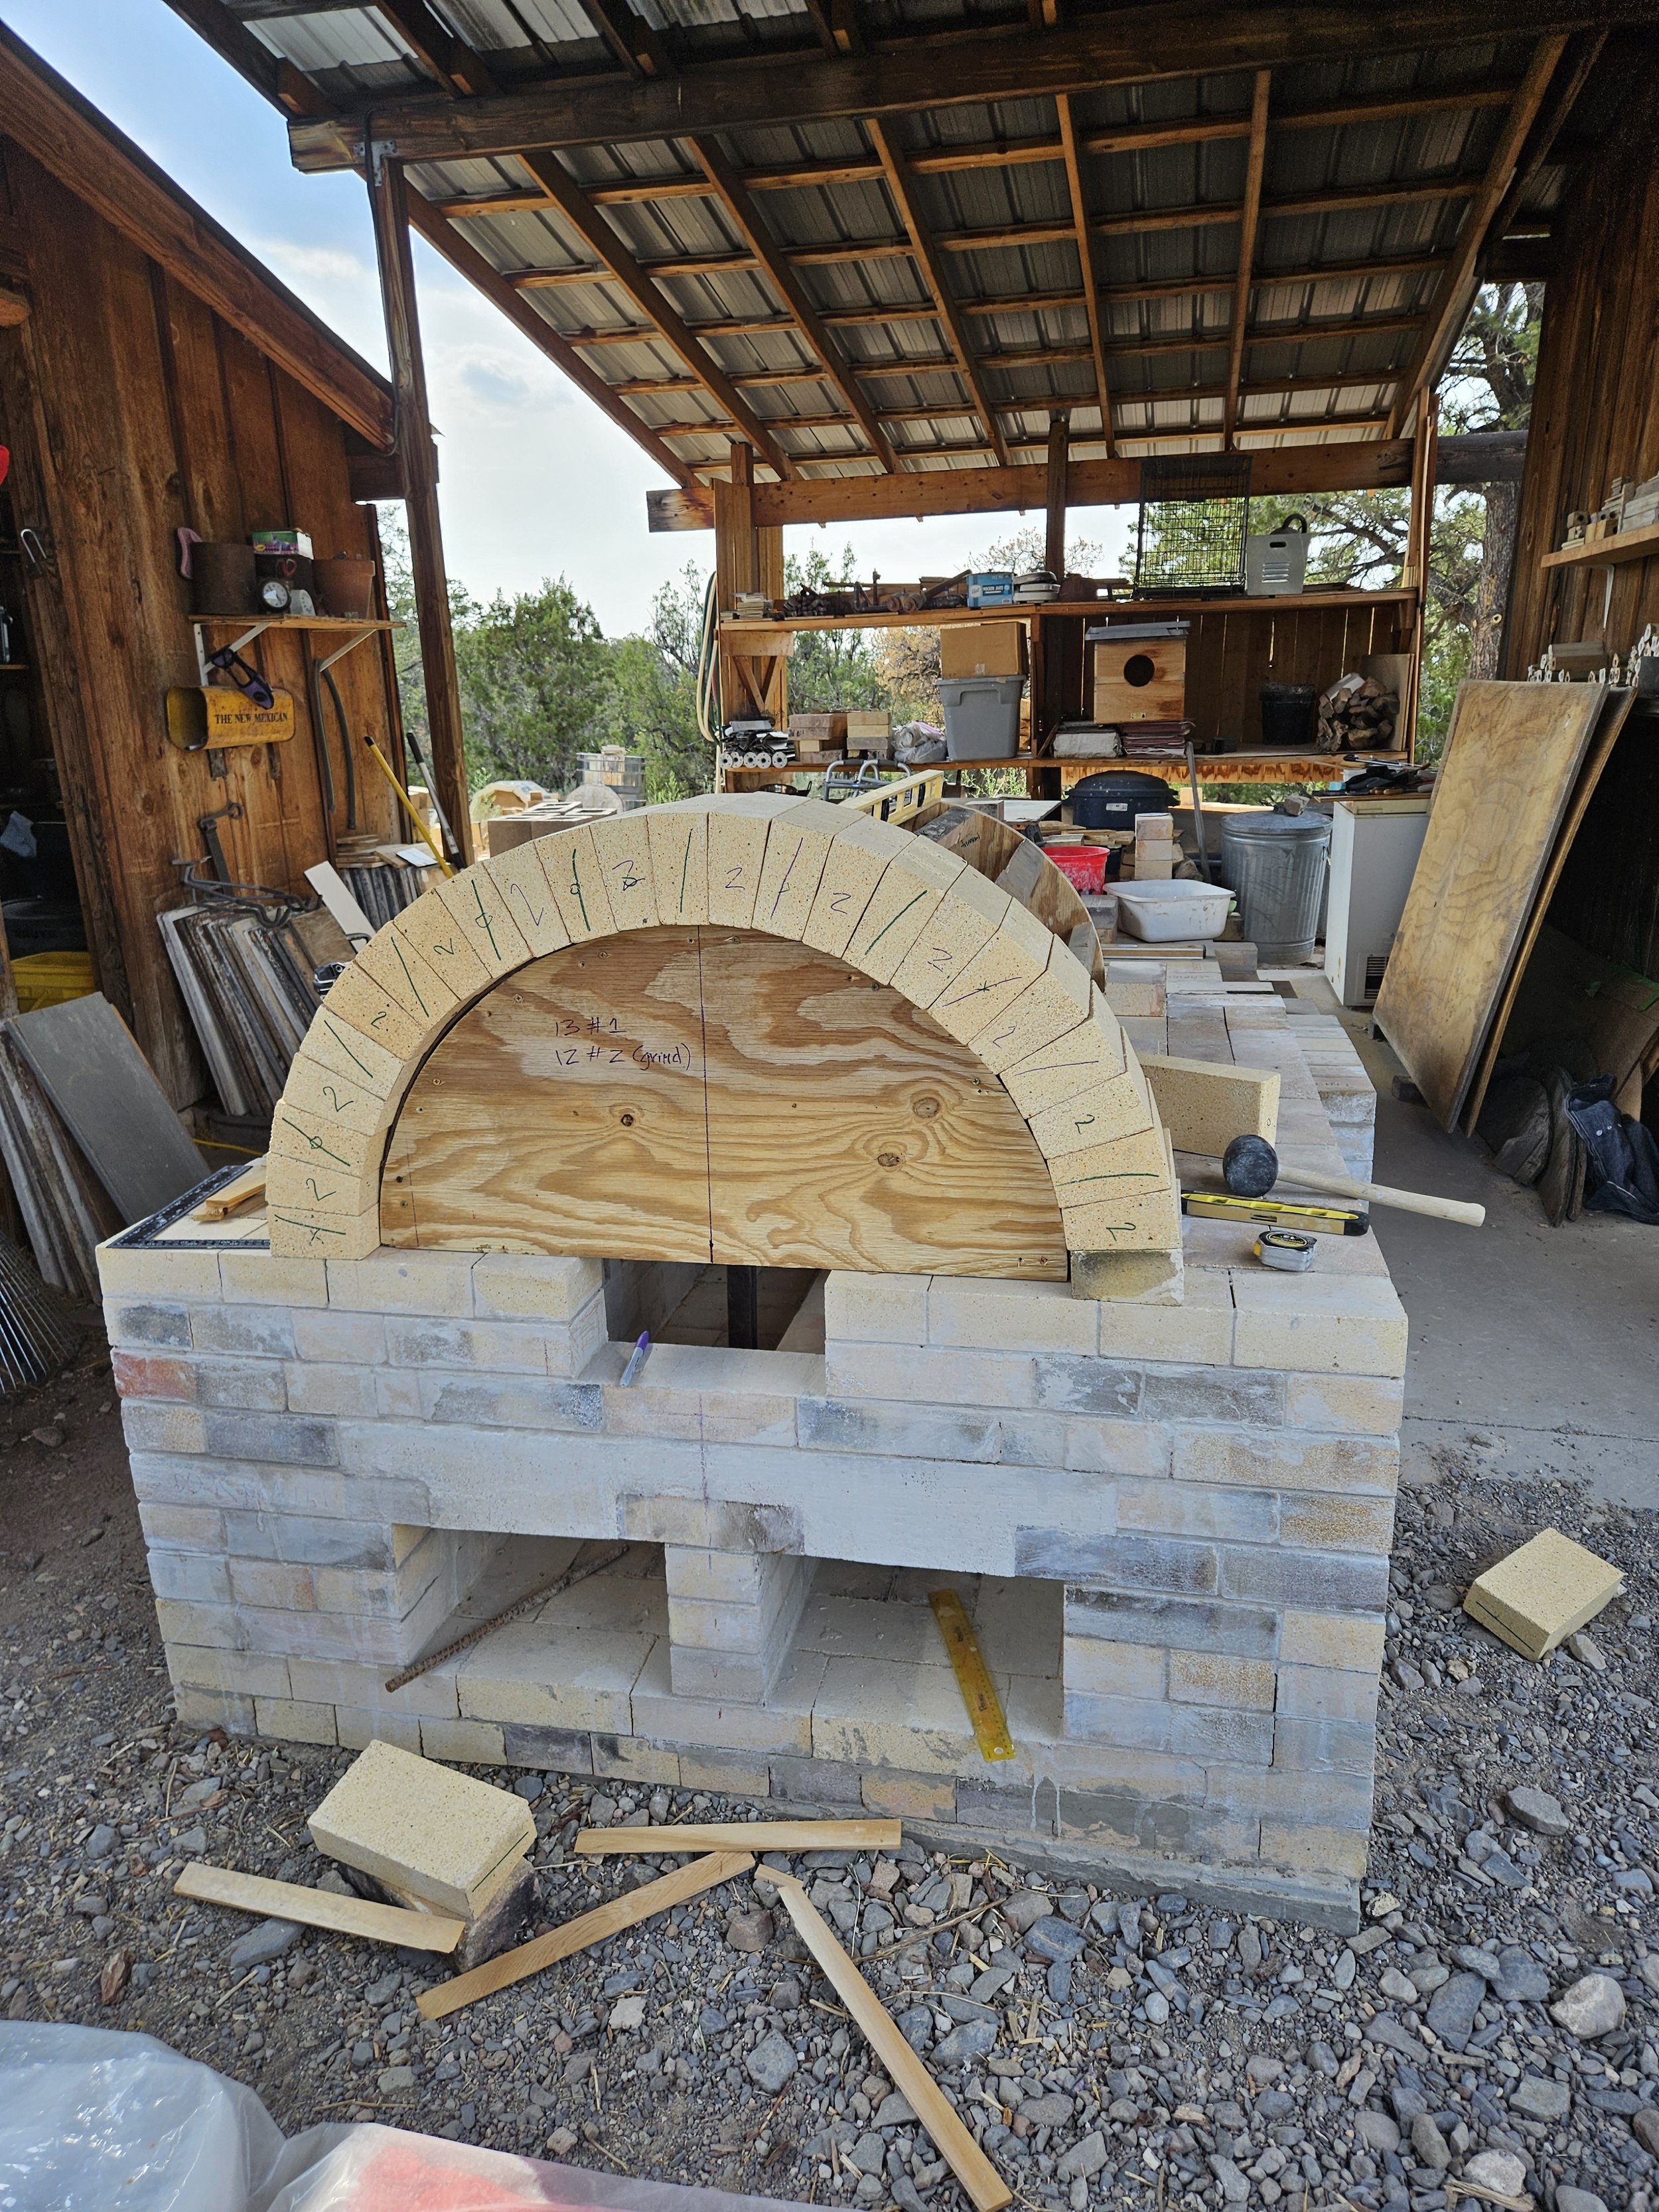
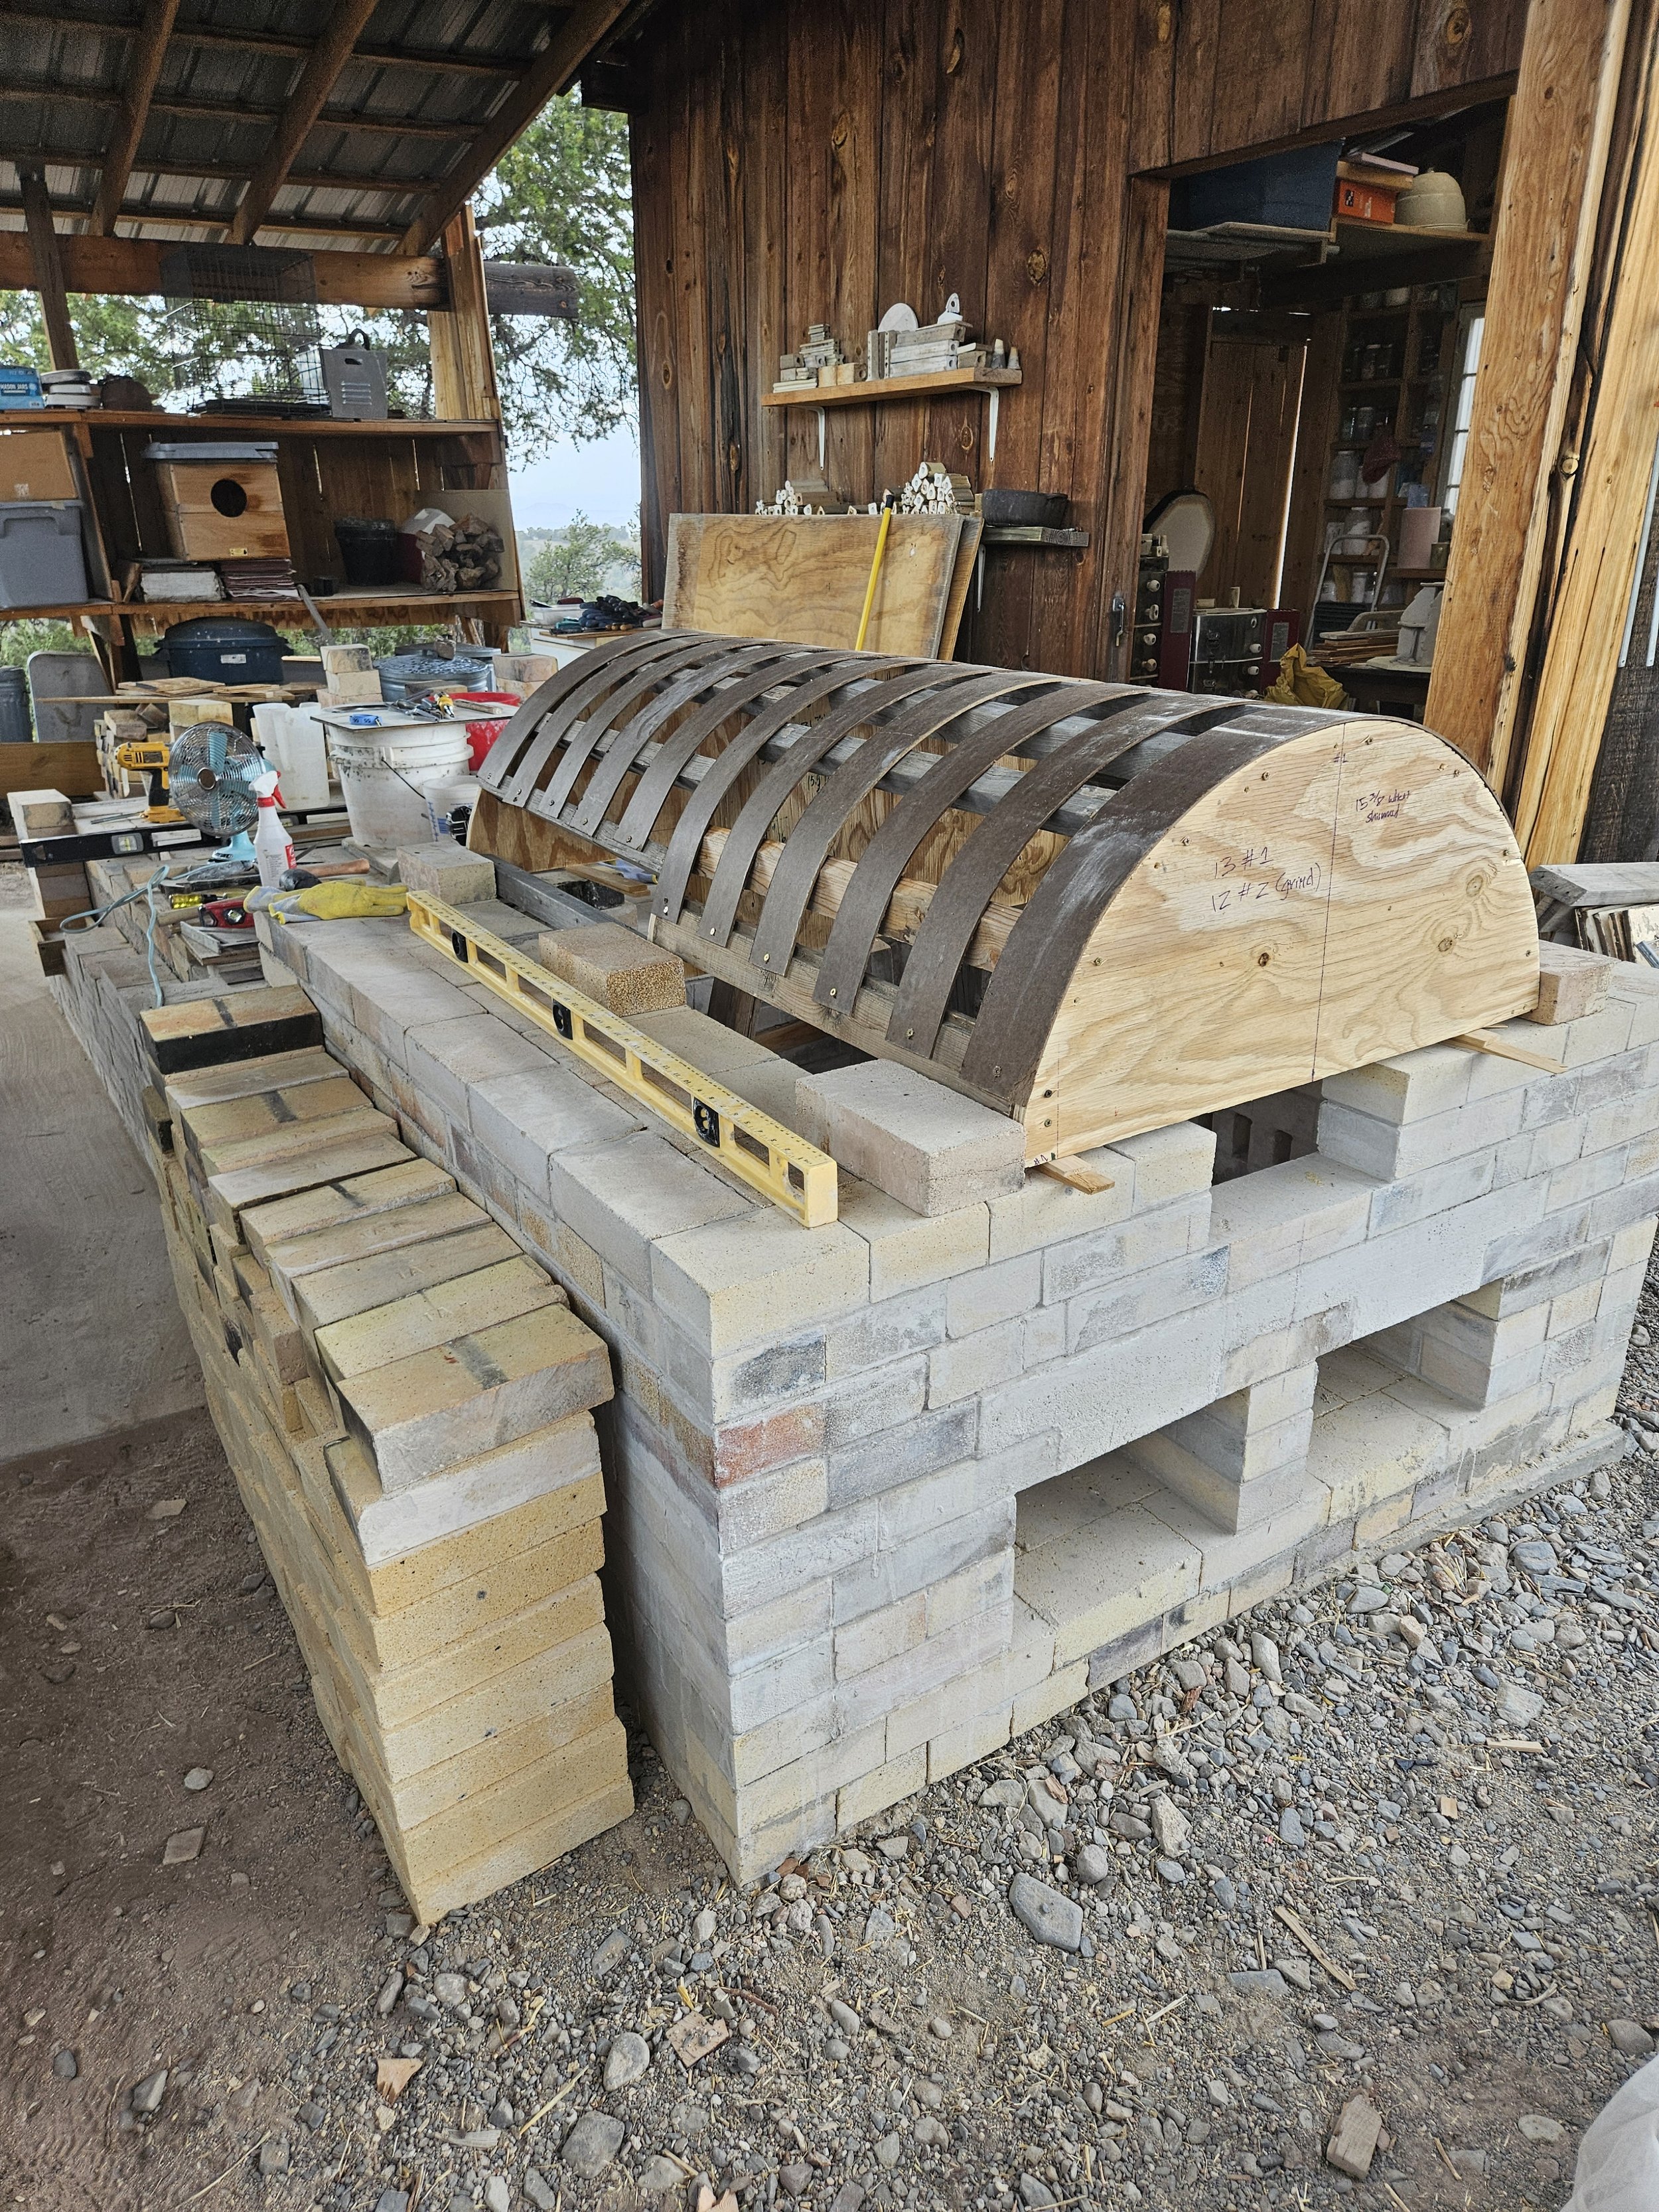
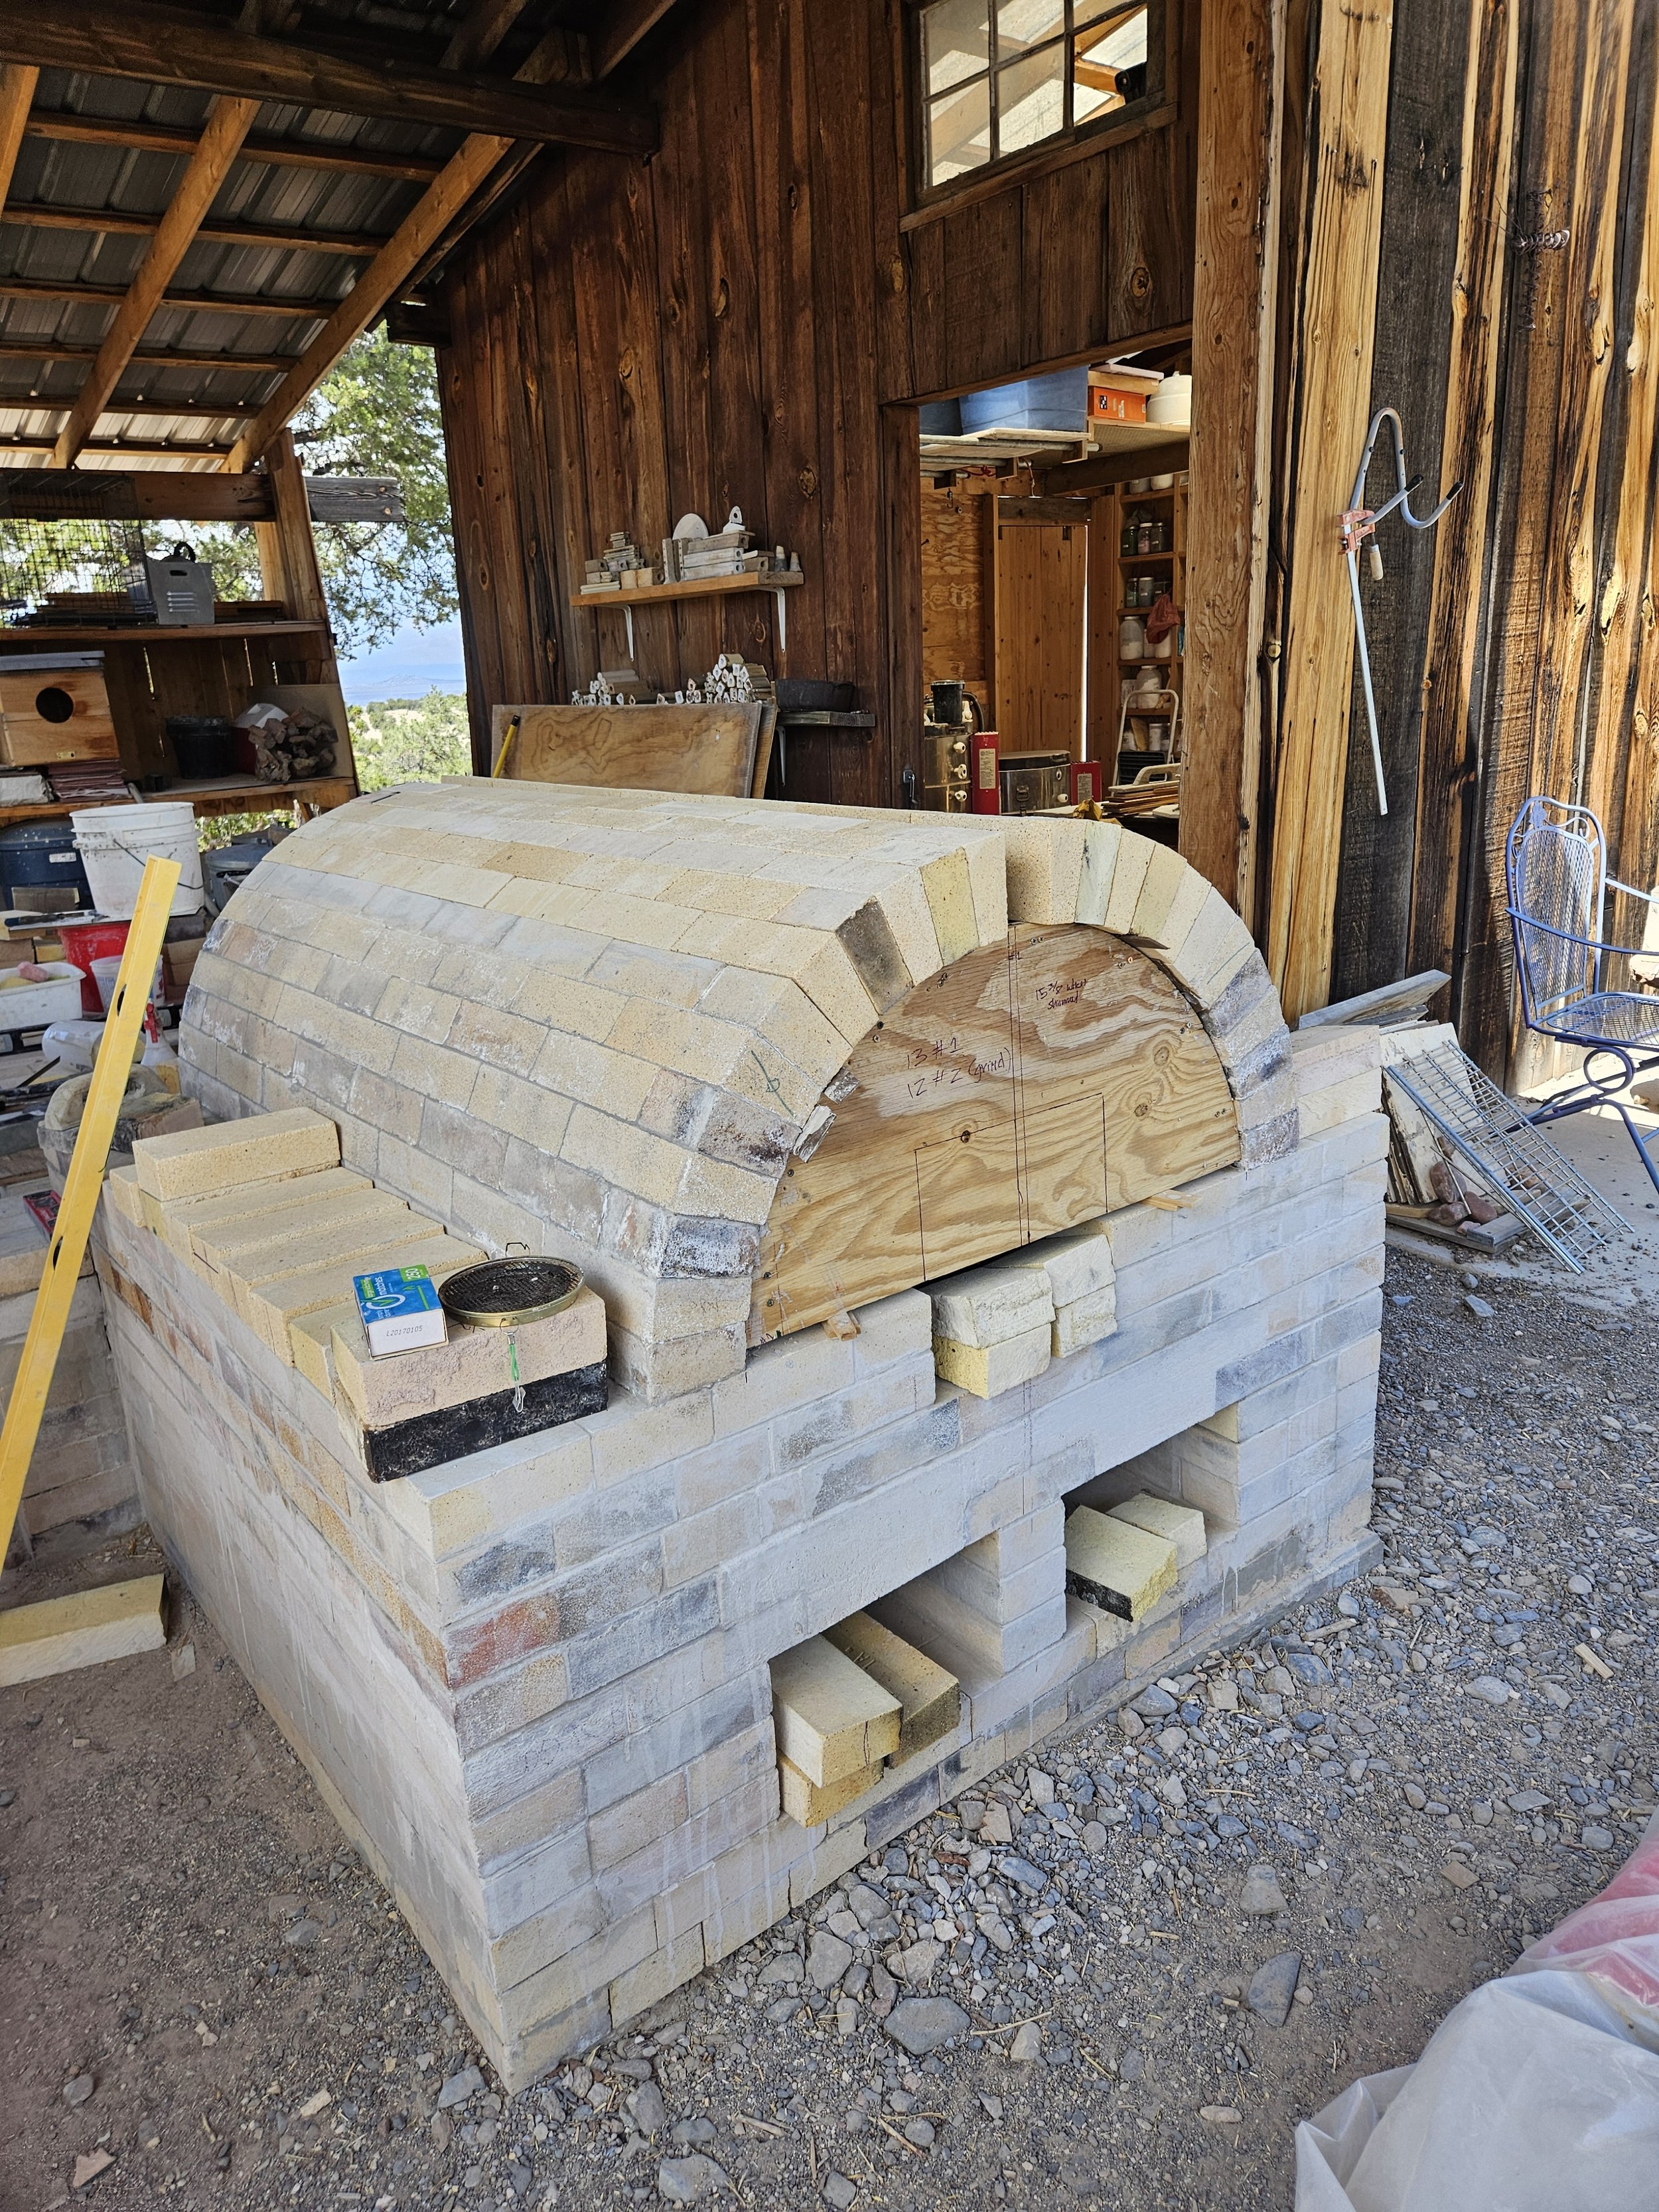
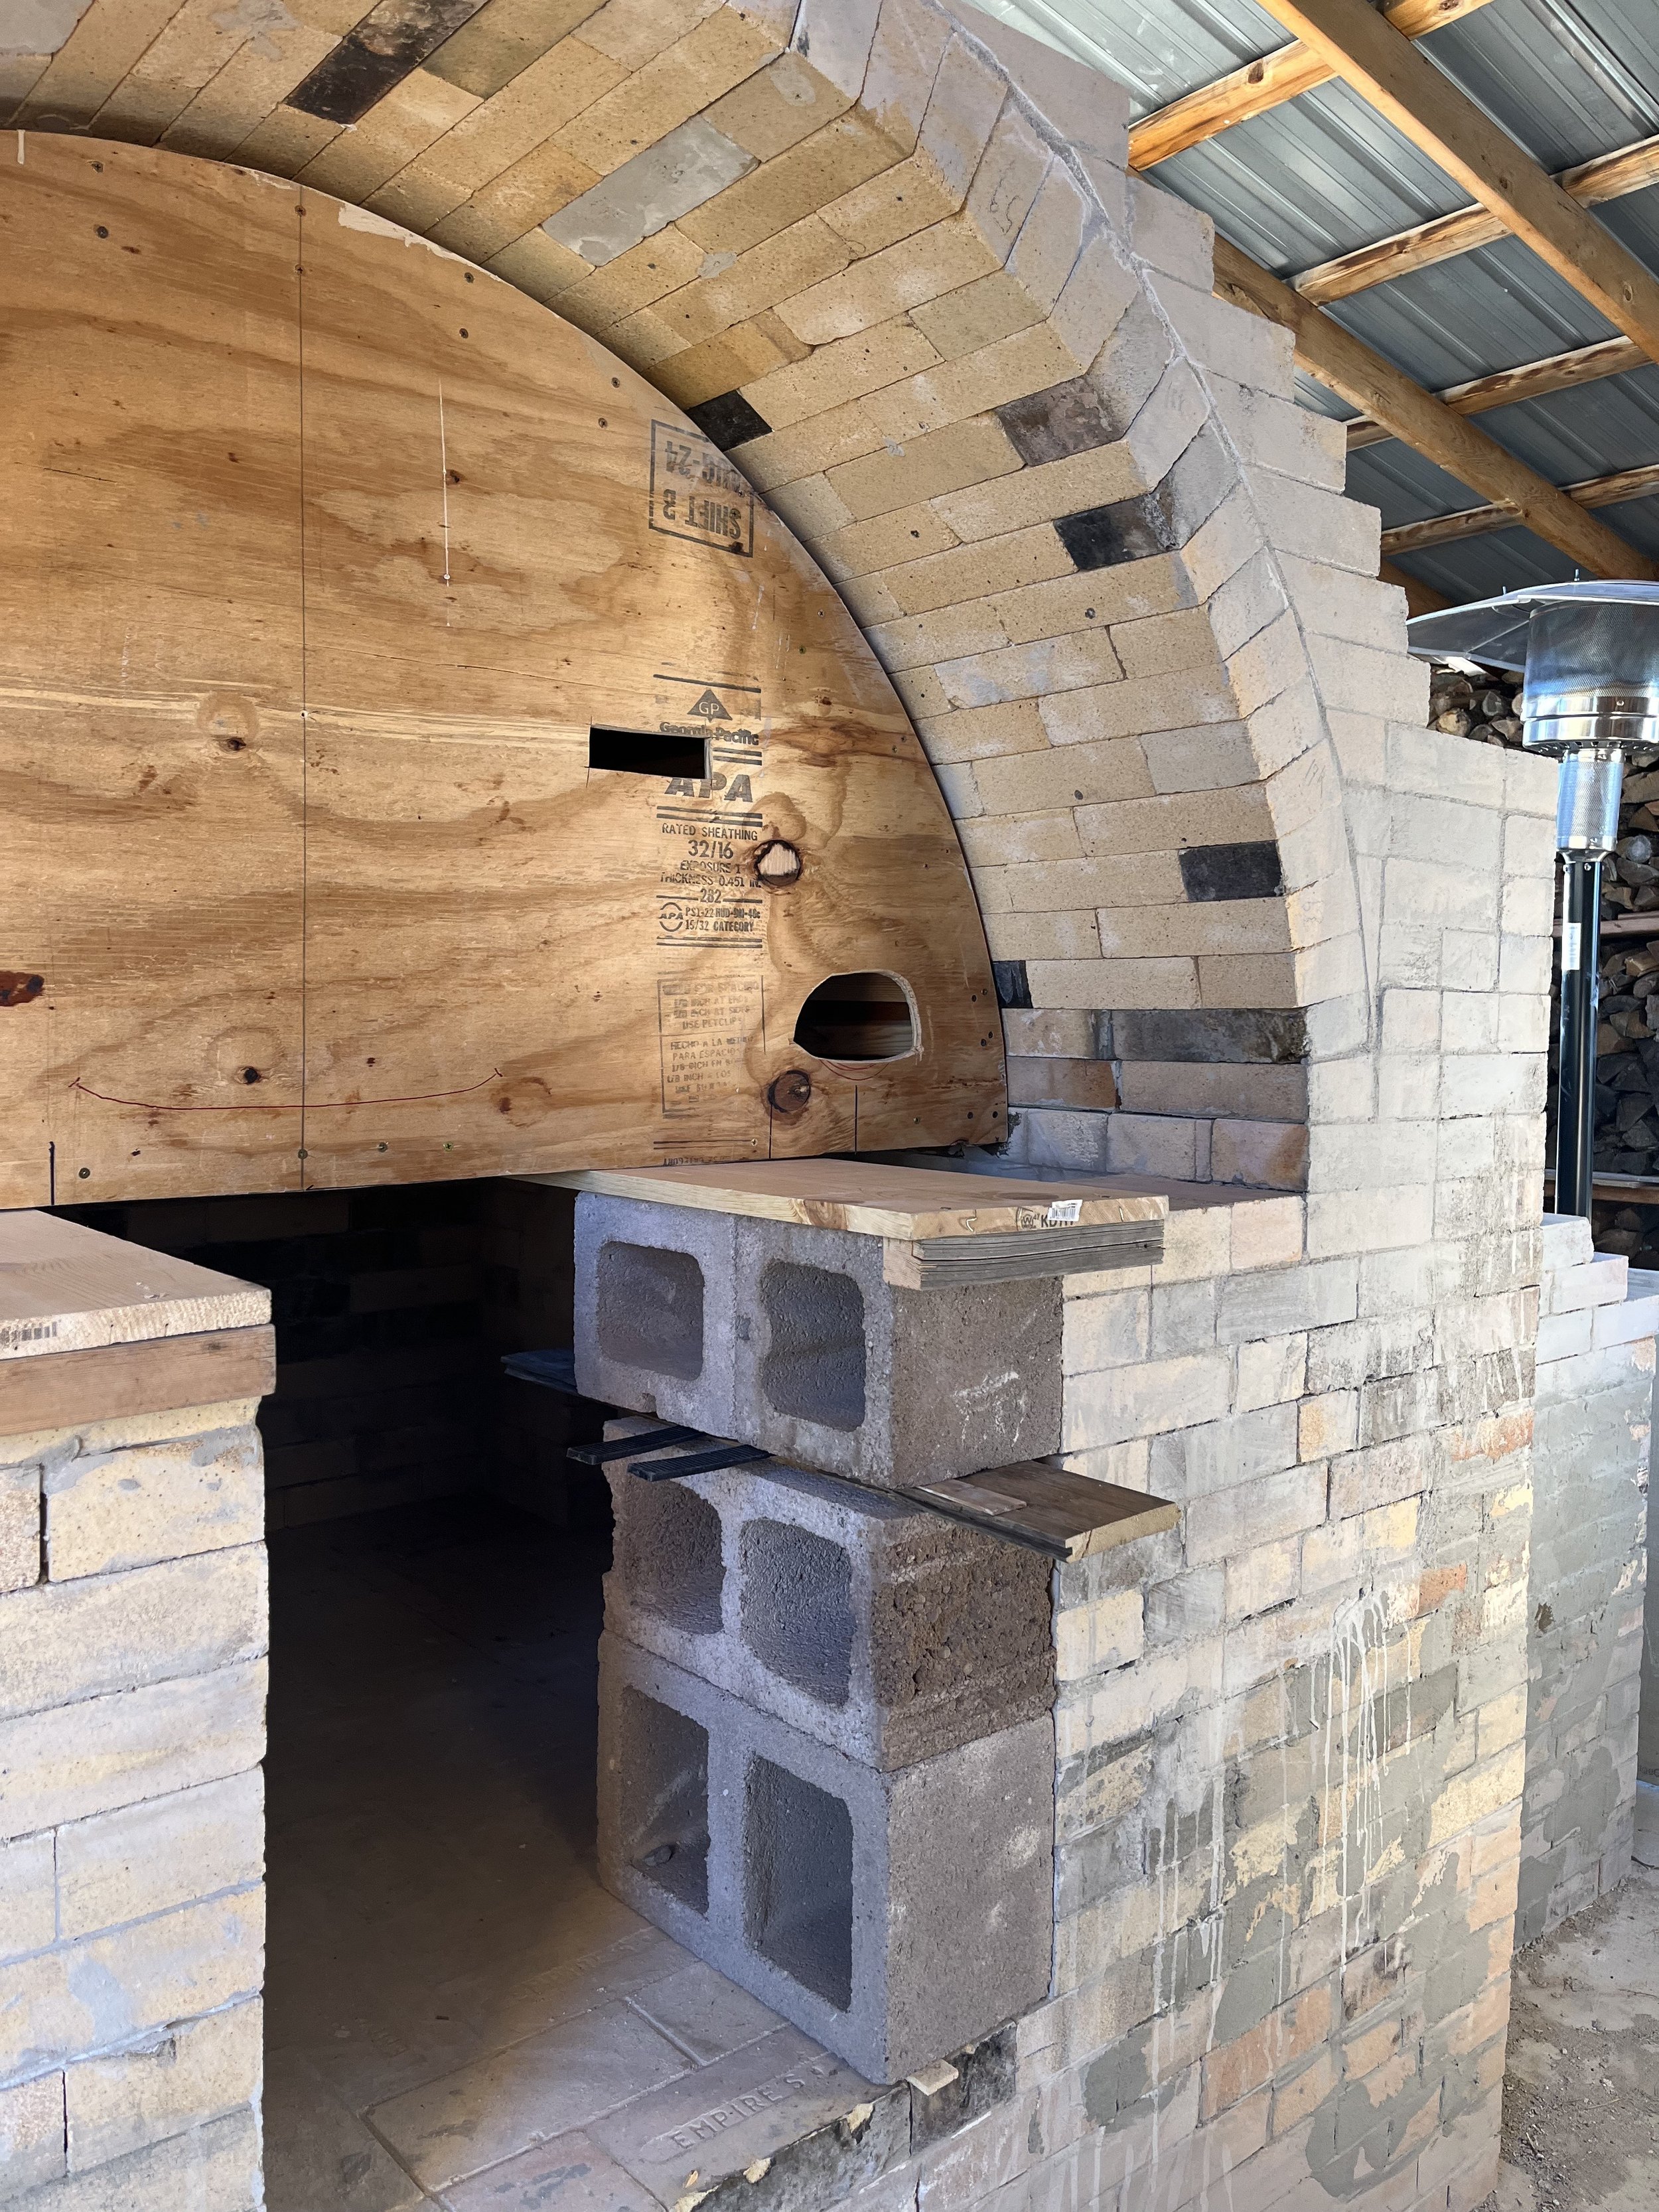
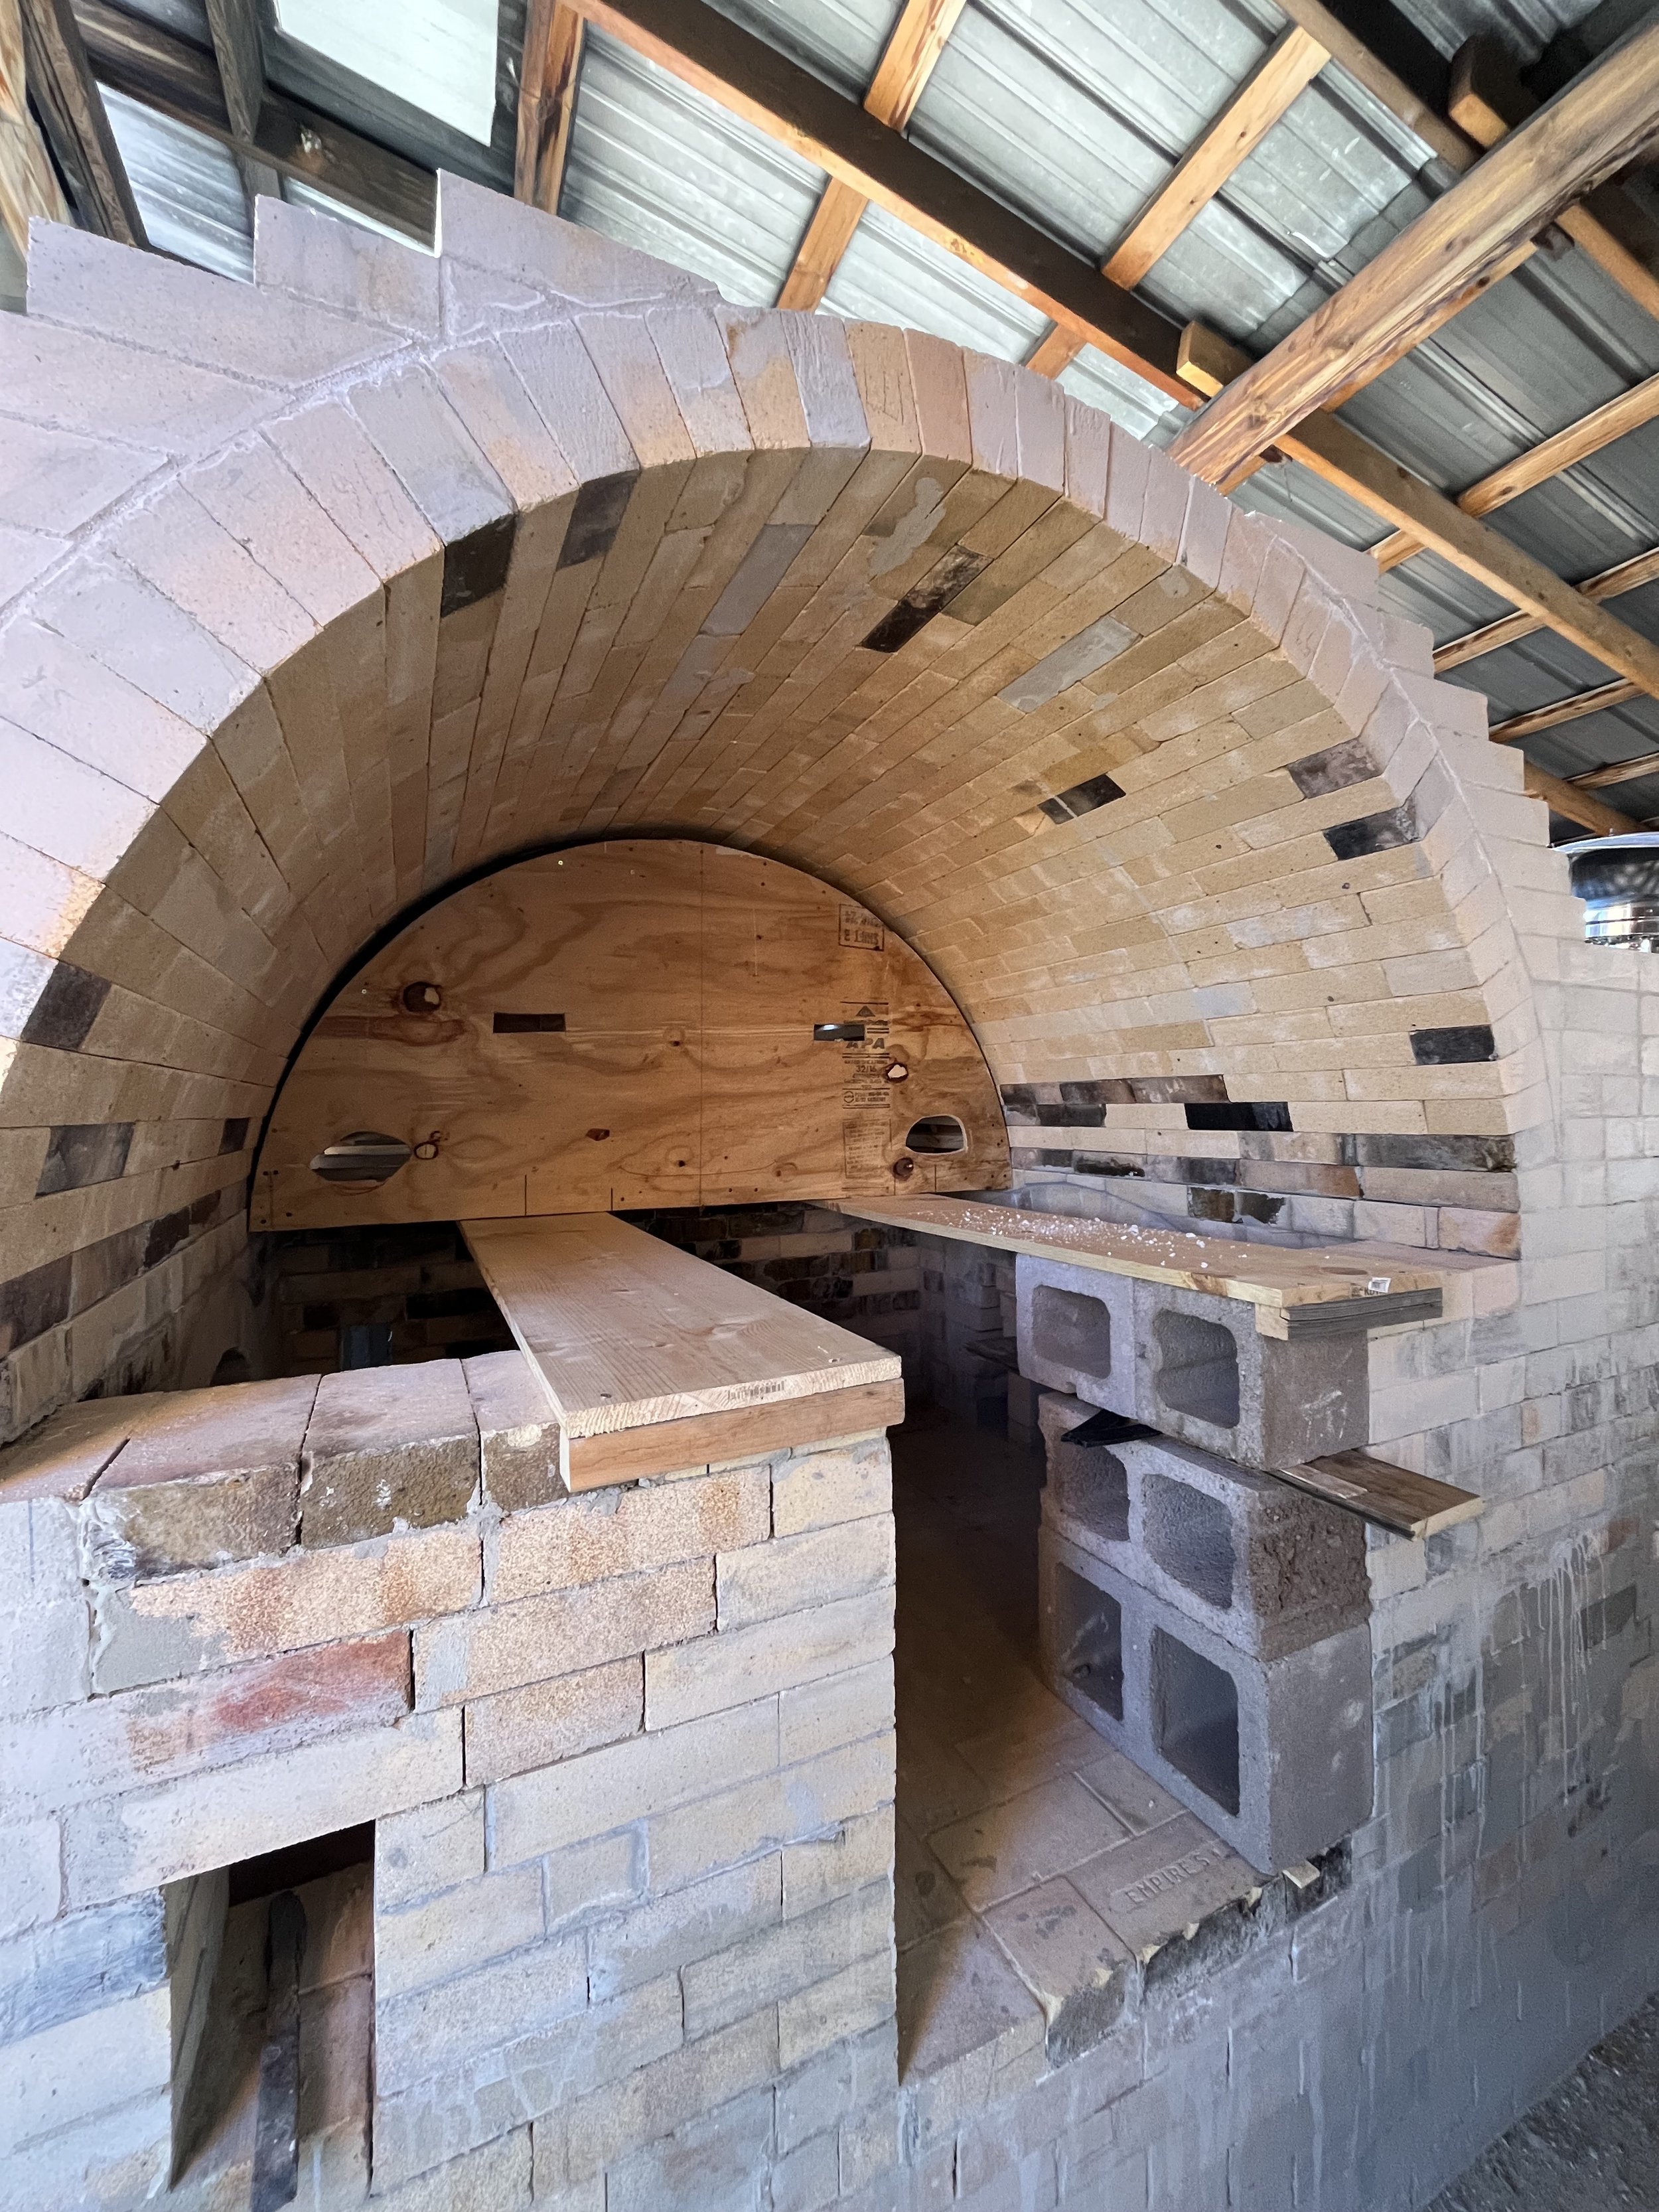
Building the kiln chamber arch using plywood, 2x4s, and masonite. When complete, its weight will make it too heavy to lift on our own, so we built it in place. (-photo by Tori)
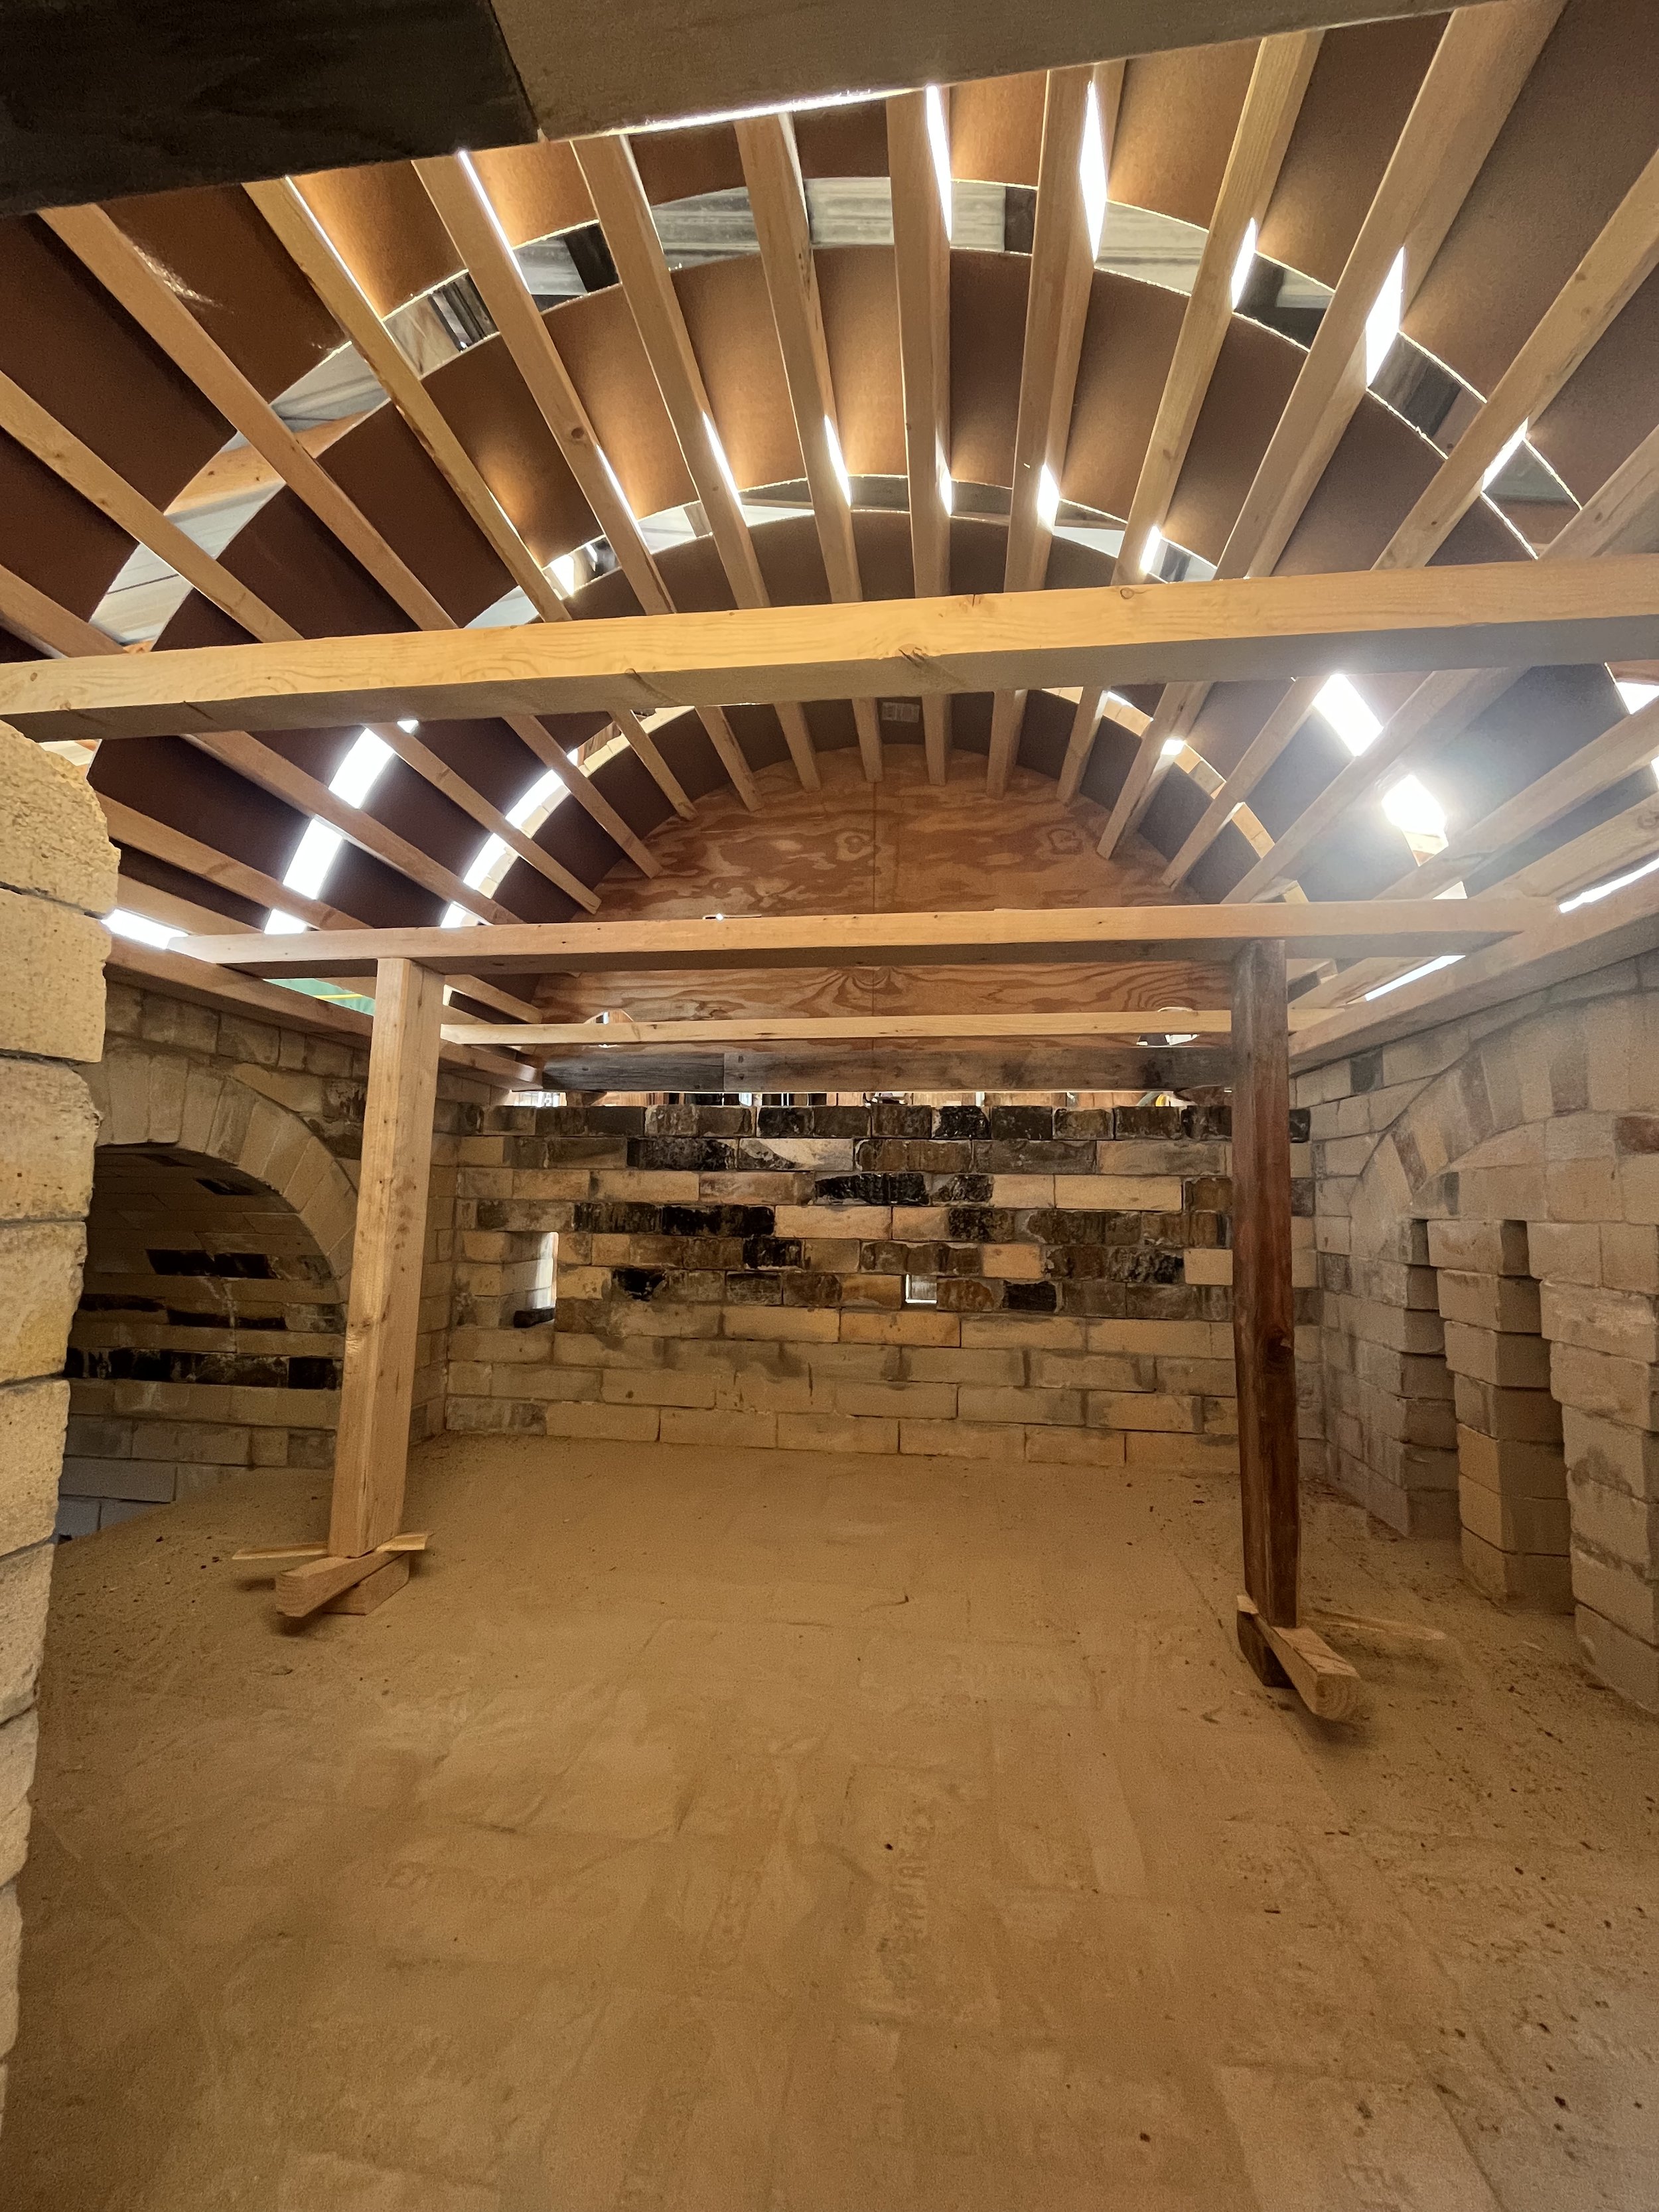
Inside view of the kiln chamber arch form before the bricks are laid. (-photo by Tori)

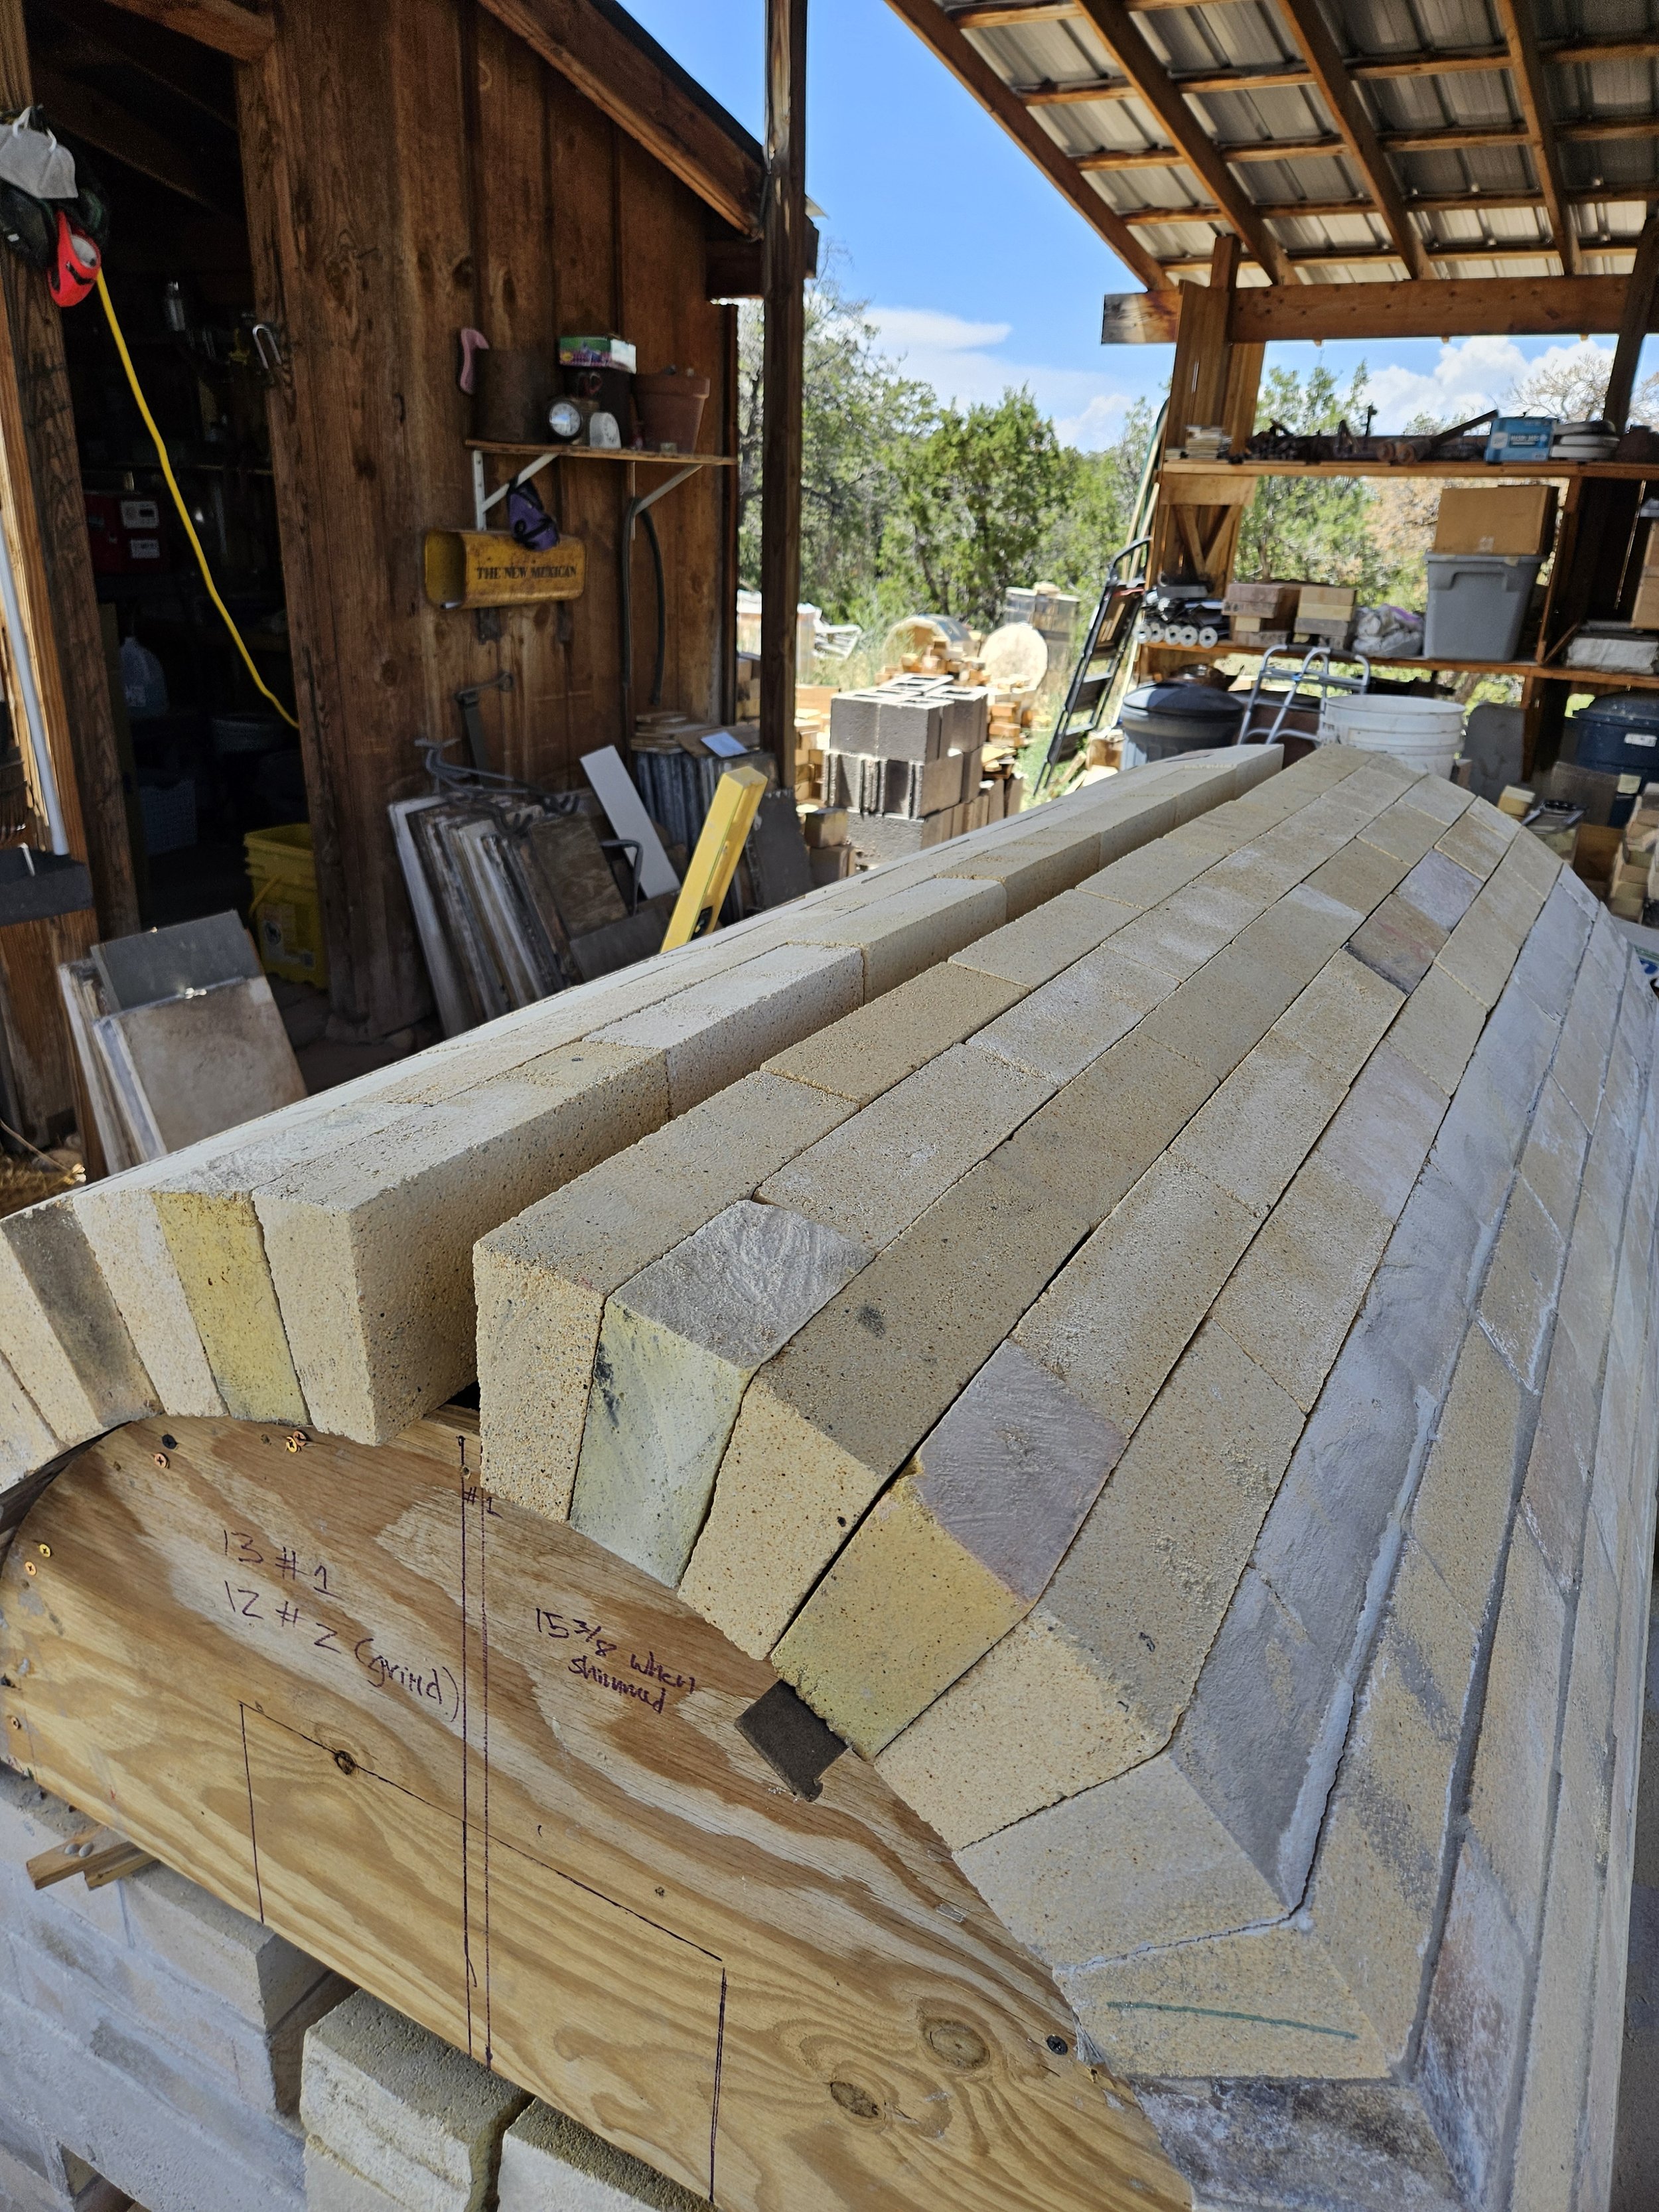
Kiln chamber arch in place and arch bricks layed.

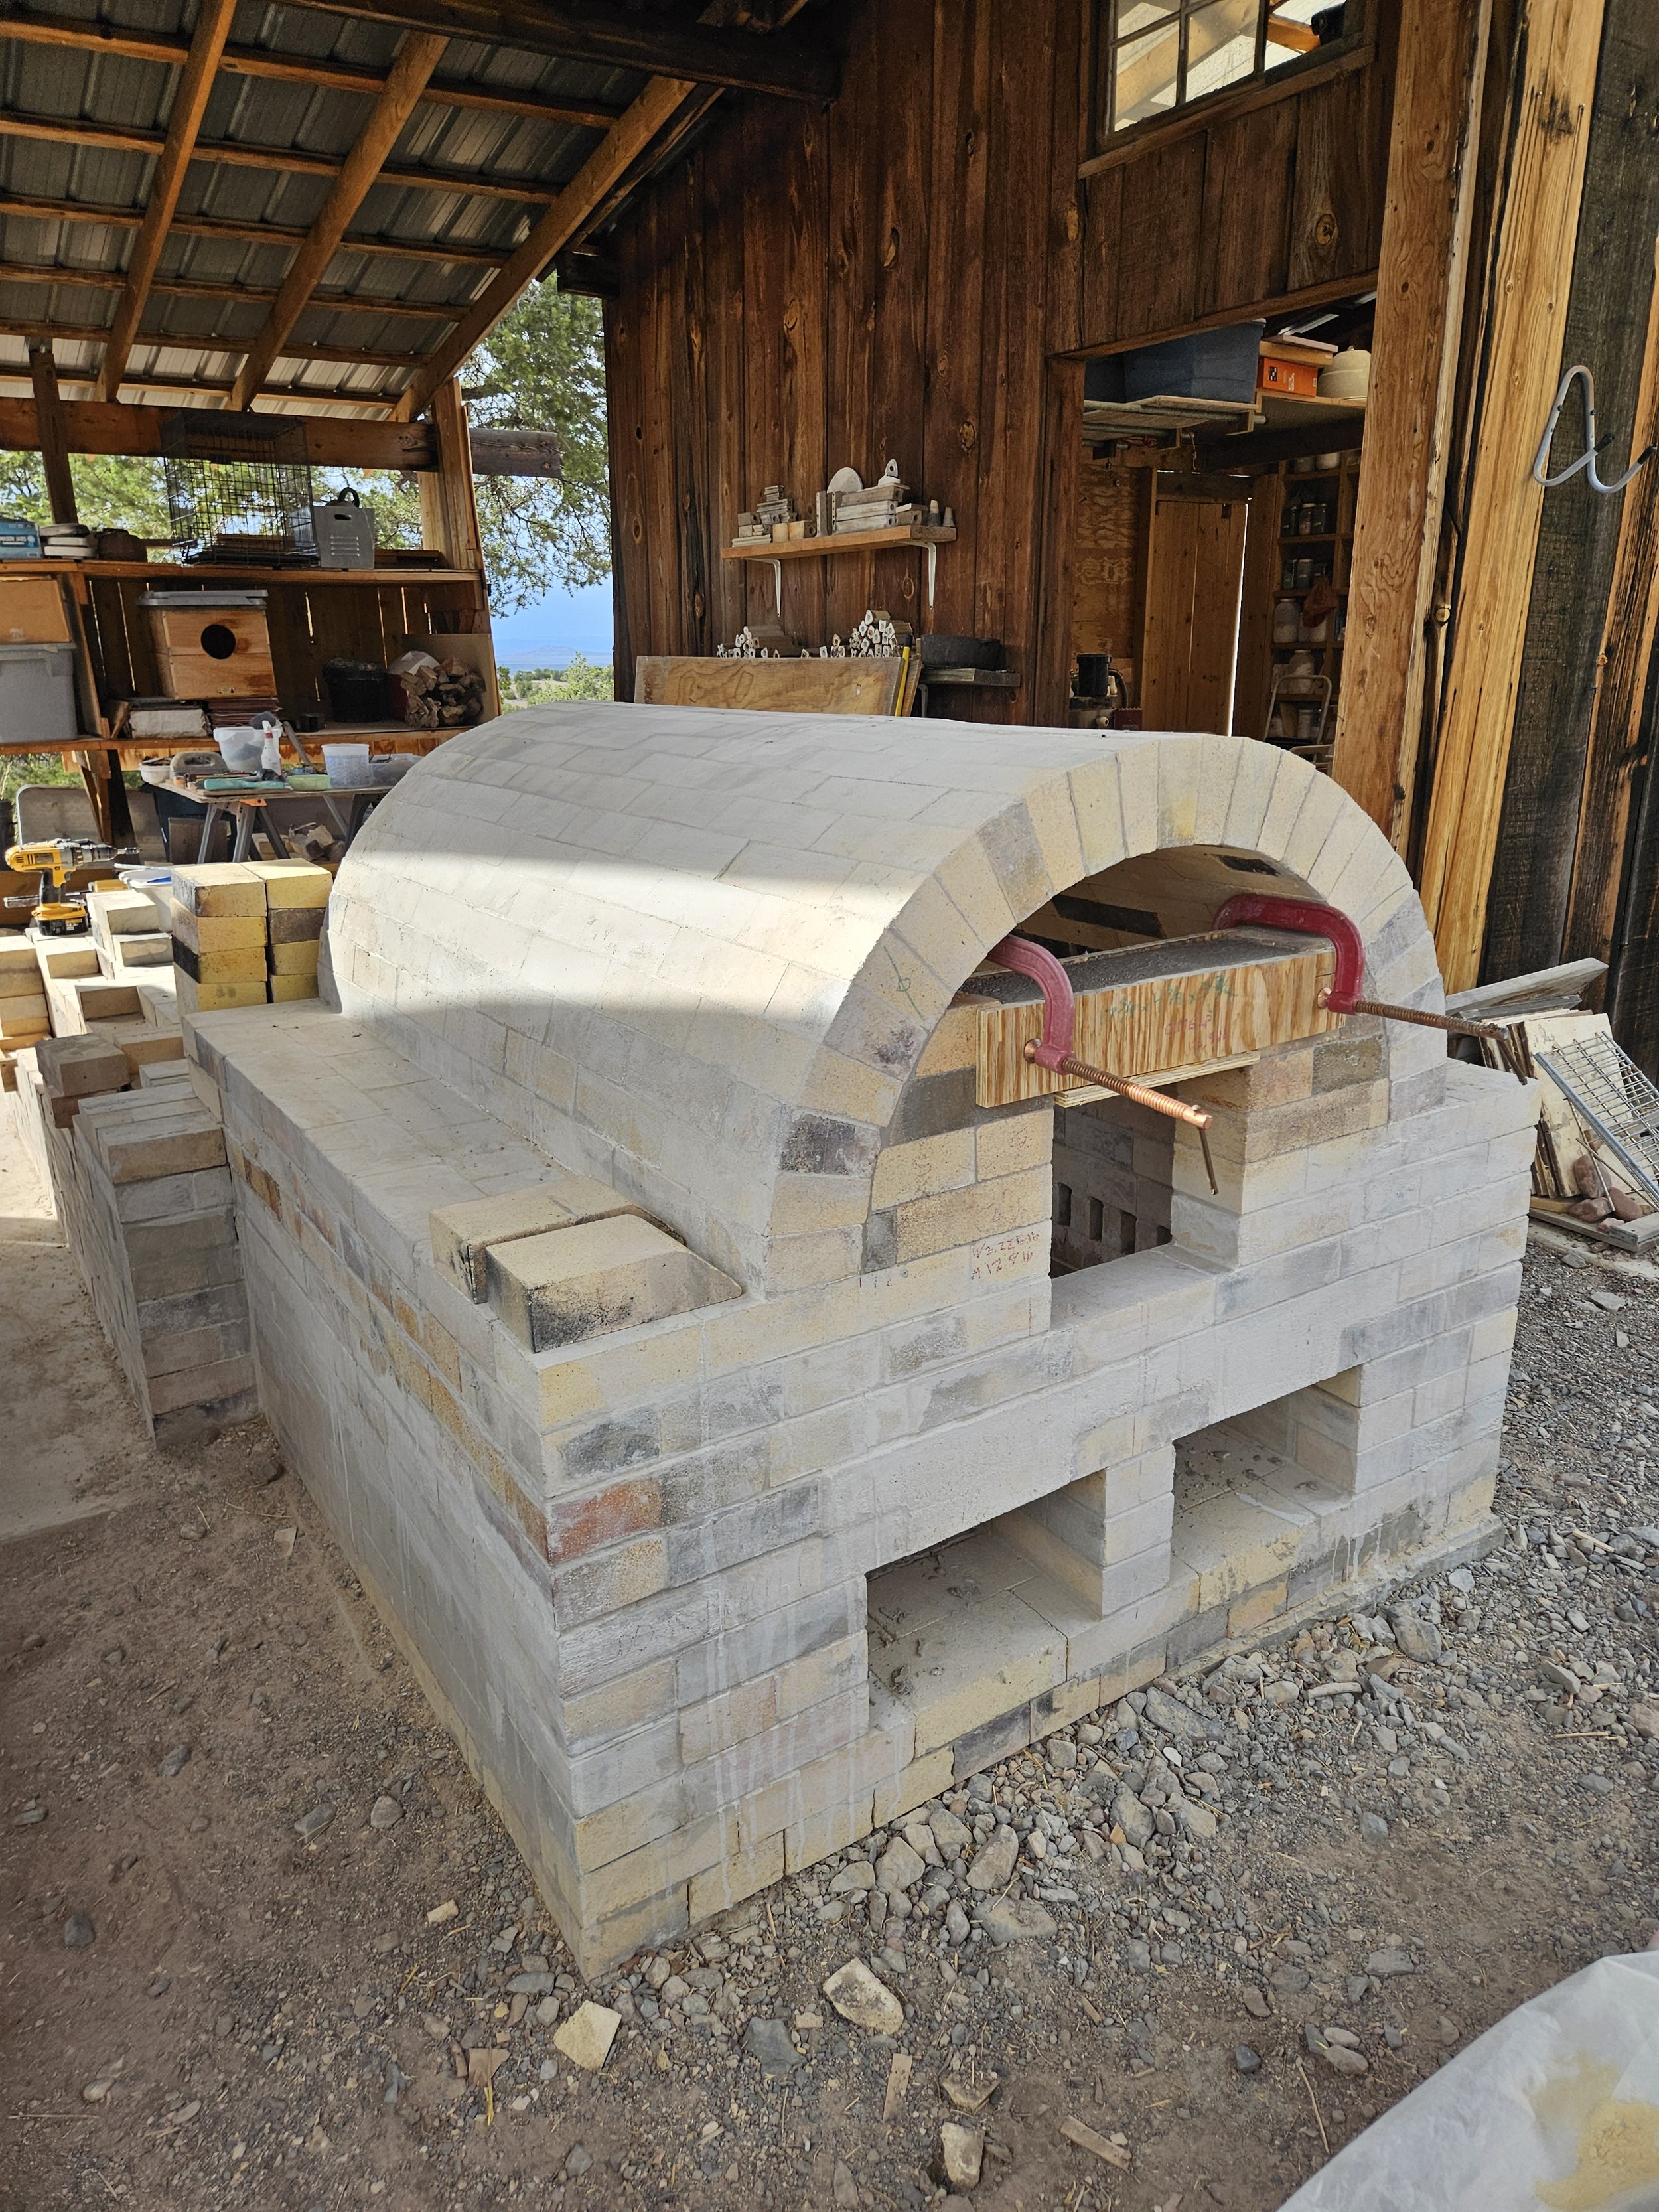
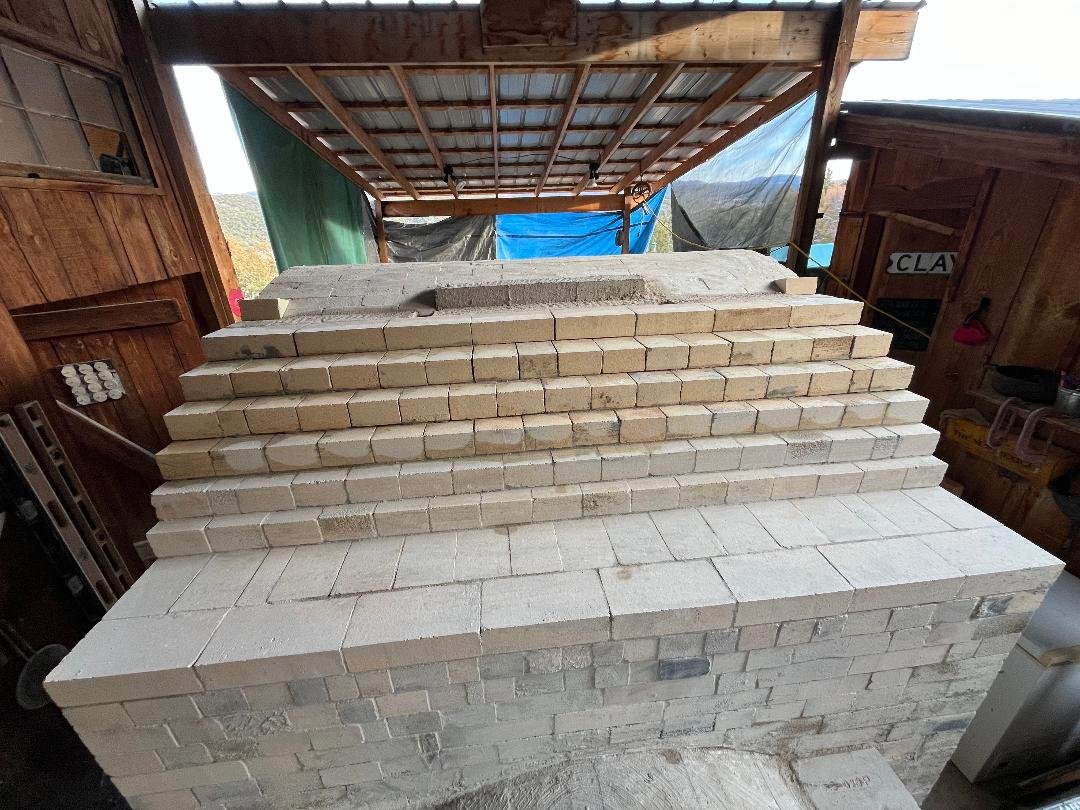
Beginning the buttressing of the large arch. Because of the outward force of this massive Roman arch, the arch form was not removed until the buttressing was complete.

Arch form in place with holes cut for access and greased shims in place.
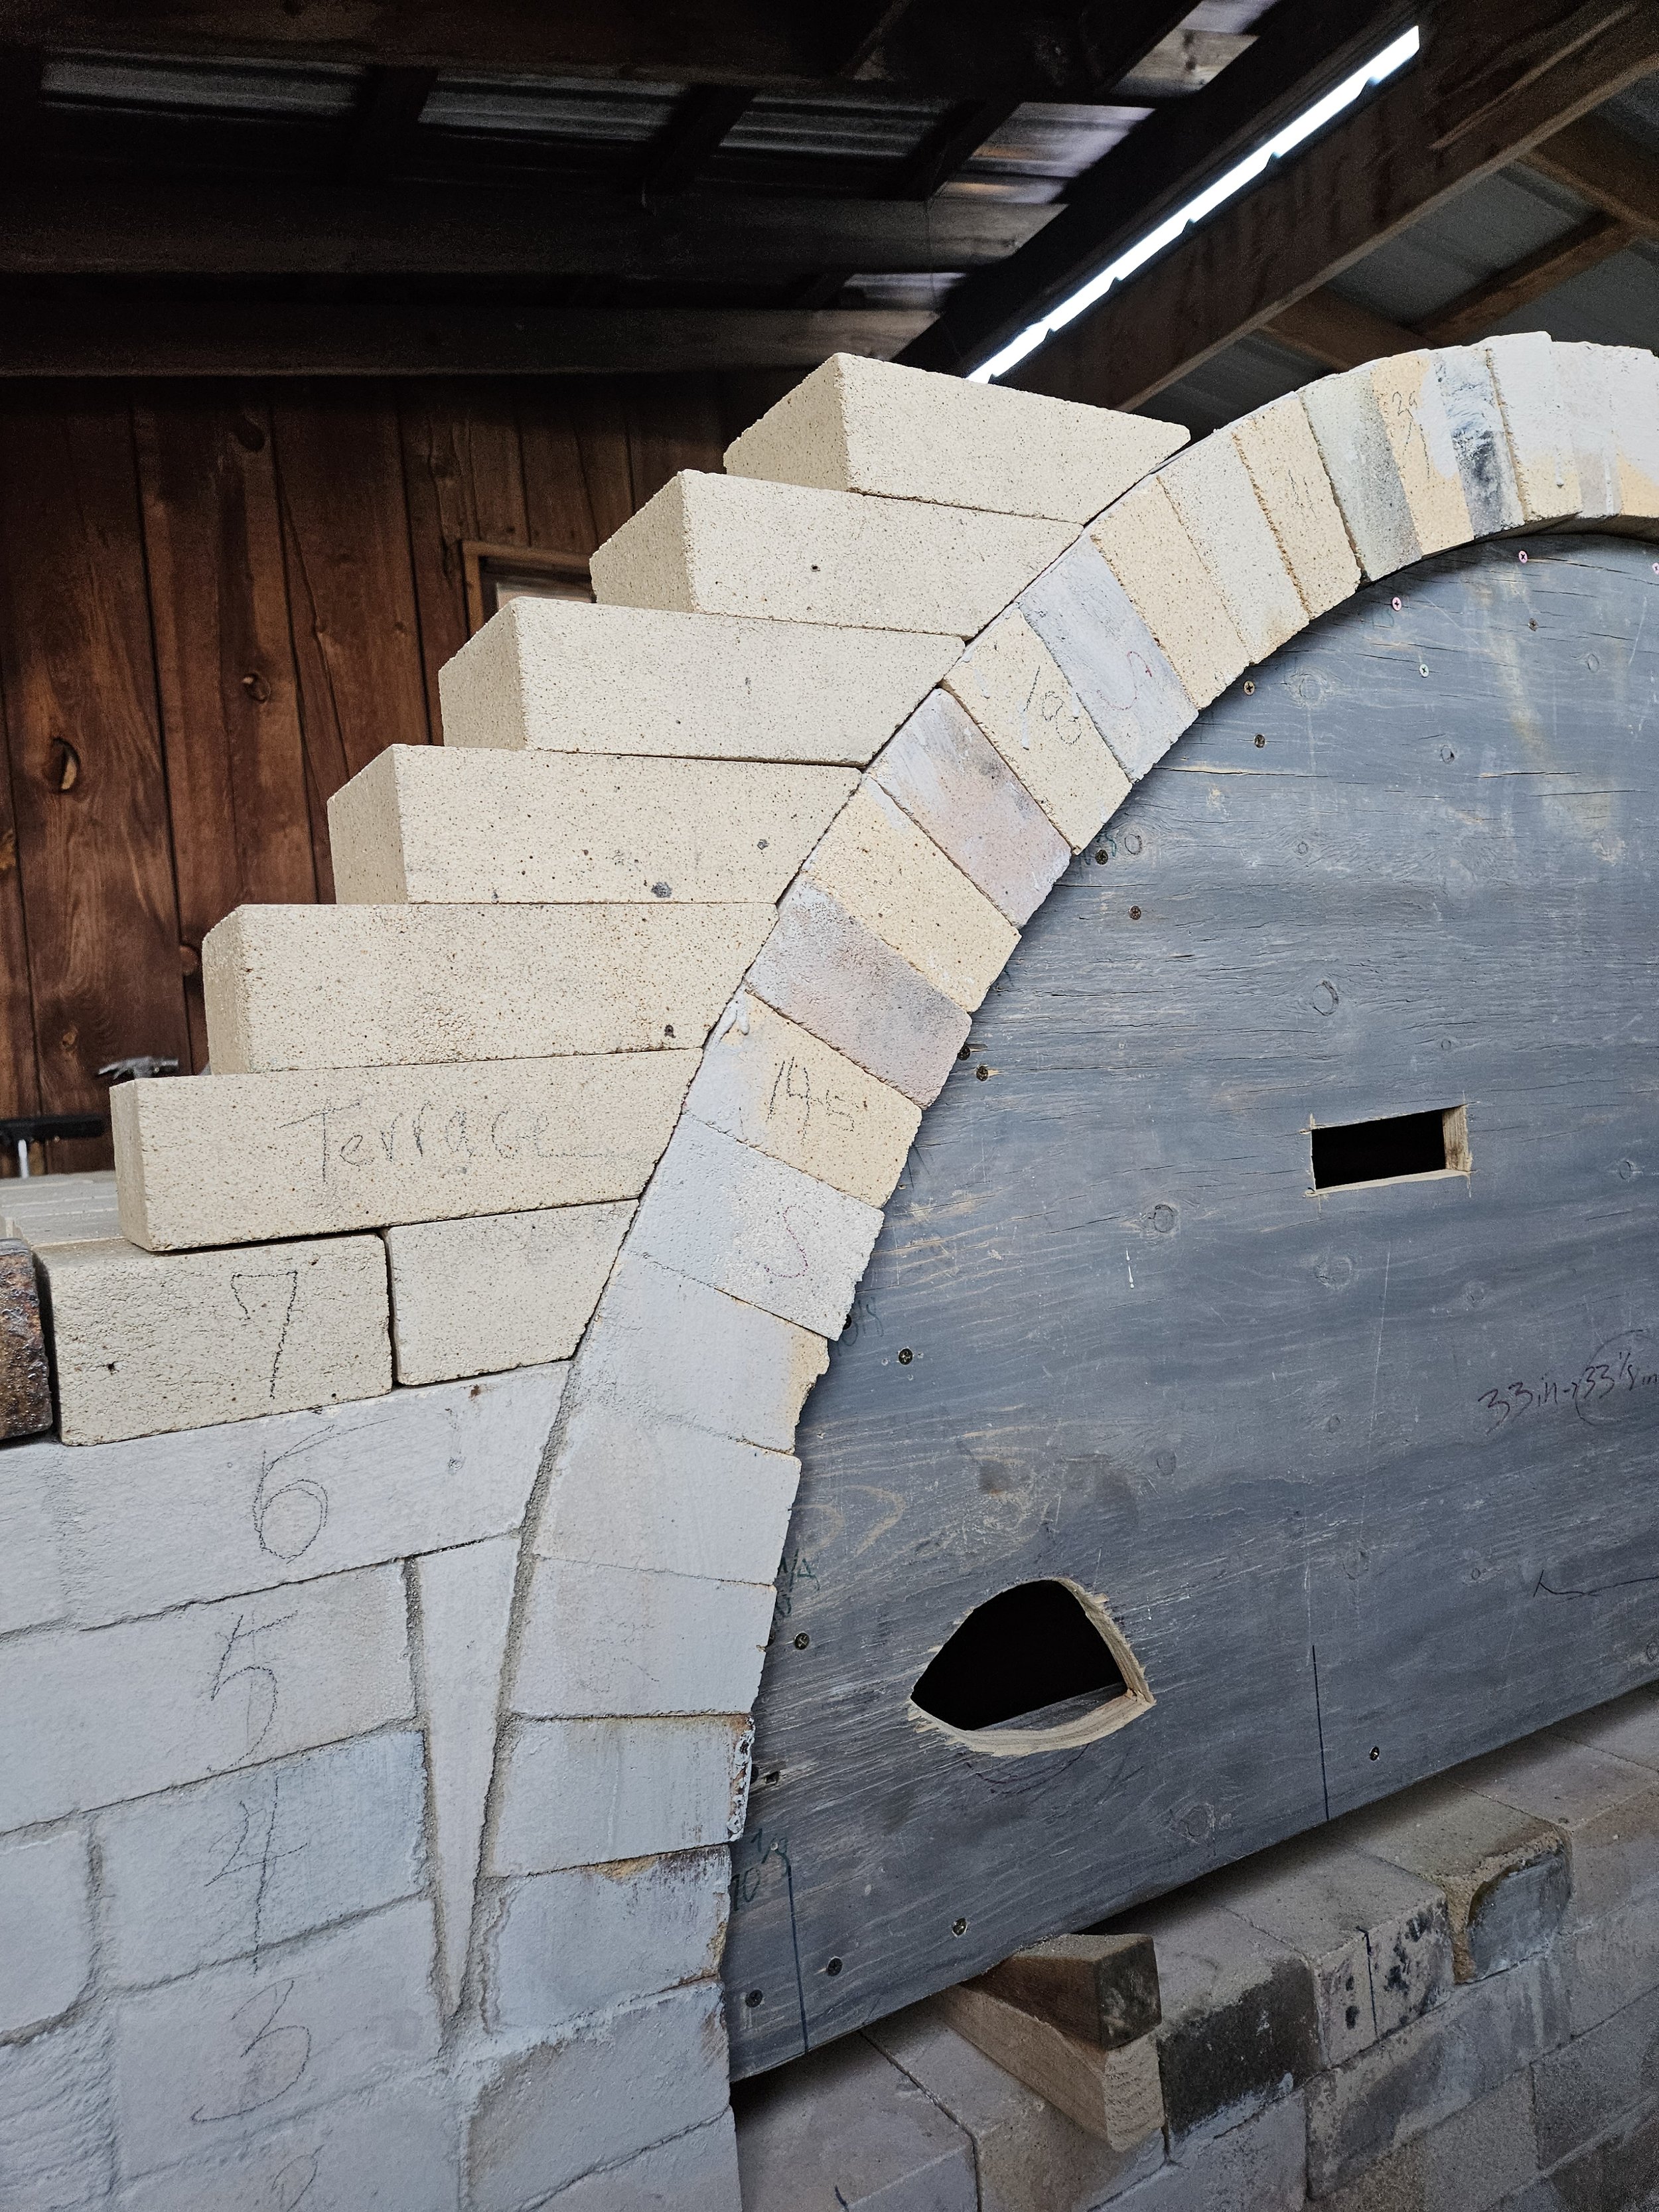
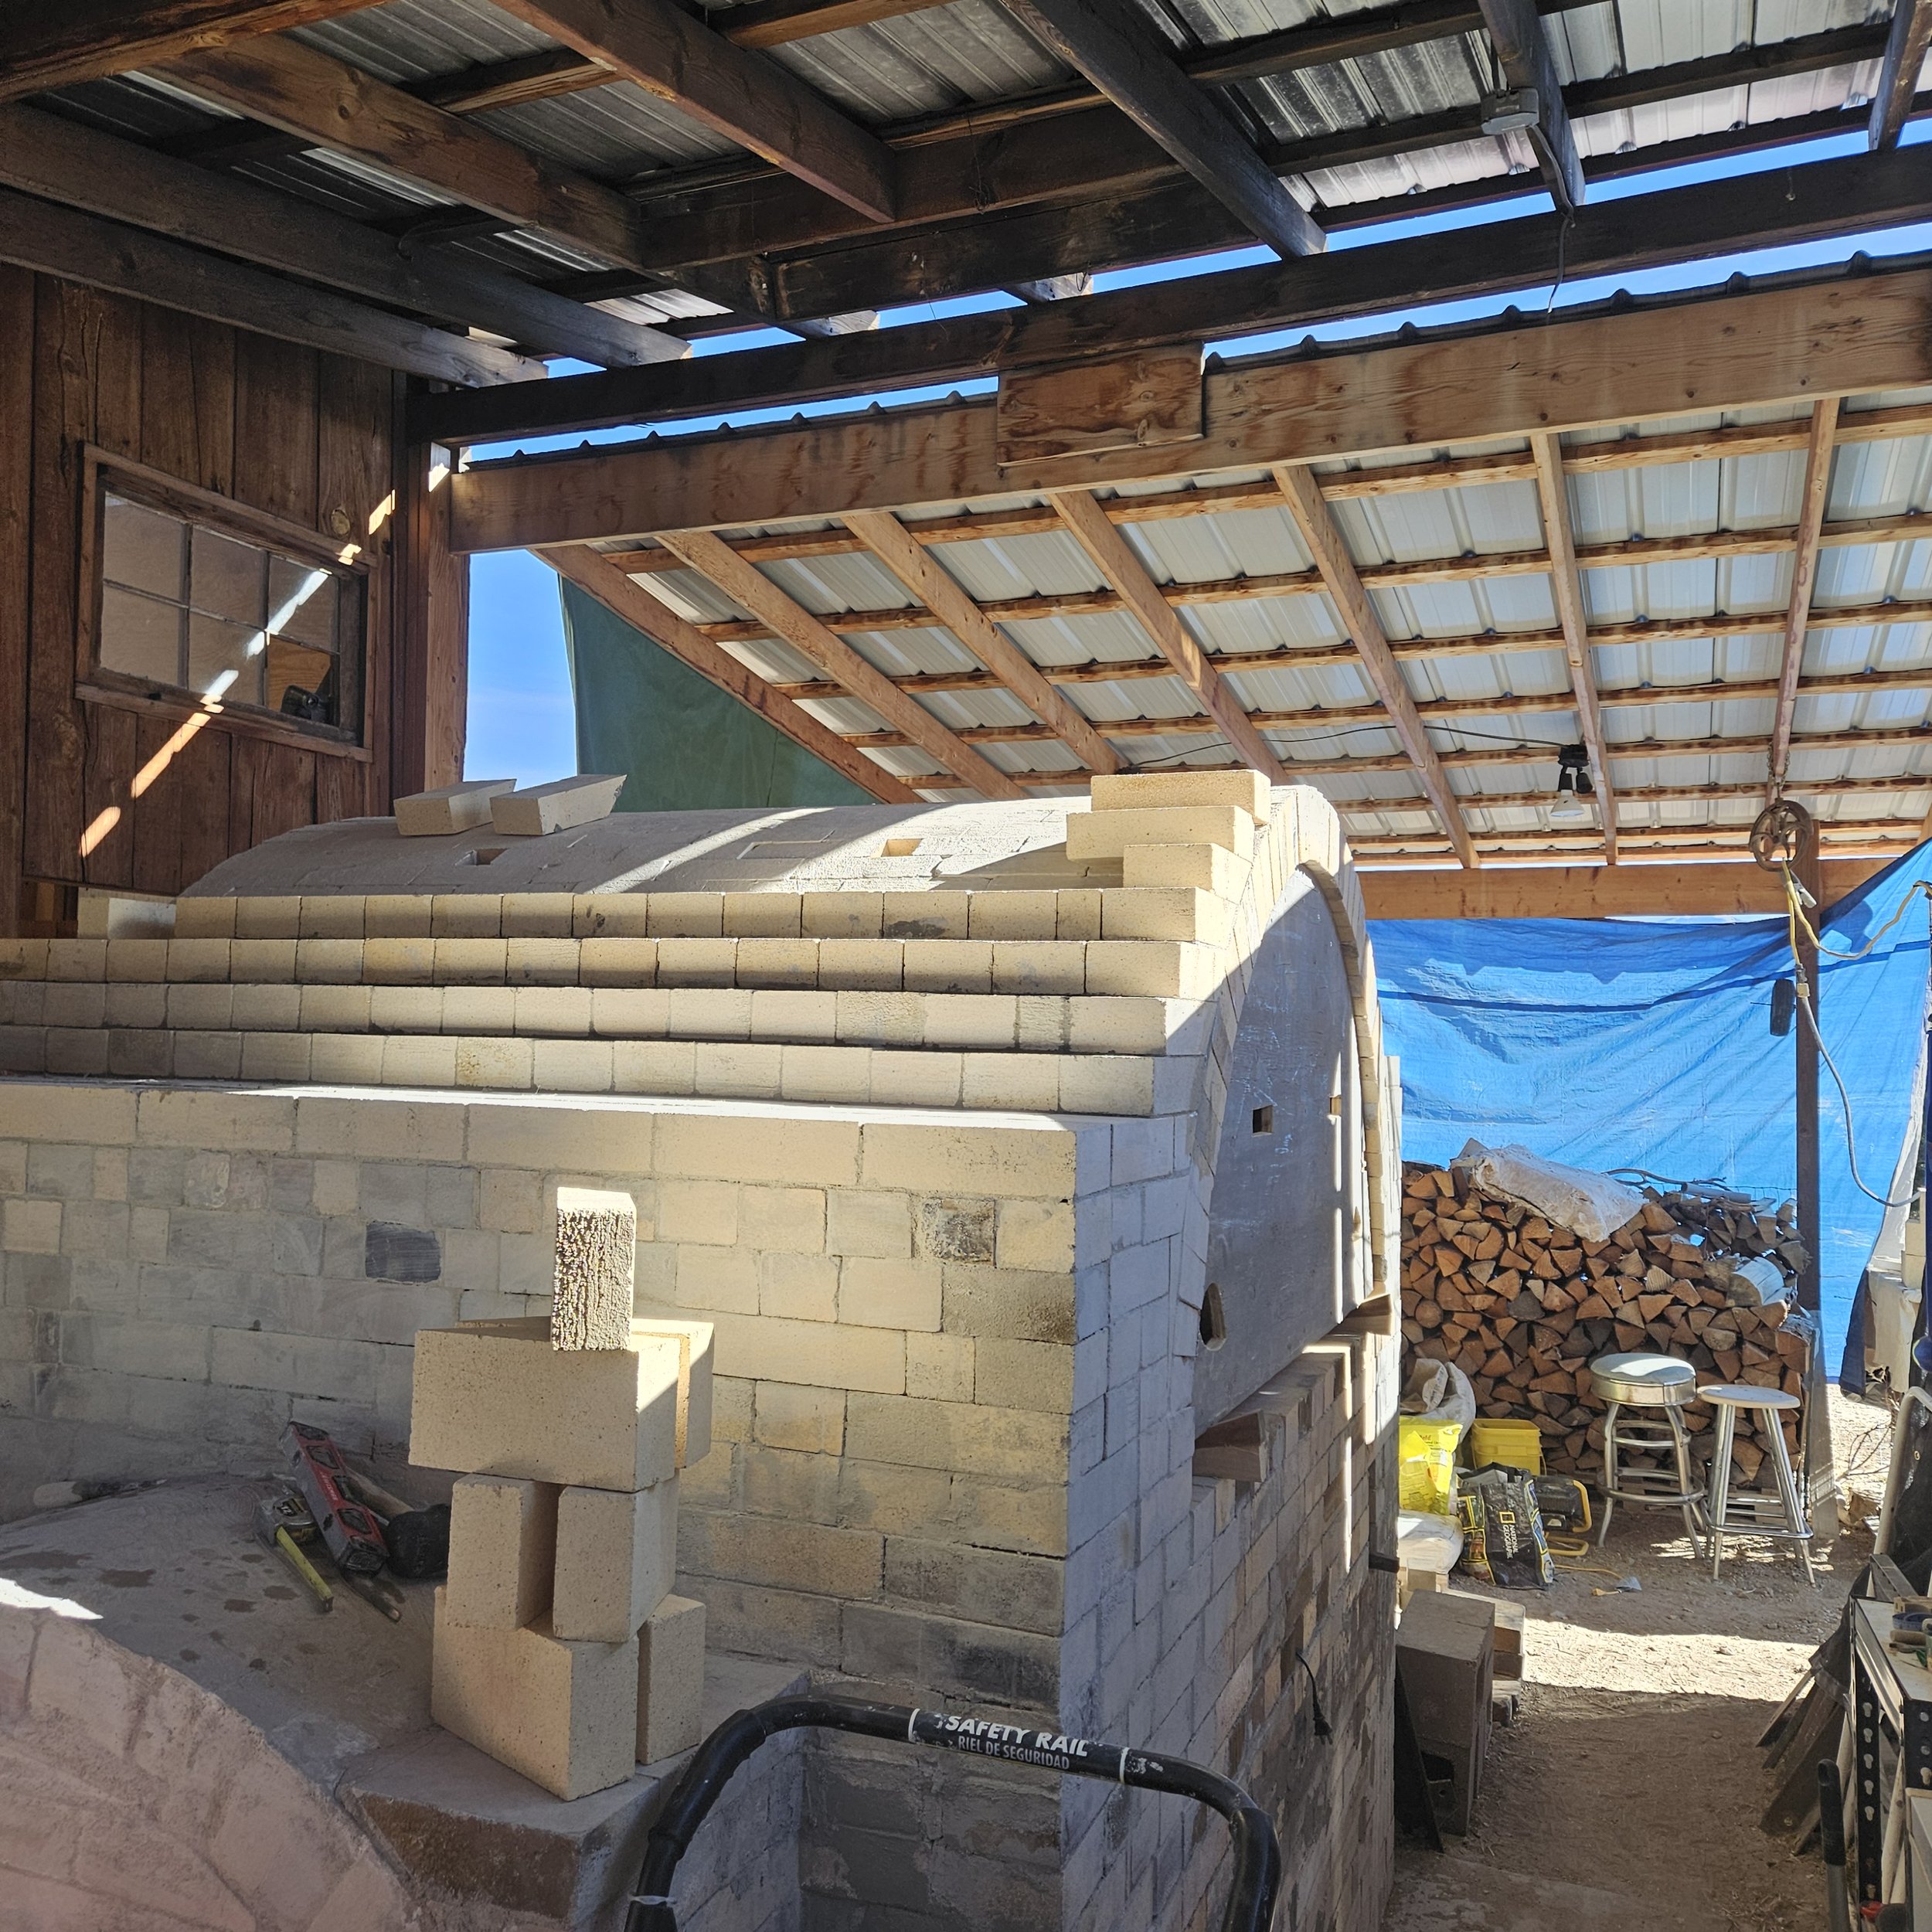
Layout of the corbelled buttress.
Another view of the buttressing in its early stages. Because of the large quantity of firebricks on hand, massive buttressing was a good option for both structural support and to promote a slow cooling cycle.
Buttressing continues.
The arch form and buttressing as seen from the collection box end of the kiln.

Close up of the buttressing in progress. By this time, winter temperatures necessitate covering the day's work with an electric blanket overnight, to allow the mortar to set up without freezing. Ralph Scala gave me this tip among others.

The buttressing close to completion in preparation for removing the large arch form.
Buttressing from the chimney end.
Top view of the buttressing nearing completion. The topmost portion is castable, with two 'blow-hole' openings.

Mark snapped this photo of me finishing up castable refractory surrounds for the pyrometer and blow holes in the top of the arch form.
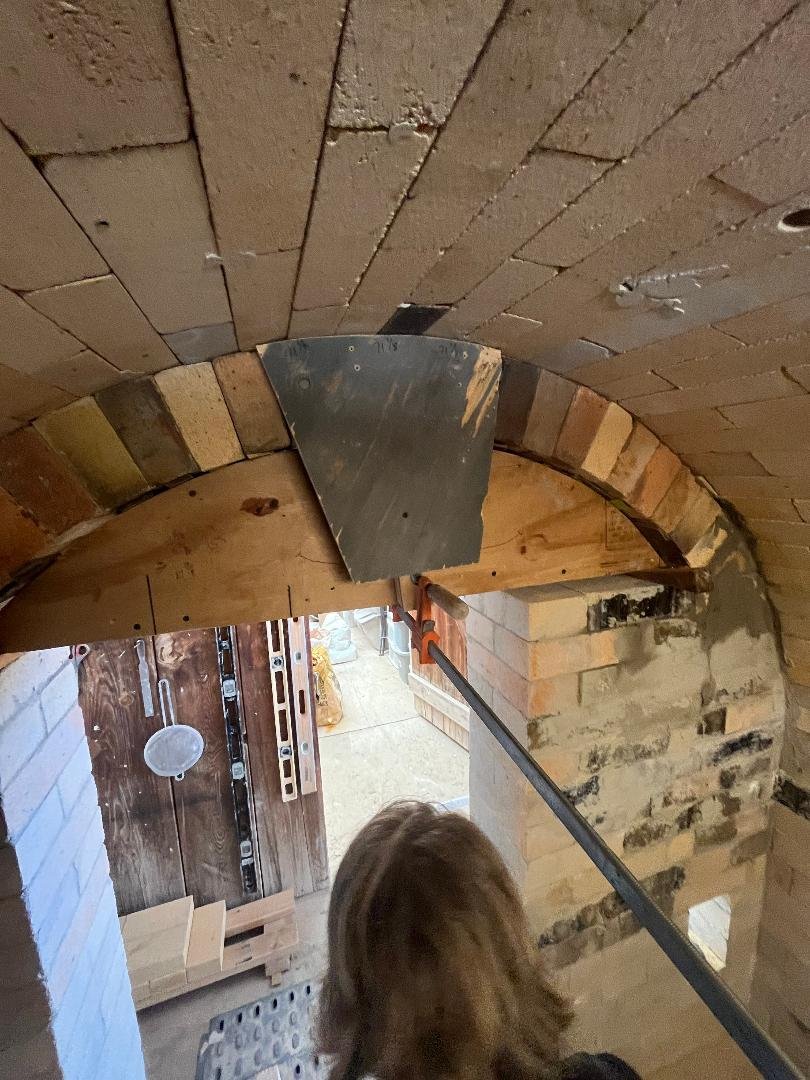
Because the kiln chamber arch form was very heavy and there was not clearance on either side to remove its entire length, a system for gradual removal had to be engineered. Two ten-foot pine boards with stops (shown here) were slipped in under the arch form. Because they were just 1" thick, they allowed the arch form to drop from the shims and then slide on the boards, which we greased slightly for ease of sliding. (-photo by Tori)

The form was slid out gradually, a few inches at a time, with Tori on one end and me on the other. (-photo by Tori)
Sliding out of the form continued. (-photo by Tori)

After the form was out about halfway, a shed wall stands in the way, so we cut the form apart and disassembled it for removal, since even cut in half it was two heavy for the two of us to lift. (-photo by Tori)

First half removed, and the process continues with the second half. (-photo by Tori)

Arch form removed, filling in of the the arch ends continues. There are three peephole openings and a stoke port in this wall.

View from inside the kiln chamber, bricking up the arch ends in progress.

Continuing to fill in the door side of the arch end. The door opening is 27" wide, to accommodate exactly 3 brick lengths. As an oversight, the door opening was just a fraction too narrow, so I used a flush-mount cutting blade to trim the left side wall (a dusty and harrowing job).

Door opening continues upward.

A double arch on the door side will protect the arch from the wear and tear of repeated bricking up and unbricking of the door opening over time.
Double arch complete with a castable refractory keystone, since this configuration does not allow a keystone to be tapped into place from above. The castable cures for a full week before removing the form. (-photo by Tori)
Trapezoidal stoke port plug made from castable refractory with a 'handle' from a repurposed leg of my previous grate. (-photo by Tori)

Top crescent of the back wall of the kiln chamber arch has been filled with castable and a jerry-rigged form is in place.
Double arch complete, keystone cast, and arch form removed.

Door opening completed.
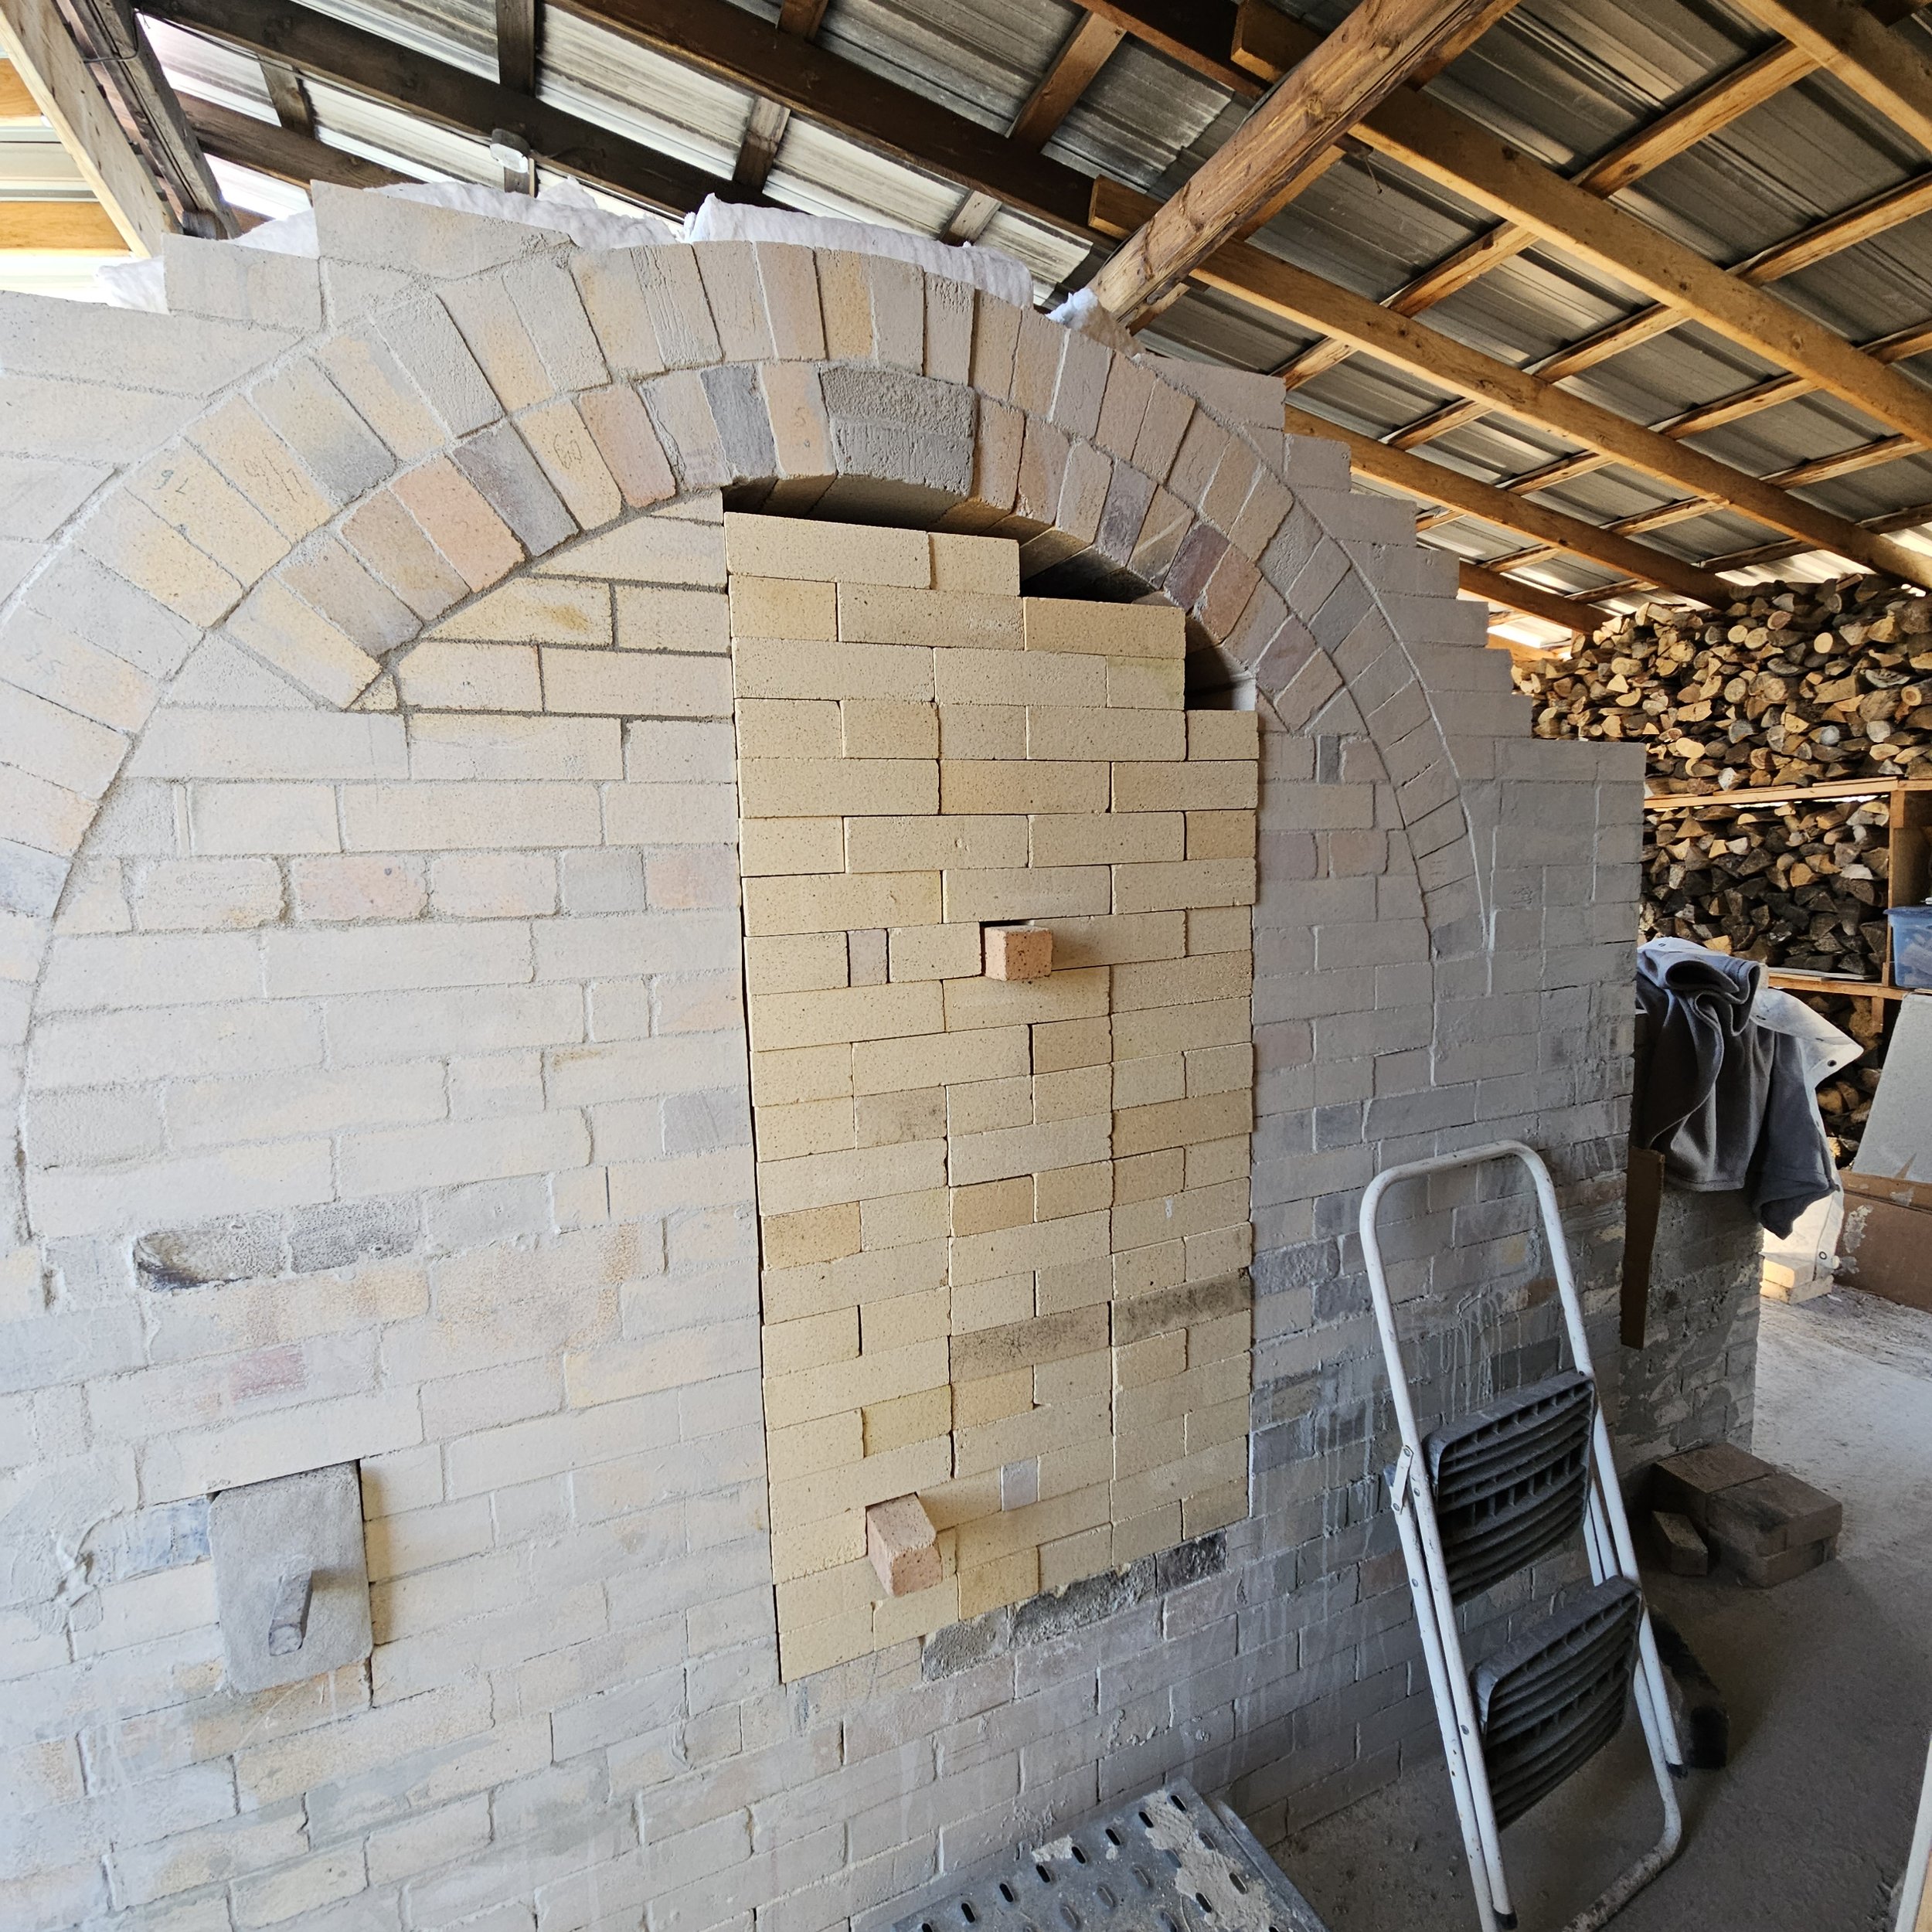
A trial run of bricking up the door opening, in preparation for custom shaping the top pieces.

Work on the chimney. Notches cut in the bricks for the dampers.

Birds-eye view of the chimney to the height of the dampers.

Forms in place for castable refractory dividers for the dampers.

Castable filling in the forms.

Beginning to work out a door to close up the kiln between firings.

The chimney after the castable refractory has dried and forms have been removed.

Chimney above the dampers, with the transition from two bricks thick to one brick thick walls.

Chimney work continues.

Using scrap insulating firebrick for the kiln chamber roof.

Cutting through the roof tin after cutting the rafters so the chimney can go through the roof.

Roof open.

Reinforcing box built, allowing for a minimum of 2" clearance around the chimney on all sides according to common building codes.

Chimney going through the roof.

Kaowool skirt around the header. (-photo by Tori)
Chimney work continues after installing a kaowool layer on all sides of the header using bailing wire.

Chimney in progress. (-photo by Tori)

View from below as chimney work continues.

Laying the last few courses - April 23, 2025. (-photo by Tori)

Betsy and Tori on the big day.

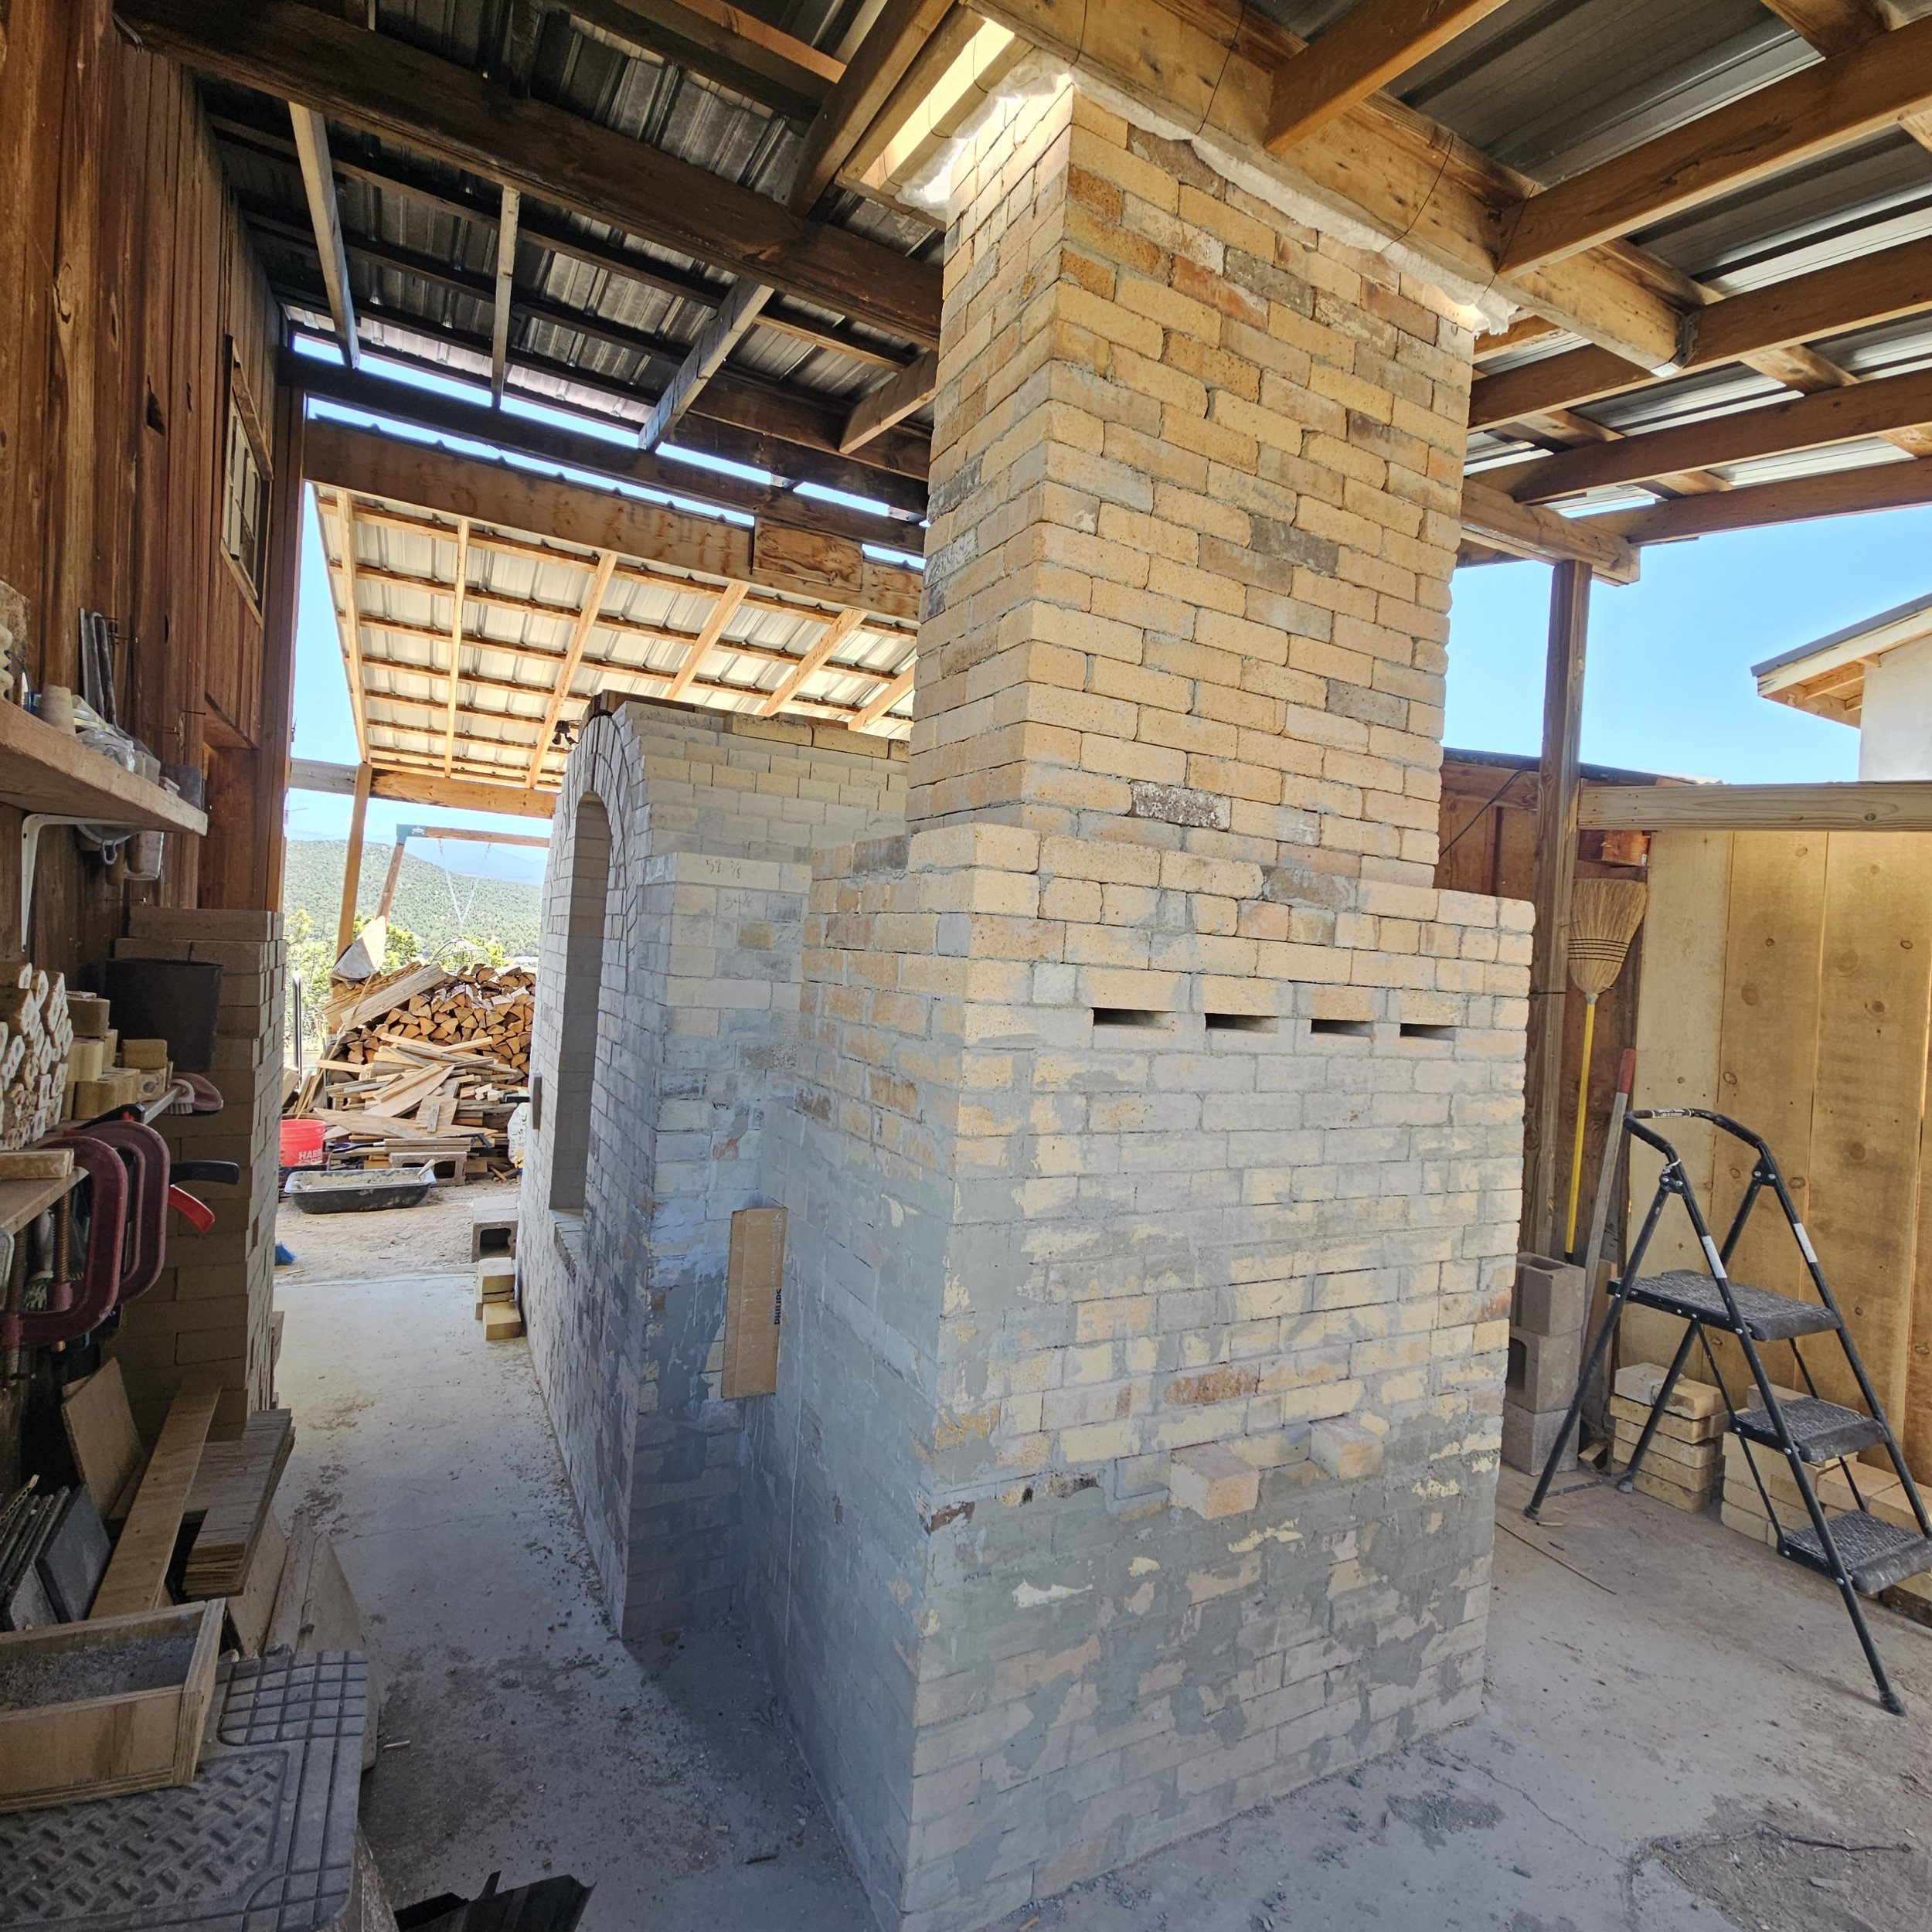
Chimney complete. Code requires that the chimney rise at least 2' above anything within 10', which coordinated perfectly with the planned chimney height of 14'.

View from below. The chimney's last two feet are ordinary red brick. The bricks are mortared in place, with no angle iron framework necessary.

Bricklaying complete, and kiln chamber door bricked up.
Tools and materials checklist: (in progress)